
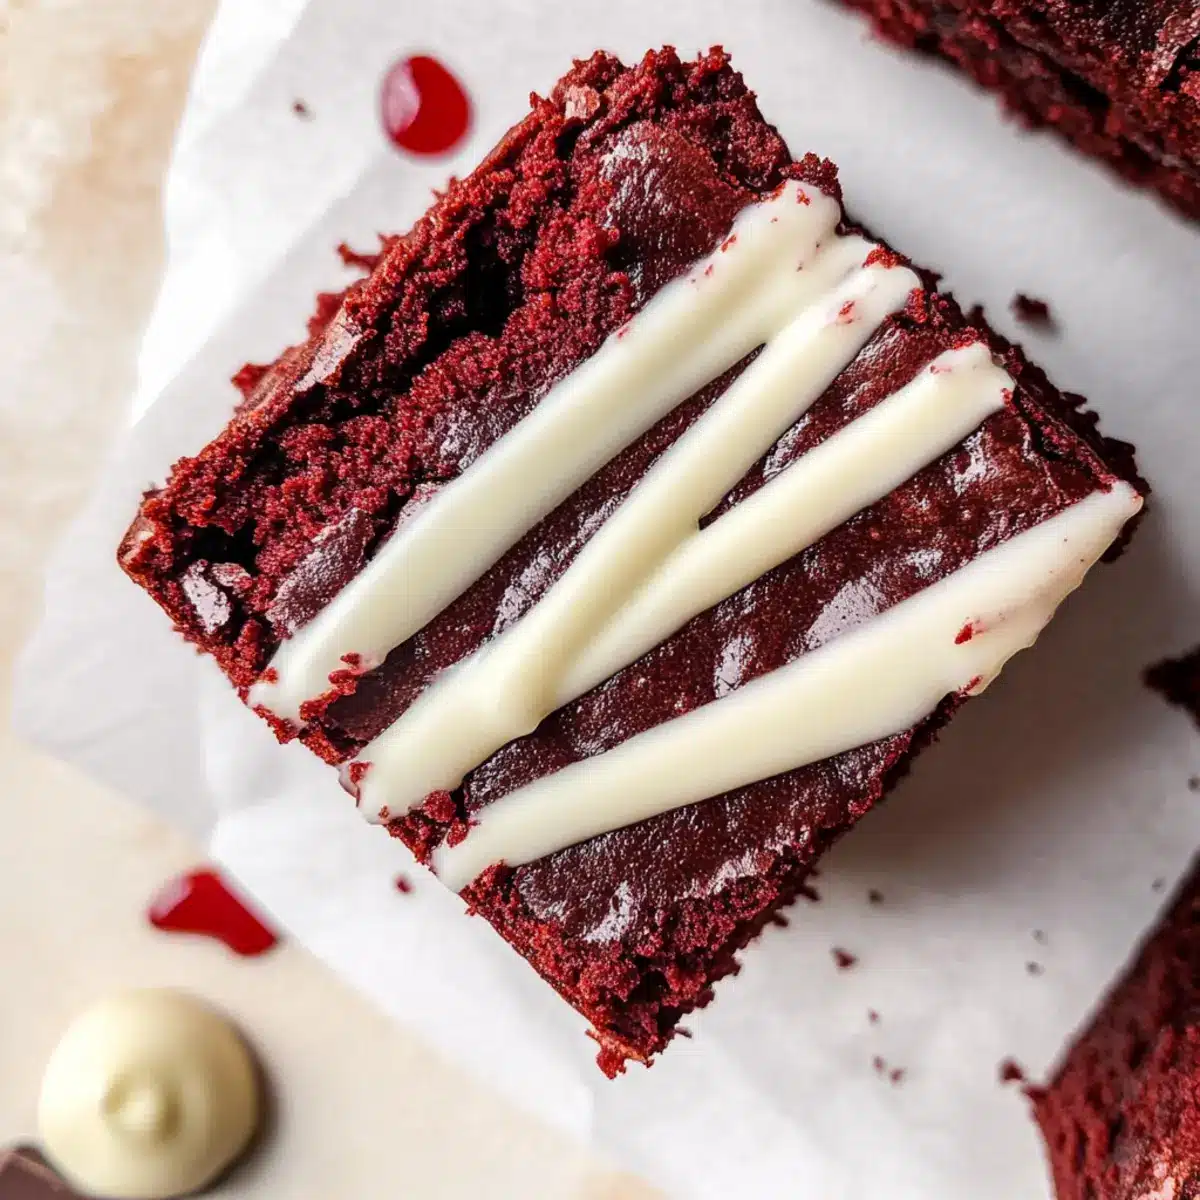
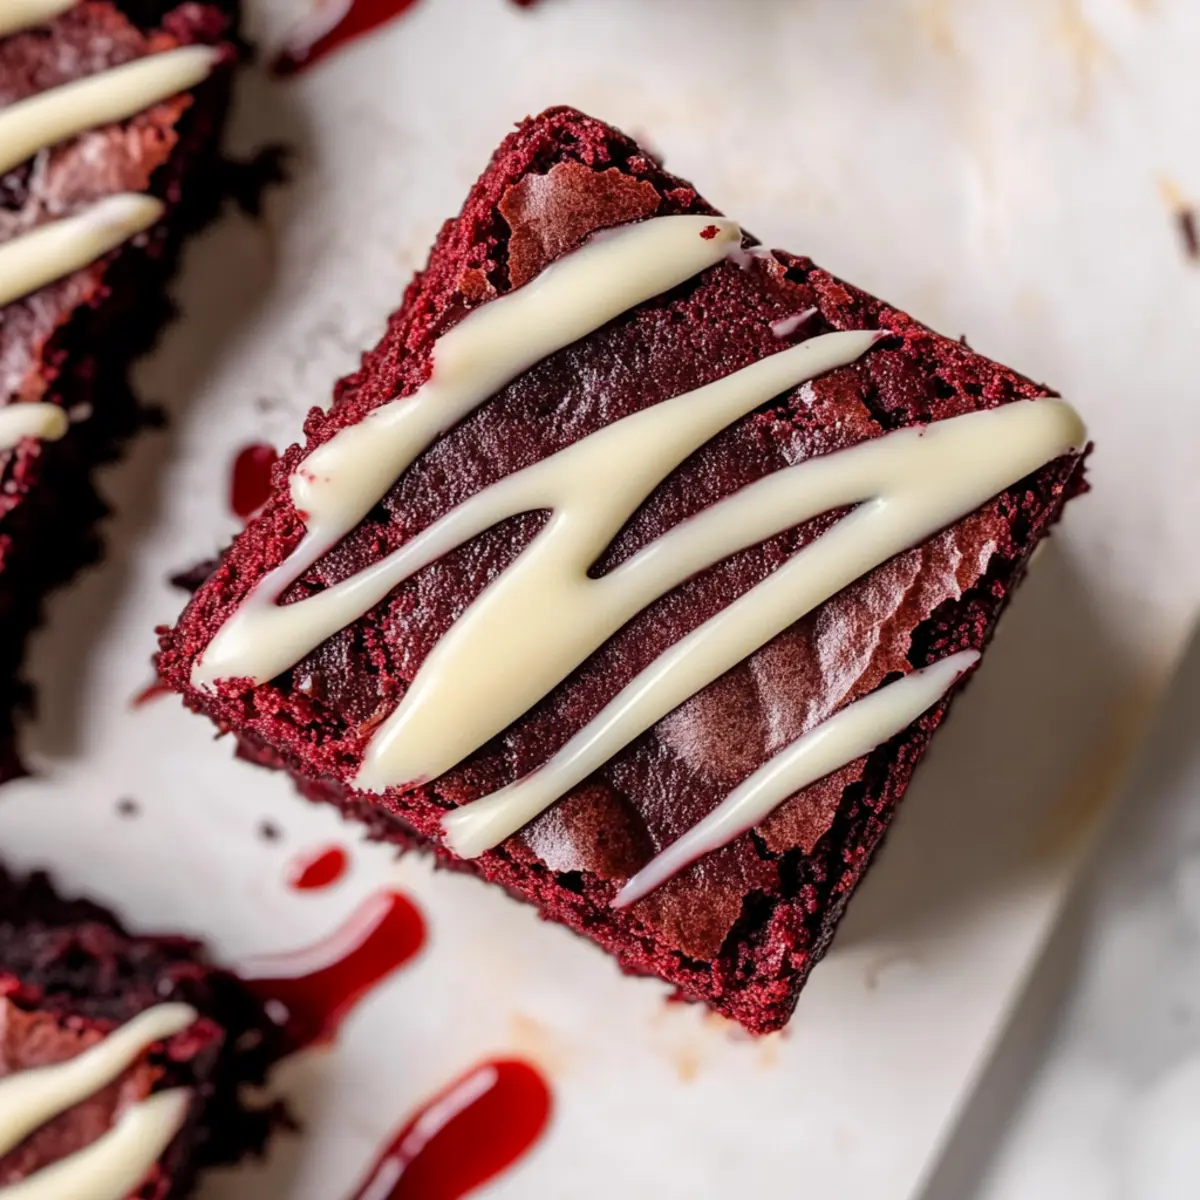
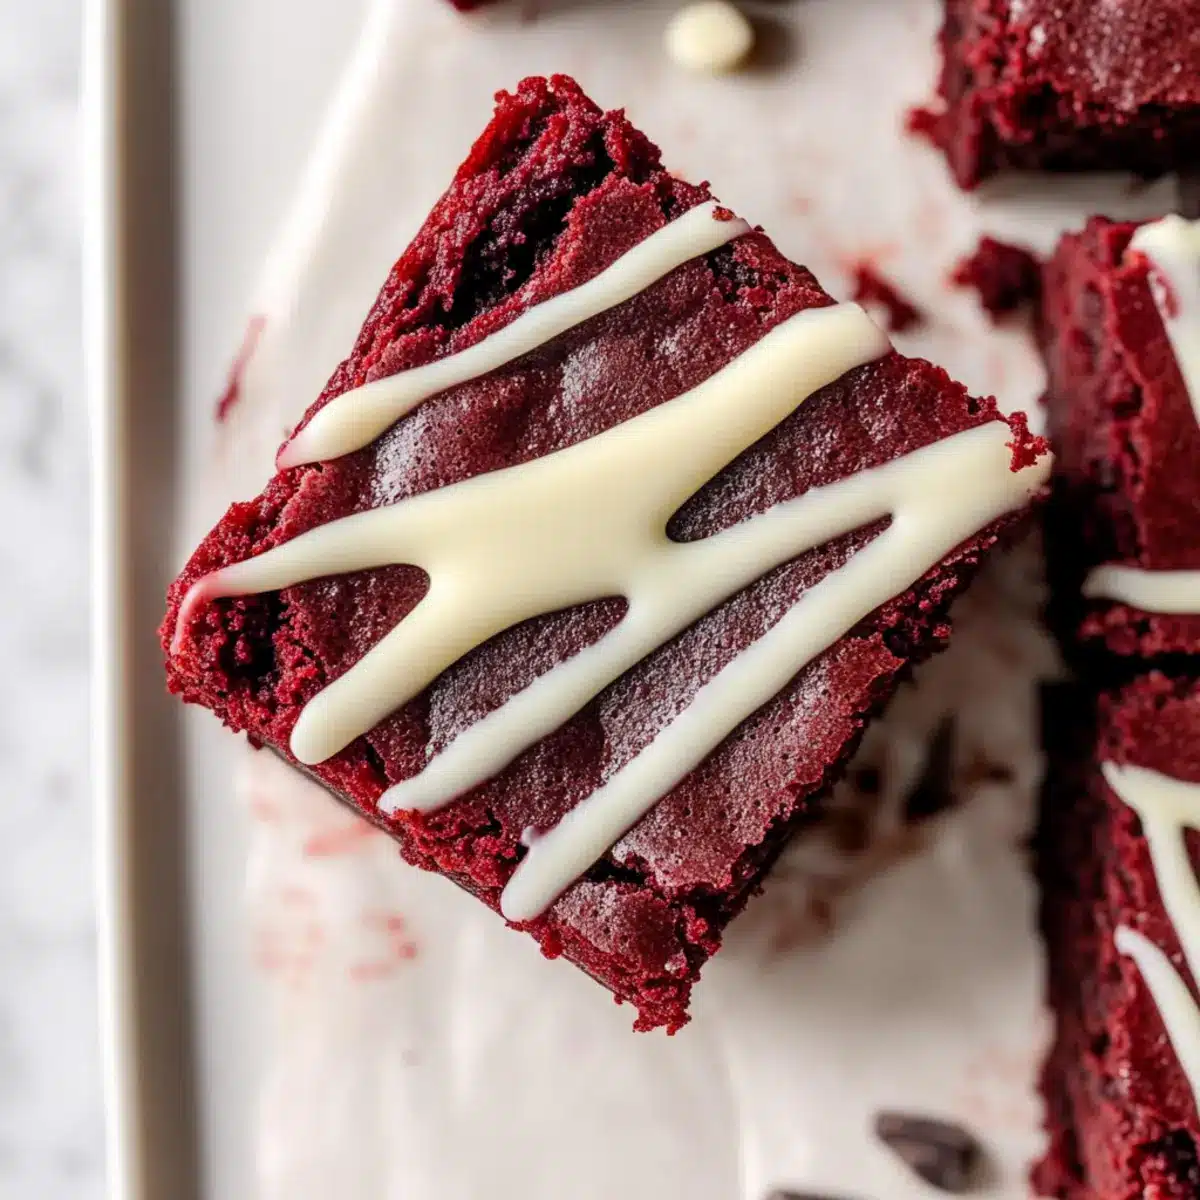
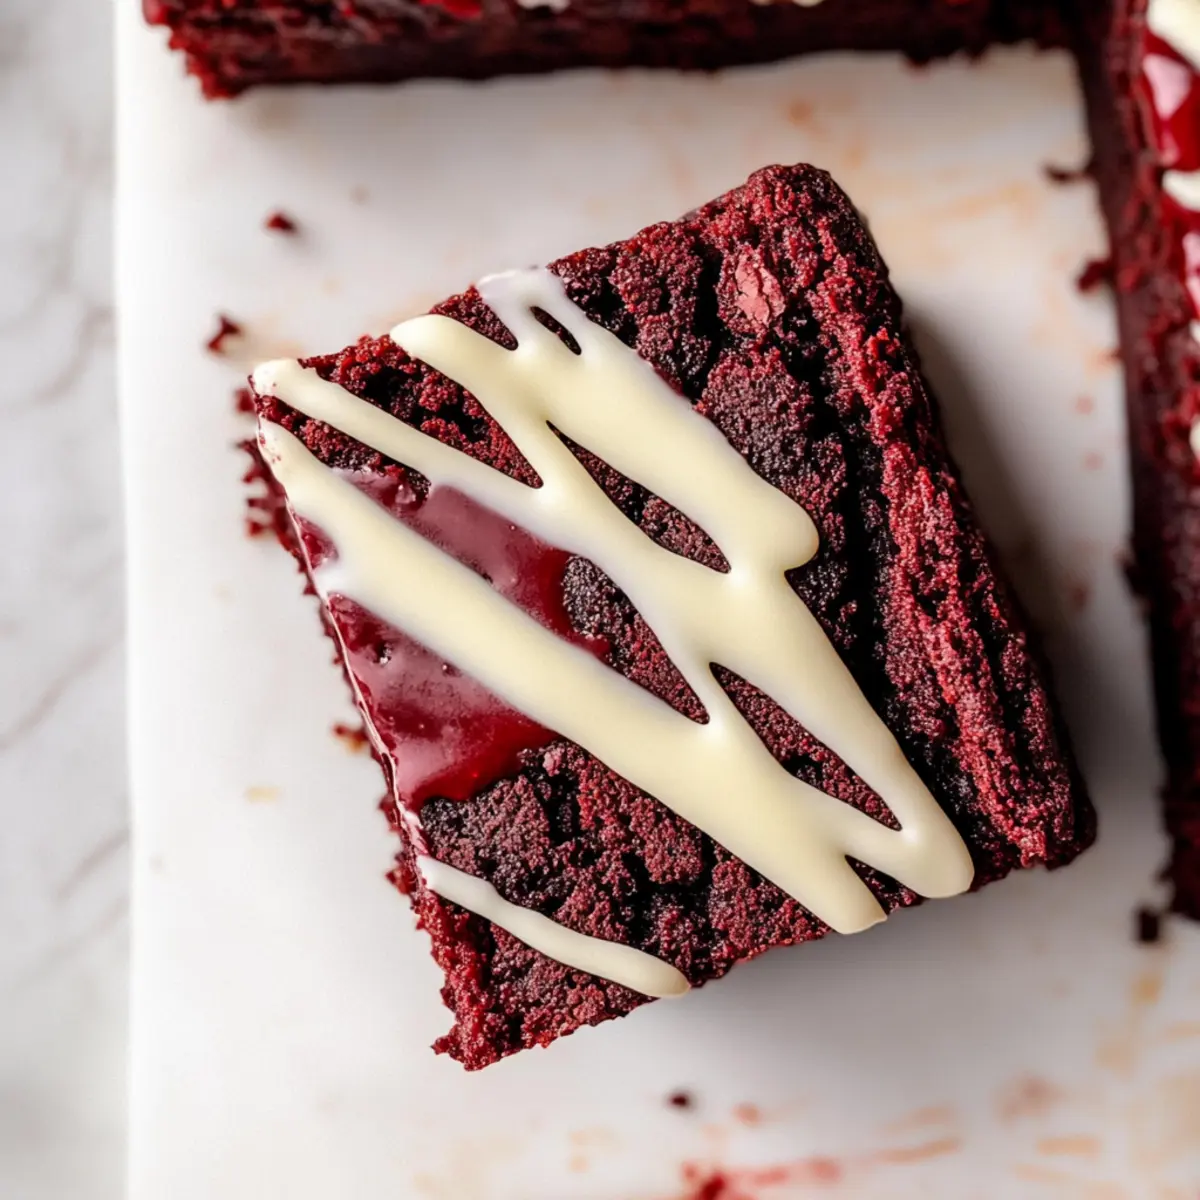
As I stood in my kitchen, the alluring scent of melting chocolate enveloped me like a warm embrace—it was time to whip up a batch of Red Velvet Brownies! These gooey, fudgy delights are not just any dessert; they bring a splash of vibrant color and an added touch of elegance, making them perfect for special occasions like Valentine’s Day. What I adore most is how effortlessly these brownies come together, satisfying my sweet tooth while also impressing friends and family. The rich chocolate flavor combined with that striking red hue topped off with a drizzle of white chocolate creates a visually stunning treat that’s as delicious as it is beautiful. Are you ready to dive into this delightful recipe and make your own batch of irresistible Red Velvet Brownies?
Why are these brownies a must-try?
Irresistible flavor: The combination of semi-sweet dark chocolate and a hint of cocoa creates a rich, fudgy dessert perfect for chocolate lovers.
Visually stunning: The striking red color of these brownies makes them a showstopper at any gathering, especially for special occasions like Valentine’s Day.
Super easy: With just a few simple steps and everyday ingredients, you can whip up these delightful treats in no time!
Crowd-pleaser: Whether it’s a holiday, birthday, or a casual get-together, these Red Velvet Brownies are sure to impress your guests and family alike.
Endless pairs: Serve warm with a scoop of vanilla ice cream or a dollop of whipped cream for an indulgent twist. If you want some extra tips, check out my section on storage tips to ensure your brownies stay fresh and delicious!
Red Velvet Brownie Ingredients
• Everything you need to create these luscious treats!
For the Batter
- Granulated Sugar – Sweetness. You can reduce slightly for a less sweet brownie.
- Large Eggs – Structure and moisture. Use 3 eggs at room temperature for best results.
- Semi-Sweet Dark Chocolate – Richness. Substitute with milk chocolate if you prefer a sweeter taste.
- Vegetable Oil – Moisture and fat. For a richer flavor, substitute with melted butter (145g).
- Red Gel Food Coloring – Color enhancement. Optional—adjust the amount for the desired depth of red.
- White Vinegar – Stabilizing agent for the batter. Lemon juice can be used as an alternative.
- Vanilla Extract – Flavor. Try to use pure vanilla for the best taste.
- All-Purpose Flour – Structure. Substitute with gluten-free flour blend for a gluten-free option.
- Unsweetened Dutch Cocoa Powder – Deep chocolate flavor. Regular cocoa powder can be used if Dutch isn’t available.
- Cornstarch – Tenderness and fudginess. This ingredient is essential for that gooey texture.
- Salt – Flavor enhancement. It’s crucial for balancing out the sweetness.
For the Topping
- Melted White Chocolate – Topping. Optional; using white chocolate chips for drizzling works wonderfully, too.
Step‑by‑Step Instructions for Red Velvet Brownies
Step 1: Preheat the Oven
Begin by preheating your oven to 160ºC (325ºF). While the oven heats, prepare a square baking pan measuring 20×20 cm (8×8 inch) by lining it with parchment paper. This not only prevents sticking but also makes it easier to lift the brownies out once they’re baked.
Step 2: Melt the Chocolate
Next, chop your semi-sweet dark chocolate into small pieces and melt it gently in a microwave or double boiler. Stir occasionally until smooth, then allow it to cool for about 5 minutes. This melted chocolate will add richness and a deep flavor to your Red Velvet Brownies, enhancing their fudgy texture.
Step 3: Combine Dry Ingredients
In a mixing bowl, sift together the all-purpose flour, cocoa powder, cornstarch, and salt. Sifting helps to eliminate lumps and ensures an even distribution of dry ingredients. Set this bowl aside as this mixture will be combined with the wet ingredients later, contributing to the delightful texture of your brownies.
Step 4: Whip the Eggs and Sugar
In a separate large bowl, beat three large eggs and granulated sugar using an electric mixer on high speed for about 2 minutes, until the mixture becomes light and fluffy. This step introduces air into the batter, creating a lovely rise in your brownies while maintaining their fudgy nature.
Step 5: Add Wet Ingredients
Now, slowly incorporate the cooled melted chocolate into your egg mixture. Add in the vegetable oil, red gel food coloring, white vinegar, and vanilla extract, mixing until everything is well combined. The vibrant color will transform your batter into a beautiful red hue, perfect for those eye-catching Red Velvet Brownies.
Step 6: Mix Dry and Wet Ingredients
Gradually add the dry ingredient mixture into the wet ingredients, mixing on medium speed just until combined. Be careful not to overmix, as this could lead to denser brownies. You want to see a smooth, rich batter that captures all those delicious flavors beautifully.
Step 7: Bake the Brownies
Pour the brownie batter into the prepared pan and spread it evenly. Place it in the preheated oven and bake for 40-45 minutes. Check doneness by inserting a toothpick; it should come out with moist crumbs, indicating that the brownies are perfectly fudgy without being underbaked.
Step 8: Cool and Drizzle
Once baked, remove the pan from the oven and allow the brownies to cool on a wire rack for about 30 minutes. After cooling, melt your white chocolate and drizzle it over the top of the brownies for a delicious finishing touch. This adds a sweet contrast to the rich chocolate flavors of your Red Velvet Brownies.
Red Velvet Brownies Variations & Substitutions
Feel free to let your creativity shine as you make these brownies uniquely yours!
- Dairy-Free: Substitute vegetable oil with coconut oil and use dairy-free chocolate to keep them indulgent without dairy.
- Gluten-Free: Swap all-purpose flour for a gluten-free flour blend to enjoy these brownies without the gluten. They’ll still be deliciously fudgy!
- Nutty Delight: Fold in 1 cup of chopped nuts, such as walnuts or pecans, into the batter for a delightful crunch and added flavor. They provide a beautiful contrast to the soft brownie texture.
- Spice it Up: Add a pinch of cayenne or cinnamon to the batter for a surprising hint of warmth that complements the chocolate beautifully.
- Fruit Flavor Boost: Mix in 1/2 cup of mashed ripe banana or applesauce for added moisture and a touch of fruity sweetness. Plus, this adds a lovely depth to the flavor!
- Chocolate Lovers: Replace the red food coloring with additional cocoa powder for a classic chocolate brownie experience without the red hue.
- Caramel Drizzle: Instead of white chocolate, top with a homemade caramel sauce for an extra indulgent twist that will impress anyone with a sweet tooth.
- Cheesecake Swirl: Create a layer of cheesecake by swirling in a mixture of cream cheese, sugar, and vanilla extract on top of the brownie batter before baking for a lavish dessert.
These twists can transform your Red Velvet Brownies into something new and exciting! If you’re interested in unique serving suggestions, check out my section on what to serve with Creamy Chocolate Chia Pudding for wonderful pairing ideas!
Make Ahead Options
These delicious Red Velvet Brownies are perfect for meal prep enthusiasts! You can prepare the brownie batter up to 24 hours in advance and store it covered in the refrigerator. Just mix the ingredients, then pour the batter into the prepared baking pan, cover with plastic wrap, and refrigerate. When you’re ready to bake, simply pop the pan into a preheated oven and proceed with baking as directed—these gooey brownies will be just as delightful! If you’re feeling extra organized, you can also bake them ahead of time, let them cool completely, and store the brownies in an airtight container for up to 3 days at room temperature. Just remember to drizzle with melted white chocolate just before serving for that finishing touch!
Storage Tips for Red Velvet Brownies
Room Temperature: Store your Red Velvet Brownies in an airtight container at room temperature for up to 5 days to maintain their delicious texture.
Fridge: For enhanced freshness, refrigerate the brownies in an airtight container for up to a week. Allow them to come to room temperature before serving.
Freezer: Freeze brownies wrapped tightly in plastic wrap and then placed in a freezer bag for up to 3 months. Thaw in the fridge overnight before enjoying.
Reheating: To enjoy warm brownies, reheat in the microwave for about 10-15 seconds or until warmed throughout, perfect for that fudgy experience!
Expert Tips for Red Velvet Brownies
-
Avoid Overbaking: Check brownies at the 40-minute mark; they should have moist crumbs. Overbaking leads to a dry texture instead of the desired fudginess.
-
Room Temperature Eggs: Using eggs at room temperature helps create a light, airy batter, leading to a perfect brownie rise and texture. Take them out in advance for the best results!
-
Quality Chocolate: Opt for high-quality semi-sweet dark chocolate for a rich flavor. A better chocolate makes a big difference in your Red Velvet Brownies.
-
Mix Gently: When combining wet and dry ingredients, mix just until incorporated. Overmixing can result in denser brownies, losing that beloved fudgy texture.
-
Cooling Time: Allow the brownies to cool completely before cutting. This helps them firm up, making it easier to get clean, beautiful squares.
What to Serve with Gooey Red Velvet Brownies?
Indulge in a truly unforgettable dessert experience by pairing these luscious treats with delightful accompaniments.
-
Vanilla Ice Cream: The creamy sweetness balances the rich chocolate flavors, creating a delightful contrast that melts in your mouth.
-
Whipped Cream: A dollop of fluffy whipped cream adds a light, airy touch to every bite, enhancing the fudgy texture of the brownies.
-
Fresh Berries: Juicy strawberries or raspberries provide a tart burst that complements the sweetness of the brownies beautifully. Consider a mix of berries for an eye-catching presentation!
-
Chocolate Sauce: Drizzle some warm chocolate sauce over your brownies for an extra indulgent experience. The smooth sauce enhances the chocolatey goodness while adding a glossy finish.
-
Nuts: Chopped pecans or walnuts sprinkled on top add a lovely crunch, creating a delightful contrast to the soft, chewy brownie texture.
-
Sparkling Wine: Serving the brownies with a glass of sparkling wine elevates the occasion, making each bite feel like a lavish treat. The bubbles create a delightful pairing with the rich dessert.
-
Coffee: A warm cup of coffee adds depth to the flavor experience, enhancing the chocolatey notes of the brownies and making it perfect for evening gatherings.
-
Red Velvet Milkshake: Take the red velvet theme to new heights with a creamy milkshake made with vanilla ice cream and a hint of cocoa. It’s a playful and indulgent twist for any sweet tooth!
-
Chocolate-Covered Strawberries: These elegant bites add romance to your dessert table and complement the red velvet theme perfectly for special occasions.
Red Velvet Brownies Recipe FAQs
How do I select the best ingredients for Red Velvet Brownies?
Absolutely! When it comes to the star ingredients like semi-sweet dark chocolate, choose a high-quality brand for the best flavor. For eggs, use large ones at room temperature, as this will aid in creating a fluffier batter. For the red gel food coloring, opt for a gel format rather than liquid to achieve that vivid hue without adding extra moisture to the batter.
How should I store my Red Velvet Brownies to keep them fresh?
You can store your Red Velvet Brownies in an airtight container at room temperature for up to 5 days. If you’d like to extend their freshness, place them in the refrigerator for up to a week. Just remember to let them come to room temperature before indulging in those delightful fudgy bites!
Can I freeze Red Velvet Brownies and how?
Definitely! Freezing your brownies is a great way to keep them for later. Wrap them tightly in plastic wrap, and then place them in a freezer-safe bag. They will stay fresh for up to 3 months. When you’re ready to enjoy, simply thaw them in the fridge overnight, and they’re ready to go!
What should I do if my brownies turn out too dry?
Very! If you find your Red Velvet Brownies are too dry, it may be because they were overbaked. Always check for doneness around the 40-minute mark by inserting a toothpick; it should come out with moist crumbs. If your brownies do dry out, adding a scoop of vanilla ice cream or a drizzle of ganache when serving can help bring back some moisture and richness.
Are these brownies suitable for those with gluten allergies?
For sure! To make your Red Velvet Brownies gluten-free, simply substitute the all-purpose flour with a gluten-free flour blend. Many blends work similarly, but I recommend testing one that contains xanthan gum for the best texture. Enjoying these delightful treats is possible for everyone!
Irresistibly Fudgy Red Velvet Brownies for Sweet Occasions
Ingredients
Equipment
Method
- Preheat your oven to 160ºC (325ºF) and prepare a square baking pan by lining it with parchment paper.
- Chop and melt semi-sweet dark chocolate gently, then let it cool for about 5 minutes.
- Sift together all-purpose flour, cocoa powder, cornstarch, and salt in a mixing bowl.
- Beat three eggs and sugar on high speed for about 2 minutes until light and fluffy.
- Slowly mix the cooled melted chocolate into the egg mixture, followed by vegetable oil, food coloring, vinegar, and vanilla.
- Gradually mix the dry ingredient mixture with the wet ingredients until just combined.
- Pour the batter into the prepared baking pan and bake for 40-45 minutes. Check for doneness with a toothpick.
- Allow the brownies to cool on a wire rack for about 30 minutes and drizzle melted white chocolate on top before serving.
Leave a Reply