
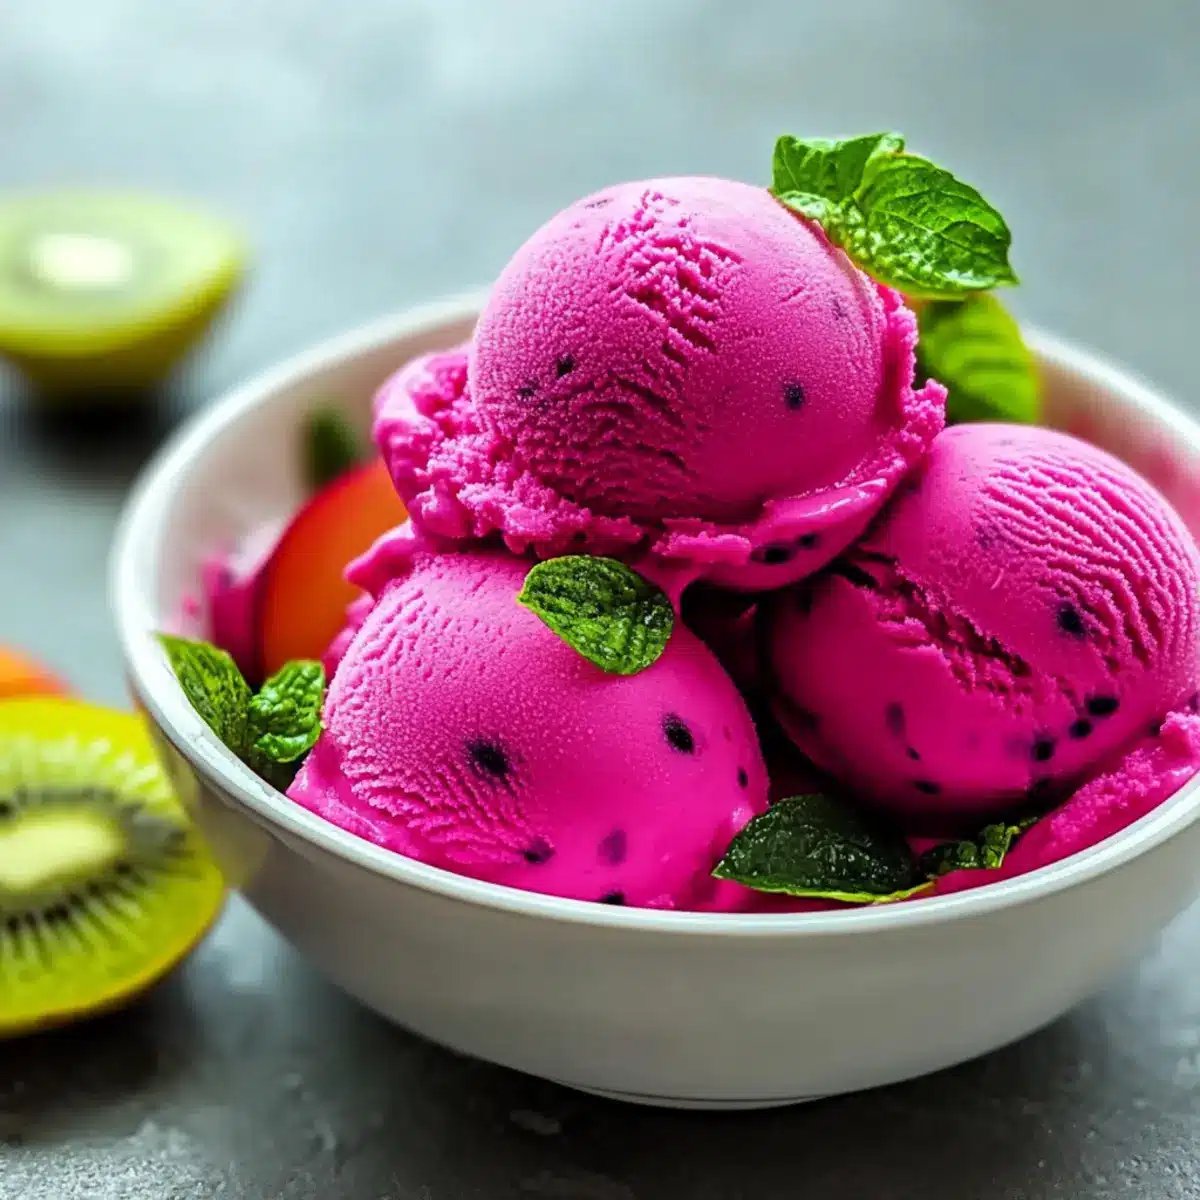
Walking through a vibrant market, I was drawn to the striking pink hue of dragon fruit, a tropical delight that almost feels like a slice of summer on your plate. This vivid fruit not only adds an exotic flair but transforms a simple dessert into a visual masterpiece. Our Dragon Fruit Ice Cream is a dairy-free treat that combines creamy texture with refreshing taste, making it an irresistible option for those hot days when you crave something cool and satisfying. With minimal prep time and no ice cream maker required, you can whip up this luscious dessert in no time—perfect for impressing family or simply treating yourself. Curious about how to bring this tropical flavor to life in your own kitchen? Let’s dive into the recipe!
Why is Dragon Fruit Ice Cream Amazing?
Vibrant Color: The stunning pink hue of this ice cream not only delights the eyes but also sets the mood for a tropical getaway.
Dairy-Free Delight: Made with creamy coconut and almond milk, it’s a perfect treat for those avoiding dairy but craving something rich and satisfying.
Easy to Make: With no churn necessary, you can whip up this dessert in a flash, making it an accessible option for both novice and seasoned cooks.
Tropical Flavor: The unique taste of dragon fruit will transport you to a sun-soaked paradise with every bite, making it perfect for summer gatherings or simply treating yourself.
Customizable: Feel free to add a splash of lime zest or swirl in toasted coconut for that extra touch—this recipe is as versatile as it is delicious! For more tropical inspirations, be sure to check out our Creamy German Goulash or consider serving it with fresh tropical fruits to elevate your dessert experience!
Dragon Fruit Ice Cream Ingredients
Discover the essential components to create this delightful dragon fruit ice cream!
For the Base
- Dragon Fruits – Provides the main flavor and vibrant color; choose ripe red-fleshed for a deeper hue.
- Almond Milk – Adds creaminess and a subtle nutty flavor; substitute with oat milk for a richer texture.
- Coconut Milk – Rich source of creaminess to enhance the tropical flavor; avoid “light” versions for the best consistency.
- Sugar – Sweetens the ice cream without overpowering the fruit; can be swapped with honey or maple syrup, but note that results may vary in texture.
- Vanilla Extract – Adds warmth and depth to balance the sweetness.
With these ingredients, you’re on your way to creating a creamy and refreshing dragon fruit ice cream that will be the star of your summer dessert lineup!
Step‑by‑Step Instructions for Dragon Fruit Ice Cream
Step 1: Prepare Your Ice Cream Maker
Start by setting up your ice cream maker according to the manufacturer’s instructions. This often involves placing the freezer bowl in the freezer for at least 24 hours ahead of time to ensure it’s fully frozen. Having a well-prepared ice cream maker will guarantee that your Dragon Fruit Ice Cream reaches that perfectly creamy texture.
Step 2: Blend the Ingredients
In a powerful blender, combine the ripe dragon fruit flesh, almond milk, coconut milk, sugar, and vanilla extract. Blend on high speed for about 1–2 minutes until the mixture is smooth and uniform, ensuring the sugar is completely dissolved. This vibrant blend creates the delicious base for your dragon fruit ice cream, bursting with tropical flavors.
Step 3: Churn the Ice Cream
Pour the blended mixture into the pre-chilled ice cream maker. Turn it on and churn for approximately 20-25 minutes, or until the mixture thickens to a soft-serve consistency. Keep an eye on it; once it reaches a creamy texture and holds its shape, you know your Dragon Fruit Ice Cream is nearly ready for the next step.
Step 4: Freeze to Set
Transfer the churned ice cream into a freezer-safe container. Press a piece of parchment paper directly onto the surface to prevent ice crystals from forming. Freeze the container for at least 4 hours, or until the ice cream is firm and scoopable. This will help solidify the flavors and give you that luscious texture when you’re ready to serve.
Step 5: Serve and Enjoy
When you’re ready to enjoy your homemade Dragon Fruit Ice Cream, let it sit at room temperature for 5–10 minutes to soften slightly. This brief wait will make scooping easier and enhance the creamy mouthfeel of each delightful scoop. Serve it in bowls or cones, and savor the tropical vibes with every bite!
What to Serve with Dragon Fruit Ice Cream
Transform your tropical dessert experience with these delightful accompaniments that elevate every scoop.
- Fresh Berries: Juicy strawberries and blueberries add a burst of flavor and vibrant color, perfectly contrasting with the creamy ice cream.
- Chilled Coconut Water: This hydrating drink brings out the island vibes, complementing the tropical flavors of the dragon fruit dessert beautifully.
- Mango Salsa: A zesty mango salsa, infused with lime and mint, provides a refreshing sweetness that pairs wonderfully with the ice cream.
- Toasted Coconut Flakes: Crunchy and nutty, toasted coconut flakes add texture and deepen the tropical essence of the dish.
- Chocolate Drizzle: Rich dark chocolate drizzled over your dragon fruit ice cream creates a delightful balance of sweetness and bitterness.
- Lime Sorbet: For an added layer of refreshment, serve a scoop of tart lime sorbet alongside—ideal for those who love citrusy contrasts.
- Mint Sprigs: Fresh mint not only makes for a stunning garnish but also offers a cooling effect and fragrant aroma that enhances the experience.
- Pineapple Skewers: Grilled or fresh pineapple skewers bring a juicy, caramelized sweetness that beautifully complements the creamy texture of the ice cream.
Tips for the Best Dragon Fruit Ice Cream
- Choose Ripe Fruit: Use ripe dragon fruits for the sweetest flavor and vibrant color; ripe fruit will elevate your ice cream’s taste.
- Chill Ingredients: Refrigerate almond and coconut milk before blending to enhance the creaminess and make churning easier.
- Blend Smoothly: Ensure the mixture is completely smooth before churning, as any chunks can lead to a gritty texture in your Dragon Fruit Ice Cream.
- Avoid Ice Crystals: Press parchment paper directly onto the ice cream surface in the container to prevent unwanted ice crystals during freezing.
- Let It Rest: Allow the ice cream to sit at room temperature for 5–10 minutes before serving for a smoother, creamier scoop.
How to Store and Freeze Dragon Fruit Ice Cream
- Freezer: Store your Dragon Fruit Ice Cream in an airtight container to maintain its creamy texture for up to 2 weeks. For best results, consume within the first week.
- Covering: Press parchment paper directly onto the surface of the ice cream before sealing to minimize ice crystal formation during storage.
- Serving Tip: Allow the ice cream to sit at room temperature for 5-10 minutes before scooping to achieve that perfect creamy consistency and enhance the tropical flavor.
- Refrigeration: Do not refrigerate the ice cream as it can alter the texture; always keep it frozen until ready to serve.
Make Ahead Options
These creamy Dragon Fruit Ice Cream are perfect for busy home cooks looking to save time while still enjoying a delicious treat! You can blend all the ingredients—dragon fruit, almond milk, coconut milk, sugar, and vanilla extract—up to 24 hours in advance and store them in the refrigerator. The churning process is best done on the day you plan to serve it, ensuring that it reaches that perfectly creamy texture. Once churned, transfer the ice cream to a freezer-safe container and freeze for at least 4 hours before serving. To maintain the quality, press parchment paper directly onto the surface to prevent ice crystals. When it’s time to indulge, simply let it sit at room temperature for 5–10 minutes before scooping, and enjoy your homemade tropical delight!
Dragon Fruit Ice Cream Variations
Feel free to explore the creativity of your kitchen by customizing this recipe with flavor and texture twists!
- Lime Zest: Add a zesty kick by incorporating lime zest to the base mixture, creating a refreshing contrast to the sweetness of the dragon fruit.
- Mint Leaves: Blend in a handful of fresh mint leaves for a cooling twist that combines beautifully with the tropical flavor. The mint will elevate every scoop to a whole new level.
- Swirled Coconut: Fold in toasted coconut flakes at the end of churning for delightful texture and an extra dash of the tropics with each bite. The crunch perfectly complements the creamy base.
- Nutty Crunch: Toss in chopped macadamia nuts or almonds for a satisfying crunch that enhances the ice cream’s texture. With each bite, you’ll enjoy sweet and nutty contrasts.
- Chocolate Drizzle: Drizzle melted dark or white chocolate over the ice cream just before serving for a touch of decadence. This creates a rich and satisfying pairing with the fruity ice cream.
- Berry Blend: Incorporate fresh or frozen berries like strawberries or raspberries for a burst of flavor and color—this also adds a juicy freshness that balances the creaminess nicely.
- Spiced Kick: Add a pinch of cayenne or chili powder to the base mixture for a surprising and delightful heat that elevates the entire dessert experience. It’s a bold flavor adventure!
- Citrus Burst: Enhance the tropical vibe by mixing in grapefruit or orange juice, offering a refreshing tang that pairs wonderfully with the sweetness of the dragon fruit.
No matter how you choose to customize, each variation is a gateway to a delightful tropical escape. For more creative ideas, why not explore our Chocolate Orange Creamsicle recipe or serve your dragon fruit ice cream alongside fresh tropical fruits? The possibilities are endless!
Dragon Fruit Ice Cream Recipe FAQs
How do I choose ripe dragon fruits?
Absolutely! When selecting dragon fruits, look for those that are vibrant in color with smooth skin. Ripe fruits will have a slight give when pressed gently, and avoid those with dark spots all over, as these may indicate overripeness. It’s best to use red-fleshed varieties for a deeper hue and richer flavor in your ice cream.
What’s the best way to store dragon fruit ice cream?
To keep your Dragon Fruit Ice Cream fresh, store it in an airtight container in the freezer for up to two weeks. However, for optimal texture and flavor, I recommend enjoying it within the first week. Always cover the top with parchment paper prior to sealing to minimize the formation of ice crystals.
Can I freeze dragon fruit ice cream?
Absolutely! Once churned, transfer the ice cream to a freezer-safe container, pressing parchment paper directly onto the surface to prevent ice crystals. Then freeze it for at least 4 hours until firm. If stored correctly, it will maintain its creamy texture for about two weeks in the freezer.
Why does my ice cream have ice crystals?
Very! Ice crystals can form if the ice cream is not stored properly or if it’s melted and refrozen multiple times. Always ensure to press parchment paper against the surface before sealing. If you find ice crystals forming, let the ice cream soften at room temperature for a few minutes before serving to restore that creamy texture.
Is dragon fruit ice cream safe for pets?
While dragon fruit is generally safe for pets in small amounts, it’s always best to consult your veterinarian before sharing any human food with your furry friends. Also, remember to avoid giving them any ice cream containing sugar or artificial sweeteners, as these can be harmful to pets.
Can I substitute the almond milk in the recipe?
Definitely! If you prefer a richer texture, you can substitute almond milk with oat milk or even coconut milk for a creamier result. Each alternative brings its own unique flavor; just be sure to stay away from light versions of coconut milk, as they can affect the overall creaminess of your Dragon Fruit Ice Cream.
Creamy Dragon Fruit Ice Cream for a Tropical Escape
Ingredients
Equipment
Method
- Prepare Your Ice Cream Maker: Set up your ice cream maker according to the manufacturer's instructions.
- Blend the Ingredients: Combine the ripe dragon fruit flesh, almond milk, coconut milk, sugar, and vanilla extract in a blender and blend for 1–2 minutes until smooth.
- Churn the Ice Cream: Pour the blended mixture into the ice cream maker and churn for 20-25 minutes until thickened.
- Freeze to Set: Transfer the ice cream to a container, cover with parchment paper, and freeze for at least 4 hours.
- Serve and Enjoy: Let the ice cream sit at room temperature for 5-10 minutes before serving for easier scooping.
Leave a Reply