
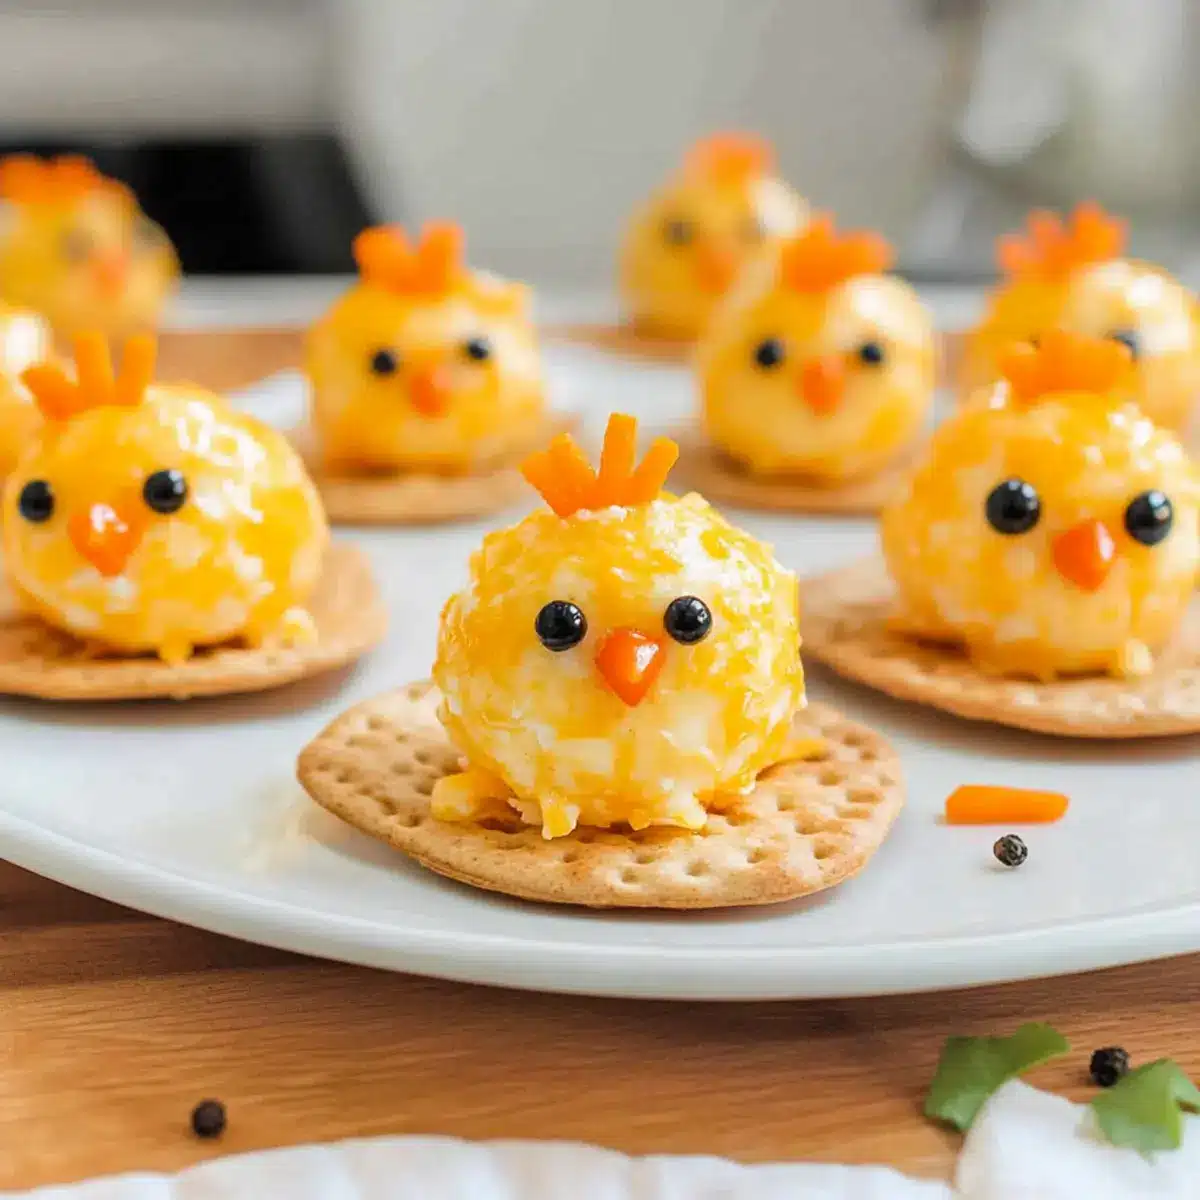
As I was sifting through ideas for our upcoming Easter gathering, my eyes landed on something utterly charming: Baby Chick Mini Cheese Balls! These delightful little bites not only bring a splash of whimsy to the table but are also irresistibly creamy and savory. Perfect as an easy appetizer, they take just 20 minutes to whip up, making them a lifesaver during the holiday rush. Whether you’re entertaining kids or impressing adults, these mini cheese balls cater to everyone’s palate while offering a gluten-free option that doesn’t skimp on flavor. Ready to add a touch of fun and deliciousness to your celebrations? Let’s hop into this delightful recipe!
Why are these cheese balls a must-try?
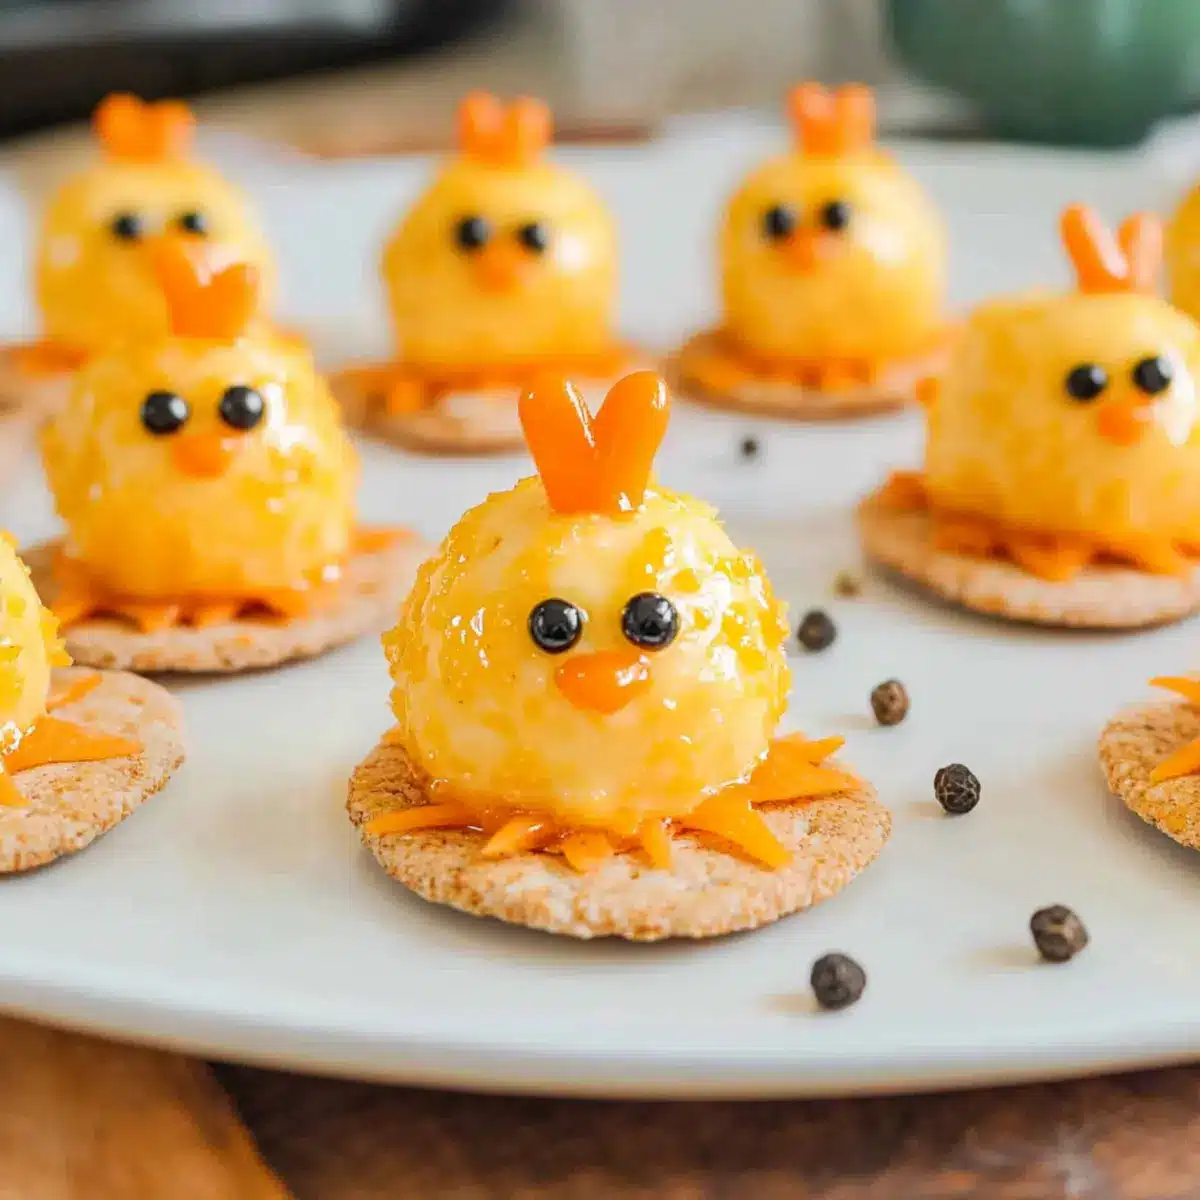
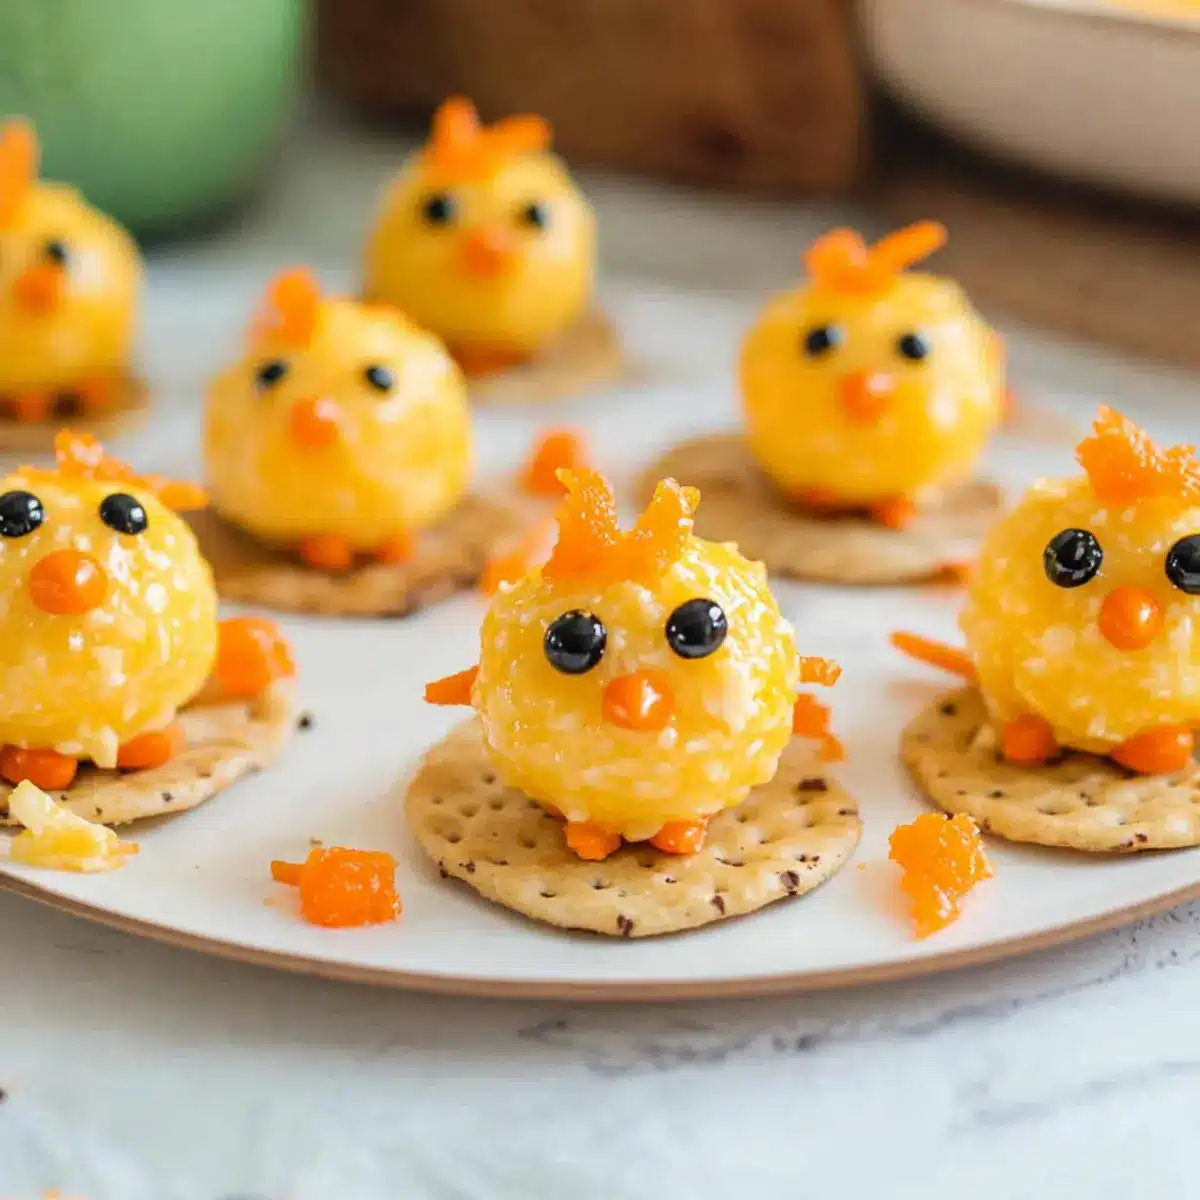
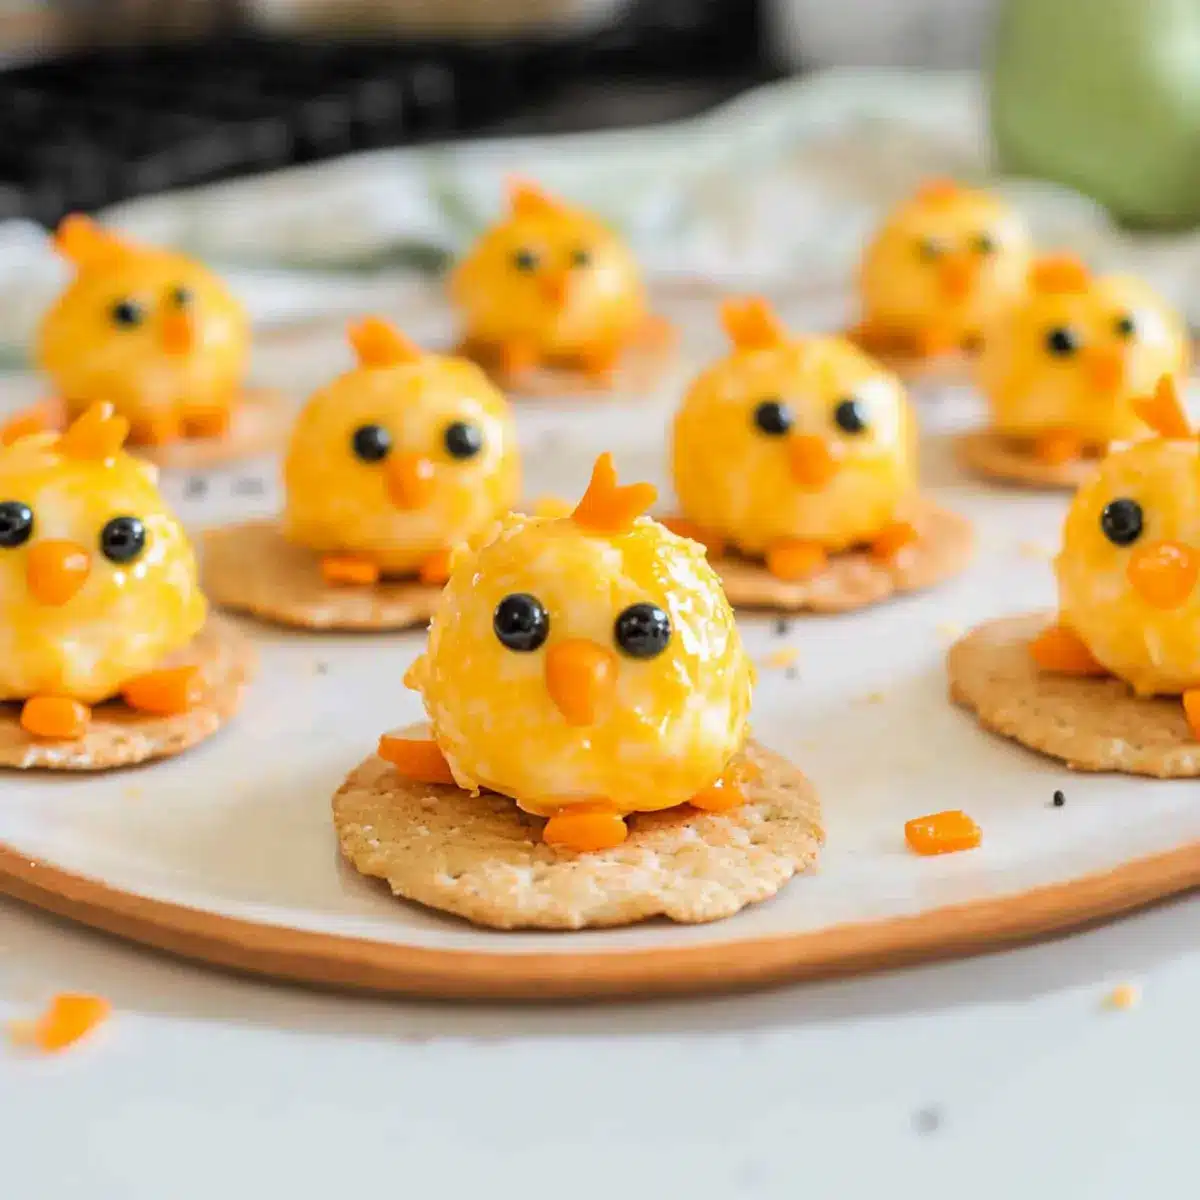
Adorable Appearance: Each Baby Chick Mini Cheese Ball is a feast for the eyes with its playful chick design, making them a hit for festive gatherings.
Quick & Easy: Whip up these treats in just 20 minutes, perfect for last-minute appetizers or surprise guests.
Kid-Friendly: These cheese balls not only appeal to kids but also encourage them to get involved in the kitchen.
Flavorful & Versatile: With creamy cheese and hints of garlic and onion powder, these bites are bursting with flavor; you can easily customize them with different cheeses for a unique touch!
Gluten-Free Option: Not only are they suitable for everyone, but they can also be served on cucumber slices for a refreshing twist, making them a healthier choice!
Serve them alongside Thanksgiving Stuffing Balls or your favorite veggie sticks for a colorful platter that everyone will enjoy!
Baby Chick Mini Cheese Balls Ingredients
For the Base
• Cream Cheese – This rich base adds creaminess; make sure it’s at room temperature for easy mixing.
• Shredded Cheddar Cheese – Provides flavor and structure; use finely shredded sharp cheddar for the best taste.
For Flavor
• Worcestershire Sauce – Optional for added depth; feel free to leave it out if you prefer a milder flavor.
• Garlic Powder – Enhances taste with its pungent kick; substitute with fresh garlic for a more aromatic option.
• Onion Powder – Adds mild onion essence; you can swap this for finely minced fresh onions if desired.
For Decoration
• Carrots – Perfect for crafting adorable beaks and feet; radishes can be used if carrots are not on hand.
• Black Peppercorns – Serve as the eyes of your chicks; swap for black olives if you prefer a softer option.
For Serving
• Crackers – A crunchy base for the cheese balls; for a gluten-free alternative, try using cucumber slices instead.
Get ready to create these delightful Baby Chick Mini Cheese Balls that are certain to bring smiles and joy to your festive gatherings!
Step‑by‑Step Instructions for Baby Chick Mini Cheese Balls
Step 1: Prepare the Creamy Base
In a large mixing bowl, use an electric mixer to beat the softened cream cheese until it’s smooth and creamy, about 2 minutes. Ensure that the cream cheese is at room temperature for easy mixing, creating a velvety texture. This will be the delicious foundation for your Baby Chick Mini Cheese Balls.
Step 2: Mix in Flavorings
Add the garlic powder, onion powder, and Worcestershire sauce (if using) to the creamy mixture. Then, gradually incorporate 1 1/2 cups of finely shredded cheddar cheese, mixing until everything is well combined. The mixture should be fluffy and aromatic, signaling that your cheese base is ready for shaping.
Step 3: Shape the Cheese Balls
Using a 1-inch cookie scoop, portion out the cheese mixture and shape it into 20 small balls. Make sure to roll them firmly in your hands for a smooth finish, which will help them hold their shape. Place the formed Baby Chick Mini Cheese Balls on a lined baking sheet as you work through each scoop.
Step 4: Coat the Cheese Balls
On a separate plate, spread the remaining shredded cheddar cheese. Roll each cheese ball in the cheddar until fully coated, ensuring every surface is well covered. This adds a delightful crunch and rich flavor to your Baby Chick Mini Cheese Balls, enhancing their appeal as festive appetizers.
Step 5: Add Carrot Decorations
Slice carrots into thin rounds, preparing two small feet and a small beak for each cheese ball. Gently insert the carrot pieces into the cheese balls to create their adorable chick features. This step adds a fun and colorful touch that makes your cheese balls truly whimsical!
Step 6: Finish with Eyes
Next, place a black peppercorn (or half of an olive) on each cheese ball for their charming eyes. Press gently to ensure they stick, creating the ultimate baby chick look. These finishing touches make your Baby Chick Mini Cheese Balls not only tasty but irresistibly cute.
Step 7: Serve or Refrigerate
Arrange the decorated cheese balls on crackers or cucumber slices for serving. For the best experience, serve immediately or refrigerate until ready to enjoy. Just keep them away from crackers to prevent sogginess, and get ready to see smiles light up during your festive gatherings!
What to Serve with Adorable Baby Chick Mini Cheese Balls
Your festive spread will shine even brighter with these charmingly creamy bites inviting all sorts of delicious accompaniments!
-
Fresh Veggie Sticks: Crisp carrots and cucumbers add a refreshing crunch, balancing the creamy texture of your cheese balls. A perfect pairing for color and health!
-
Fruit Platter: Bright, juicy fruits like strawberries and grapes not only enhance visual appeal but also give a sweet contrast to the savory mini cheese balls.
-
Cheesy Breadsticks: Serve warm, garlicky breadsticks for a delightful dip-and-savor experience. The cheesy goodness echoes the flavors of the Baby Chick Mini Cheese Balls for a unified taste.
-
Pasta Salad: A light pasta salad with fresh herbs and veggies can serve as a satisfying side dish. Its coolness complements the warm cheese balls while adding a heartiness to your meal.
-
Tart Lemonade: Offer a refreshing lemonade to quench thirst and add a zing of citrus that invigorates the palate. Its sweetness rounds out the savory notes beautifully!
-
Chocolate Eggs: For a fun touch, small chocolate eggs can be a whimsical dessert option, perfectly tying into the Easter theme when presented alongside your adorable cheese balls!
Expert Tips for Baby Chick Mini Cheese Balls
-
Chill for Ease: If the cheese mixture becomes too warm while shaping, chill it in the refrigerator for 30 minutes. This will make it easier to scoop and maintain their shape.
-
Customize Texture: For added crunch, mix in chopped nuts or panko breadcrumbs instead of just rolling the balls in cheddar. This personalizes your Baby Chick Mini Cheese Balls!
-
Safety First: For small children, opt for black olives instead of peppercorns for the eyes to avoid any choking hazards while maintaining a fun look.
-
Avoid Sogginess: Assemble the cheese balls on crackers or cucumber slices right before serving. This keeps them fresh and prevents the base from getting soggy.
-
Optional Cheese Choices: Experiment with different cheese blends such as Gouda or Swiss for a unique flavor twist. Your guests will love the variety!
Baby Chick Mini Cheese Balls Variations
Feel free to tweak these adorable cheese balls to match your taste buds and dietary preferences!
-
Different Cheeses: Swap out cheddar for Gouda or Swiss for a unique flavor twist; each brings its own creamy charm.
-
Spiced Up: For those who crave heat, add a pinch of red pepper flakes or a dash of hot sauce to the cheese mixture for a delightful kick.
-
Crunchy Alternatives: Instead of rolling in cheddar, mix in chopped nuts or use panko breadcrumbs for an extra crunchy texture that your guests will love.
-
Healthier Serving: Ditch the crackers and serve them on cucumber slices or bell pepper rounds for a refreshing and lighter option.
-
Veggie Boost: Add finely chopped bell peppers or green onions into the cheese mixture for an additional flavor layer that brightens every bite.
-
Decorative Details: Use cherry tomatoes for the beaks and olives for the feet if you’re in the mood for a slightly different design. This adds a colorful spin to your baby chicks!
-
Creative Dips: Pair the cheese balls with spicy mayo or a zesty dip like ranch for a fun dipping experience.
-
Solidify for Storage: If you’re prepping ahead, shape your cheese balls and freeze them uncoated. Just roll in your choice of topping when you’re ready to serve!
These Baby Chick Mini Cheese Balls are flexible enough to adapt to any celebration; they can easily shine alongside Cottage Cheese Chips or Reuben Balls Spicy for a diverse appetizer spread that will have everyone smiling!
How to Store and Freeze Baby Chick Mini Cheese Balls
Fridge: Store any leftover Baby Chick Mini Cheese Balls in an airtight container in the refrigerator for up to 2 days. Keep them separated from crackers to maintain their crispness.
Freezer: You can freeze uncoated cheese balls for up to 3 months. Just shape them, place them on a baking sheet to freeze, then transfer to a freezer-safe bag for later use.
Reheating: Thaw the cheese balls in the fridge overnight before use. You can serve them cold or let them come to room temperature for the best flavor.
Serving Tip: To maintain the cute chick appearance, wait until just before serving to add the decorative carrot pieces and peppercorn eyes!
Make Ahead Options
These Baby Chick Mini Cheese Balls are perfect for meal prep, allowing you to delight your guests with ease! You can prepare the cheese mixture up to 24 hours in advance; simply store it in an airtight container in the refrigerator. This not only saves you time on the day of your gathering but also allows the flavors to meld beautifully. Before serving, scoop and shape the mixture into balls, then roll them in cheddar cheese, add the carrot features, and complete with peppercorn eyes. Keeping the components separate until serving prevents sogginess and ensures your adorable cheese balls remain just as delicious and charming!
Baby Chick Mini Cheese Balls Recipe FAQs
What type of cream cheese should I use for Baby Chick Mini Cheese Balls?
It’s best to use full-fat cream cheese for a richer flavor and creamier texture. Make sure it’s at room temperature before mixing to ensure everything combines smoothly and evenly.
How long can I store Baby Chick Mini Cheese Balls?
You can store leftover Baby Chick Mini Cheese Balls in an airtight container in the fridge for up to 2 days. Be sure to keep them separated from any crackers to prevent them from becoming soggy.
Can I freeze Baby Chick Mini Cheese Balls?
Absolutely! You can freeze uncoated cheese balls for up to 3 months. Simply shape them, lay them on a baking sheet to freeze, and once firm, transfer them to a freezer-safe bag. When you’re ready to use them, thaw in the fridge overnight.
What should I do if my cheese mixture is too warm to shape?
No worries! If the mixture becomes too warm and difficult to handle, chill it in the refrigerator for about 30 minutes. This will help firm it up and make scooping easier.
Are there any dietary considerations for Baby Chick Mini Cheese Balls?
Yes, these mini cheese balls can be made gluten-free by serving them on cucumber slices instead of crackers. Just be mindful of any cheese allergies if you’re serving guests; consider using alternative cheese options or verifying ingredients to ensure they’re safe.
How can I enhance the flavor of my Baby Chick Mini Cheese Balls?
For a flavor boost, try mixing in a pinch of red pepper flakes, a dash of hot sauce, or even using different cheese blends like Gouda or Swiss. This adds a unique twist and keeps things exciting for your taste buds!
Irresistible Baby Chick Mini Cheese Balls for Happy Appetites
Ingredients
Equipment
Method
- In a large mixing bowl, beat softened cream cheese until smooth and creamy, about 2 minutes.
- Add garlic powder, onion powder, and Worcestershire sauce to the cream cheese, then gradually mix in shredded cheddar cheese.
- Using a 1-inch cookie scoop, portion out the cheese mixture and shape into small balls.
- Roll each cheese ball in remaining shredded cheddar cheese until fully coated.
- Slice carrots for beaks and feet, inserting pieces into the cheese balls.
- Press a black peppercorn onto each cheese ball for eyes.
- Arrange cheese balls on crackers or cucumber slices and serve immediately or refrigerate.
Leave a Reply