
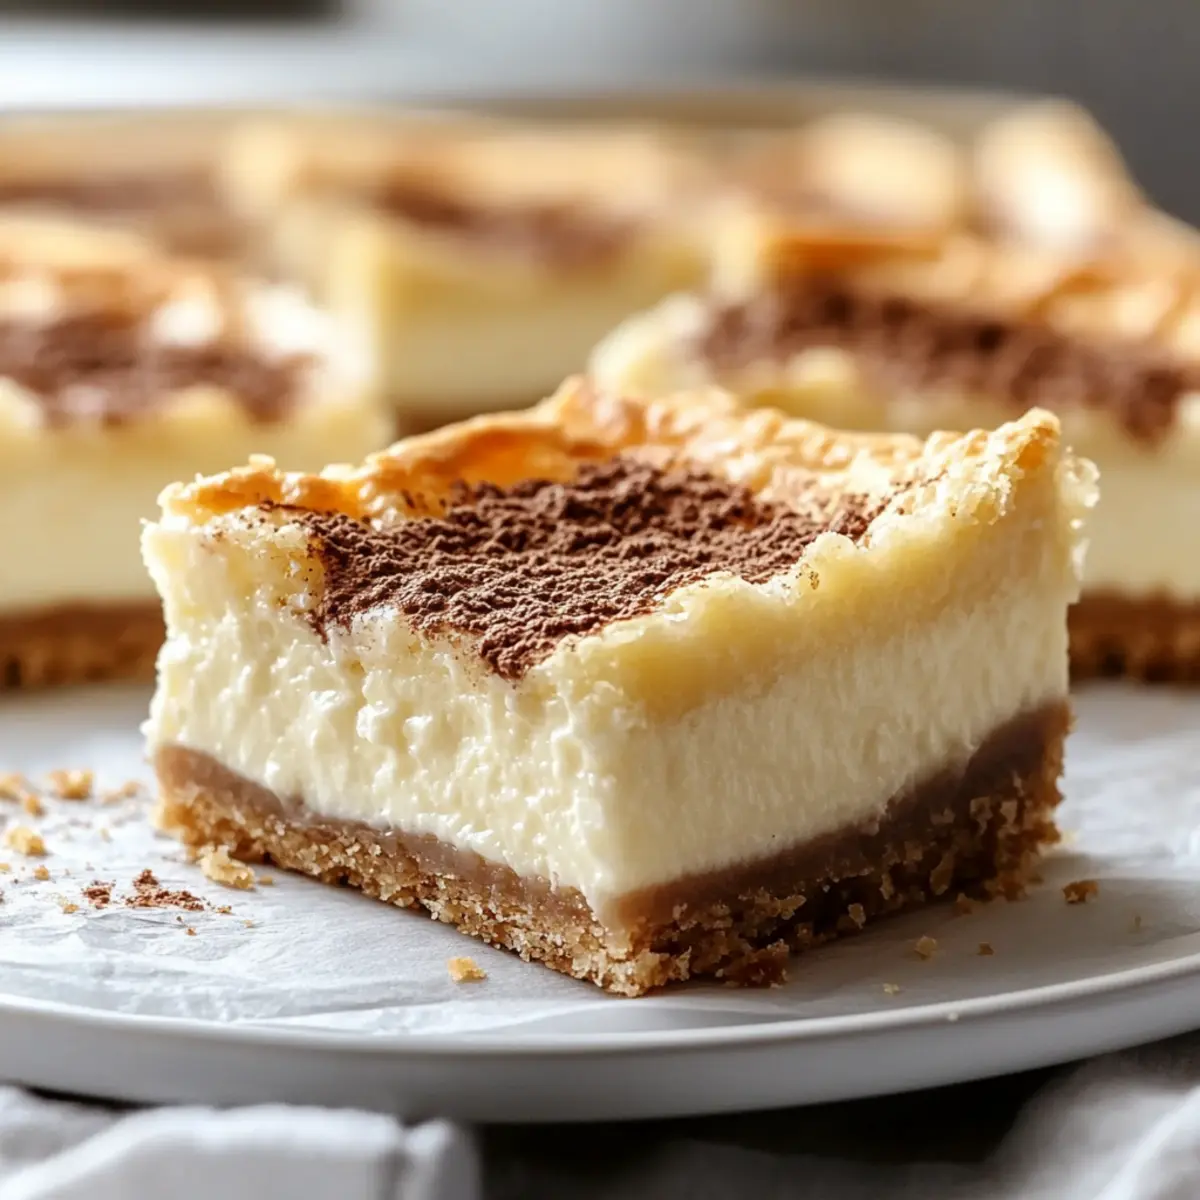
Imagine the aroma of freshly baked Crescent Cheesecake Bars wafting through your kitchen, inviting everyone to gather around for a sweet treat. This delightful recipe perfectly combines buttery crescent roll dough with a rich, creamy cheesecake filling, making it a go-to dessert for any occasion. What I love about these bars is their quick prep time—just 30 minutes from start to finish. Plus, they are wonderfully versatile! You can easily customize them with your favorite fruits, chocolates, or nuts, creating a unique dessert that suits your family’s taste. Whether you’re hosting a gathering or simply craving something sweet at home, these Crescent Cheesecake Bars are sure to impress. Ready to discover the magic of this easy, delicious recipe? Let’s get baking!
Why Are Crescent Cheesecake Bars a Must-Try?
Simplicity is the key! This recipe is a breeze, allowing even novice bakers to shine. Rich, Creamy Flavor comes from the perfect blend of crust and cheesecake filling, ensuring every bite is delightful. Versatile Options mean you can customize with fruits, nuts, or chocolates to cater to everyone’s tastes. These bars take only 30 minutes from prep to serving, making them an ideal choice for unexpected guests or last-minute cravings. Plus, the cozy aroma while baking will draw everyone into the kitchen! If you’re a fan of easy indulgences like Sugar Cookie Cheesecake or Pecan Shortbread Bars, you’ll absolutely love these bars!
Crescent Cheesecake Bars Ingredients
• Perfect for a quick dessert!
For the Cheesecake Filling
- Cream Cheese – A creamy base that makes this filling rich; make sure it’s softened for the best texture.
- Granulated Sugar – Sweetens the filling, balancing the cream cheese; feel free to use coconut sugar if you’re looking for a unique flavor twist.
- Vanilla Extract – Adds depth to the flavor; pure vanilla is recommended for the best results.
- Egg – Binds the filling and adds richness; substitute with a flax egg for a vegan version.
For the Crust
- Refrigerated Crescent Roll Dough – Creates a flaky, buttery crust; no direct substitutes, but puff pastry can work in a pinch.
Optional Topping
- Powdered Sugar – Adds a lovely garnish before serving for an elegant touch; dust it just before serving for the best presentation.
These Crescent Cheesecake Bars are not just quick to whip up; they’re a delicious canvas for your favorite flavors!
Step‑by‑Step Instructions for Crescent Cheesecake Bars
Step 1: Preheat the Oven
Begin by preheating your oven to 350°F (175°C). This ensures that the temperature is just right for baking your Crescent Cheesecake Bars, allowing the crust to become perfectly golden and flaky. While the oven warms up, gather all your ingredients and equipment, including a mixing bowl and a greased baking dish, so you’re ready to go!
Step 2: Prepare the Cheesecake Filling
In a mixing bowl, combine the softened cream cheese, granulated sugar, vanilla extract, and egg. Using an electric mixer, beat the mixture on medium speed for about 2-3 minutes until it’s smooth and creamy. The filling should be free of lumps and well-blended, creating a luscious texture that will elevate your creamy Crescent Cheesecake Bars.
Step 3: Assemble the Bars
Unroll one can of refrigerated crescent roll dough and place it into the bottom of your greased baking dish, creating an even layer. Gently press the seams together to seal any gaps. Spread the creamy cheesecake filling evenly over the dough, making sure it reaches the edges for a delightful bite every time.
Step 4: Top with Dough
Take the second can of crescent dough and unroll it on top of the cheesecake filling. Again, press the seams together to seal the edges tightly. This top layer will create a beautifully flaky crust that perfectly contrasts with the creamy center. Once layered, it’s time to bake!
Step 5: Bake to Perfection
Place the assembled Crescent Cheesecake Bars into the preheated oven and bake for 20-25 minutes. Keep an eye on them; they are done when the top is golden brown and the center slightly jiggles but appears set. The enticing aroma will fill your kitchen as you wait for this delicious dessert to finish baking.
Step 6: Cool and Serve
Once baked, remove the pan from the oven and allow the bars to cool for about 10 minutes. This slight cooling period helps the filling firm up a bit further. After cooling, slice into squares while still warm, and if desired, dust with powdered sugar for an elegant touch before serving your delightful Crescent Cheesecake Bars!
What to Serve with Crescent Cheesecake Bars
Imagine the joy of crafting a delightful dinner around a sweet, creamy treat that leaves everyone smiling and satisfied.
- Fresh Berries: Juicy strawberries or raspberries add a burst of freshness that balances the rich cheesecake flavor beautifully.
- Whipped Cream: A dollop of freshly whipped cream elevates the dessert, giving each bite a light, airy quality that melts in your mouth.
- Chocolate Drizzle: Enhance the bars with a generous drizzle of chocolate for an indulgent, decadent touch that chocolate lovers will adore.
- Coffee or Espresso: A hot cup of coffee or espresso complements the sweetness, creating a delightful balance that is simply irresistible.
- Fruit Compote: A fruity compote made from mixed berries or cherries adds a tangy contrast that brightens the creamy filling.
- Ice Cream: Serve with a scoop of vanilla or strawberry ice cream for a delightful contrast in temperature and texture.
- Nuts for Crunch: Sprinkle chopped nuts like pecans or walnuts on top for a satisfying crunch that adds an extra layer of flavor.
- Caramel Sauce: Drizzling warm caramel over the bars brings a sweet richness that enhances every bite, turning your dessert into something spectacular.
How to Store and Freeze Crescent Cheesecake Bars
Fridge: Store leftover Crescent Cheesecake Bars in an airtight container in the refrigerator for up to 3 days. This keeps them fresh and ready for a sweet indulgence any time!
Freezer: For longer storage, wrap the bars tightly in plastic wrap or aluminum foil, then place them in a freezer-safe container. They can be frozen for up to 2 months—ideal for savoring later!
Thawing: To enjoy frozen bars, simply transfer them to the refrigerator and let them thaw overnight. This helps retain their creamy texture and flavor.
Reheating: If you prefer them warm, microwave individual squares for about 10-15 seconds. Just enough to slightly warm them while preserving their delightful creaminess.
Crescent Cheesecake Bars Variations
Feel free to explore these delightful twists that elevate your Crescent Cheesecake Bars into a personalized treat!
-
Fruit Add-ins: Mix in fresh berries or sliced peaches for a refreshing element. Adding seasonal fruits brightens up the flavor and offers a delightful contrast to the creamy filling.
-
Chocolate Swirl: Drizzle in melted chocolate before baking for a rich chocolatey experience. This twist not only enhances flavor but also creates a beautiful marbled effect that’s sure to impress!
-
Nut Variants: Blend in crushed walnuts or pecans for added crunch. Nuts bring a warm, toasty flavor and satisfying texture, making each bite a little more exciting.
-
Seasoning Boost: Incorporate a sprinkle of cinnamon or nutmeg into the filling for a cozy, warm flavor. These spices add depth and a comforting aroma, perfect for a fun twist on classic desserts.
-
Caramel Drizzle: Elevate your bars with a luscious drizzle of caramel sauce right before serving. This adds a touch of indulgence and a sweet contrast to the tangy cheesecake filling.
-
Dairy-Free Option: Substitute with vegan cream cheese and a flax egg to make it plant-based. Some of your friends may appreciate this thoughtful option, ensuring everyone can enjoy these delicious bars!
-
Gluten-Free Crust: If you’re looking for a gluten-free option, use gluten-free crescent roll dough or traditional puff pastry. This simple swap ensures all can savor the beautiful goodness of this dessert.
For those interested in innovative dessert options, be sure to check out this delightful Pistachio Mushroom Cheesecake or the luscious Caramel Pretzel Bars. Each variation brings a unique twist to your dessert table!
Make Ahead Options
These Crescent Cheesecake Bars are perfect for busy cooks who love to prep in advance! You can prepare the cheesecake filling and refrigerate it up to 24 hours ahead of time. Simply mix the softened cream cheese, sugar, vanilla, and egg as instructed, then cover and store the filling in an airtight container. The dough can also be unrolled and placed in the greased baking dish, covered tightly, and kept in the refrigerator until you’re ready to bake. When it’s time to serve, spread the filling over the dough, top it with the second layer of dough, and bake as directed. This way, you’ll have a delicious dessert ready in no time, just as delightful as if you made it fresh!
Expert Tips for Crescent Cheesecake Bars
-
Use Room Temperature Cream Cheese: Make sure your cream cheese is at room temperature to avoid lumps and achieve a smooth filling.
-
Don’t Overmix: Mix the filling until just combined to keep it light and airy; overmixing can lead to a dense texture.
-
Seal the Edges: Ensure the crescent dough edges are well-sealed to prevent the cheesecake filling from leaking during baking.
-
Cool Before Cutting: Allow the bars to cool completely for cleaner slices; this helps maintain the shape and presentation.
-
Storage Savvy: Keep leftover Crescent Cheesecake Bars in an airtight container in the refrigerator for up to three days to enjoy their creamy goodness.
Crescent Cheesecake Bars Recipe FAQs
What’s the best way to select cream cheese for this recipe?
Absolutely! When choosing cream cheese for your Crescent Cheesecake Bars, look for a full-fat block rather than spreadable cream cheese, as it provides the best texture and flavor. Ensure it’s also at room temperature before mixing; this helps achieve a smooth consistency. If you’re going for a dairy-free version, vegan cream cheese works wonderfully as well!
How should I store leftover Crescent Cheesecake Bars?
To keep your leftovers fresh, store any remaining Crescent Cheesecake Bars in an airtight container in the refrigerator. They will stay delicious for up to 3 days. I recommend placing a piece of parchment paper between layers to prevent them from sticking together.
Can I freeze Crescent Cheesecake Bars?
Definitely! To freeze your Crescent Cheesecake Bars, wrap individual squares tightly in plastic wrap, then place them in a freezer-safe container. They can be stored for up to 2 months. When you’re ready to enjoy them, just thaw them in the refrigerator overnight for the best texture!
What if my filling is lumpy during preparation?
If your cream cheese filling is lumpy, it’s likely because the cream cheese wasn’t softened enough. To fix this, let it sit at room temperature for 30 minutes before mixing. You can also try beating it longer at a medium speed until smooth, but be cautious not to overmix to keep the filling light and airy!
Can I make Crescent Cheesecake Bars vegan or gluten-free?
Absolutely! For a vegan version, substitute cream cheese with vegan cream cheese and replace the egg with a flax egg (1 tablespoon ground flaxseed mixed with 2.5 tablespoons of water). To go gluten-free, use a gluten-free crescent roll dough alternative available in some grocery stores, or puff pastry can also be a great choice!
Creamy Crescent Cheesecake Bars for Easy Sweet Indulgence
Ingredients
Equipment
Method
- Preheat your oven to 350°F (175°C). Gather all ingredients and equipment.
- In a mixing bowl, combine cream cheese, sugar, vanilla, and egg. Beat until smooth and creamy.
- Unroll one can of crescent dough in greased baking dish. Seal seams, then spread cheesecake filling on top.
- Unroll the second can of dough over the filling and seal the edges. Bake in preheated oven.
- Bake for 20-25 minutes until golden brown and center jiggles slightly. Cool for 10 minutes.
- Slice into squares and dust with powdered sugar before serving.
Leave a Reply