
As I rummaged through my fridge, searching for a colorful side to perk up dinner, I stumbled upon a bunch of radishes. It hit me—why not transform them into vibrant, zesty Easy Refrigerator Pickled Radishes? In just 15 minutes of active preparation, I can create a lively condiment that’s perfect for elevating salads, sandwiches, and even snacking. The beauty of this recipe lies not only in its simplicity but also in the fun twist of flavors that develop after chilling in the brine for just 24 hours. What’s more, these tangy little gems are low-calorie, making them a guilt-free addition to any meal. So, what do you say—are you ready to add some crunch and color to your kitchen creations?
Why are Pickled Radishes So Exciting?
Bursting with flavor: These refrigerator pickled radishes offer a zesty kick that elevates any dish.
Quick and Easy: With just 15 minutes of prep time, you can whip up a delightful batch.
Customizable: Feel free to mix and match ingredients, experimenting with different vinegars or spices for unique flavors.
Low-Calorie: At about 30 calories per serving, they’re a guilt-free companion to any meal.
Perfect for Snacks: Enjoy them straight from the jar, or add to salads or sandwiches for that extra crunch!
Discover how these vibrant little gems can transform your dishes today!
Pickled Radishes Ingredients
For the Brine
• White Vinegar – This essential ingredient gives pickled radishes their signature tanginess and helps with preservation.
• Water – Balances the acidity of vinegar, preventing the brine from being too harsh.
• Sugar – Adds a touch of sweetness that harmonizes with the tang, enhancing the overall flavor profile.
• Salt – This crucial seasoning elevates the taste and helps maintain the radishes’ crispness.
For the Pickles
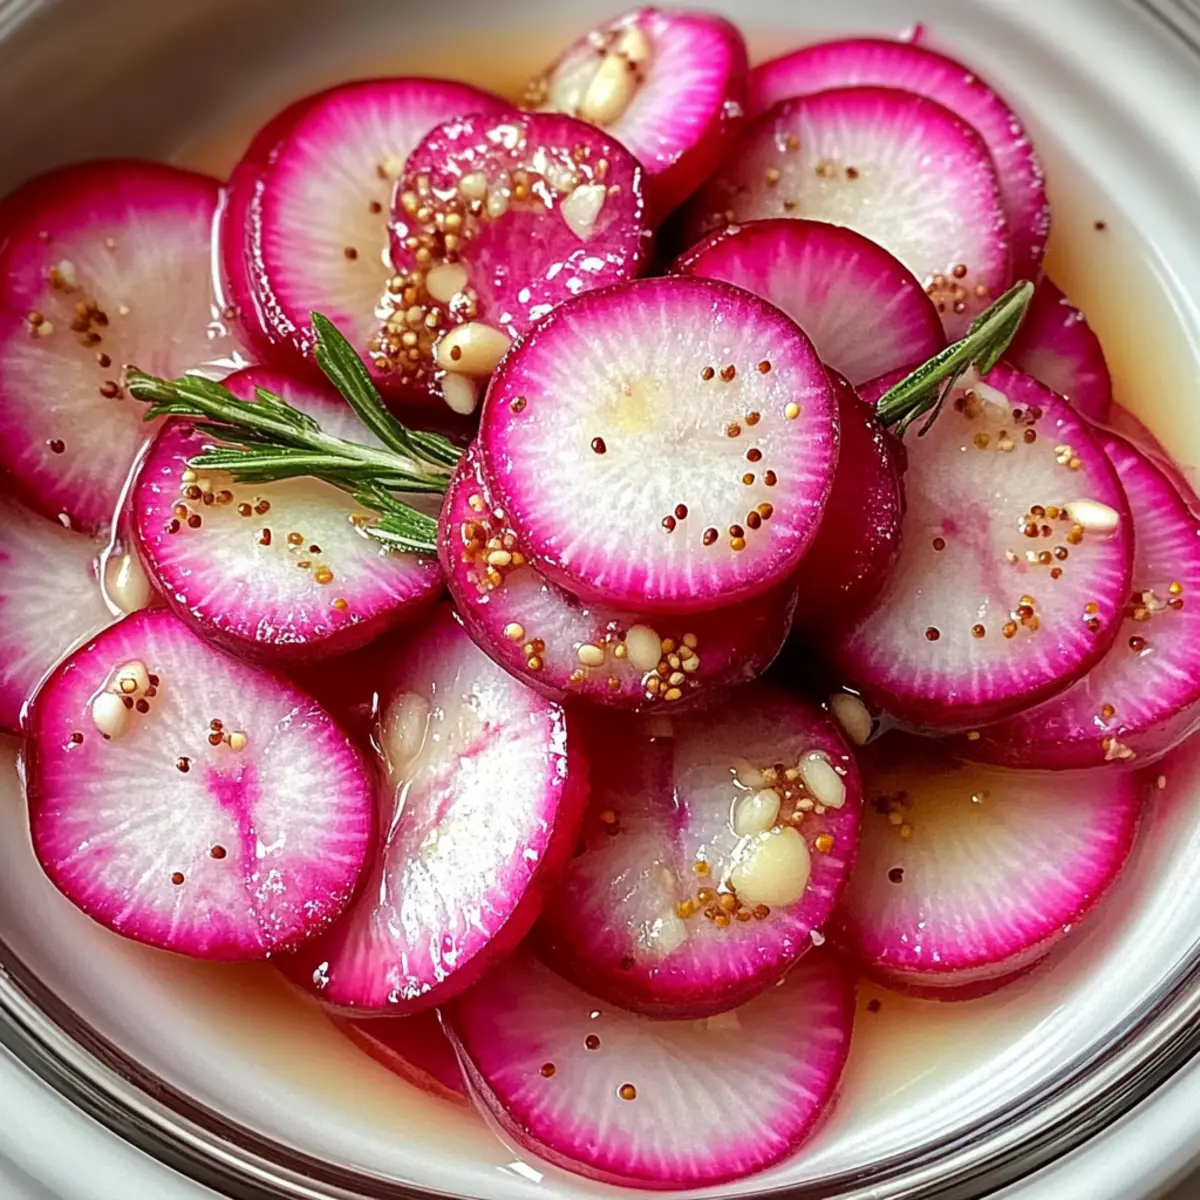
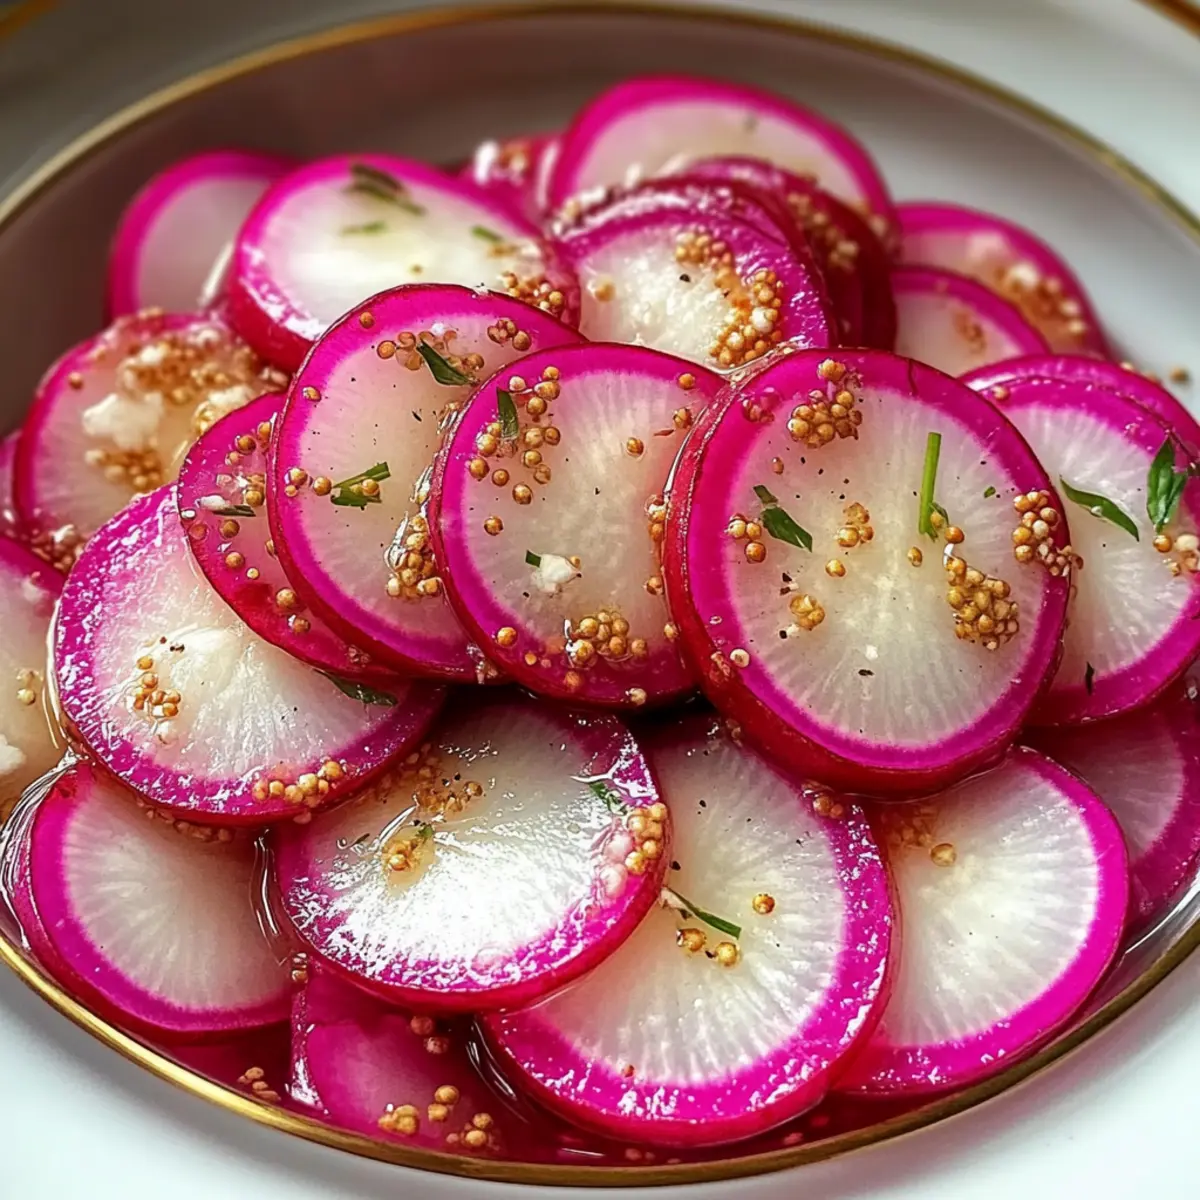
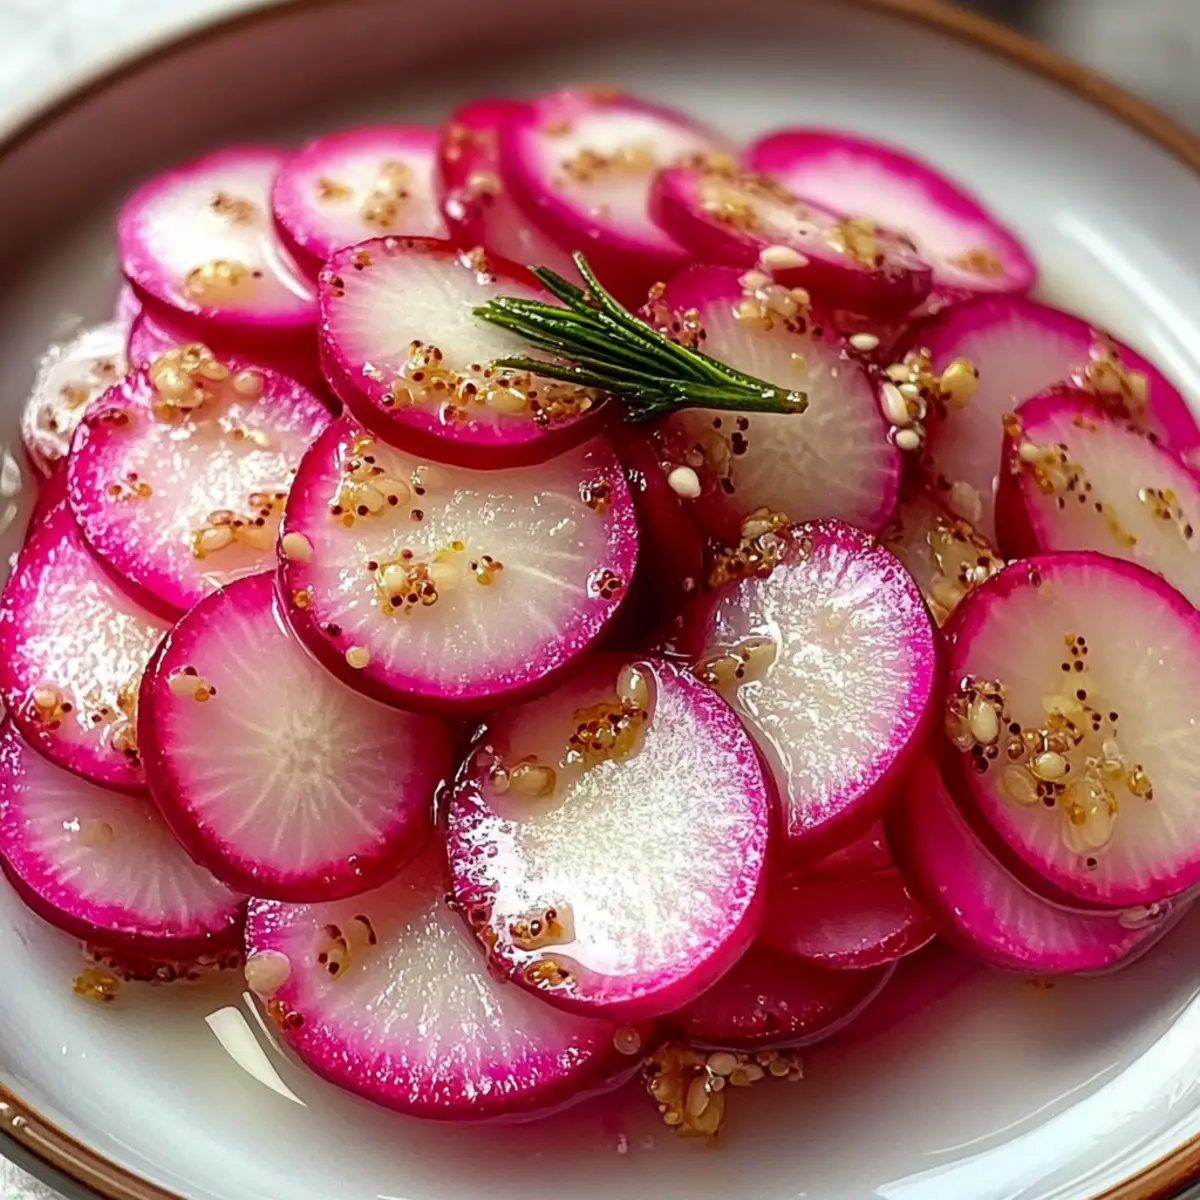
• Fresh Radishes – Choose firm, bright radishes; slicing them thin ensures optimal brining and flavor infusion.
• Mustard Seeds – Introduces a mild heat and distinctive flavor, enhancing the depth of the brine.
• Black Peppercorns – These aromatic gems infuse warmth into the pickles, adding another layer of taste.
• Garlic Cloves – Smashed to release their aromatic oils, garlic gives the pickled radishes savory depth.
• Red Pepper Flakes – Optional for those who enjoy a little extra heat; adjust according to your taste.
• Fresh Dill Sprigs – A lovely garnish that adds a refreshing herbal note to the final product.
With these ingredients in hand, you’re just a few steps away from creating delicious pickled radishes that will surely brighten up your meals!
Step‑by‑Step Instructions for Easy Refrigerator Pickled Radishes
Step 1: Prepare the Radishes
Start by washing your fresh radishes thoroughly under cold water; this helps remove any dirt and ensures freshness. Once clean, use a sharp knife or a mandoline to slice the radishes evenly into thin rounds, about 1/8 inch thick. Aim for uniformity to guarantee that each piece absorbs the pickling brine effectively and boasts the same delightful crunch.
Step 2: Make the Brine
In a small saucepan, combine 1 cup of white vinegar, 1 cup of water, 1 tablespoon of sugar, and 1 tablespoon of salt. Heat the mixture over medium heat, stirring regularly until the sugar and salt dissolve completely—this should take about 3-5 minutes. Keep an eye on the pot, and as soon as it begins to simmer, remove it from the heat to avoid boiling it too harshly.
Step 3: Add Seasonings to the Brine
After removing the saucepan from heat, stir in 1 tablespoon of mustard seeds, 1 teaspoon of black peppercorns, and 2 smashed garlic cloves. If you prefer a bit of heat, feel free to add a pinch of red pepper flakes at this stage. Allow the brine to sit for a minute, letting the flavors meld together before moving on to the next step of making your pickled radishes.
Step 4: Jar the Radishes
Take a clean glass jar, preferably a quart-sized, and start layering the sliced radishes inside. If you’ve chosen to use fresh dill, sprinkle it among the radish layers for extra flavor. Press down gently to compact the radishes, ensuring that there’s room for the brine to surround and fully flavor each piece.
Step 5: Pour the Brine Over the Radishes
Carefully pour the hot brine over the radish slices in the jar, ensuring that they are completely submerged. If some slices float above the brine, use a fork to gently push them down. This soaking is crucial for achieving that vibrant and tangy characteristic of easy refrigerator pickled radishes, so make sure all pieces are covered well.
Step 6: Cool and Refrigerate
Let the jar cool to room temperature for about 20-30 minutes, giving the radishes some initial flavor from the hot brine. Once cooled, seal the jar tightly with a lid and transfer it to the refrigerator. For the best results, allow the pickled radishes to rest and develop their flavors for at least 24 hours before enjoying—this step is essential for the right tang and crunch!
Step 7: Serve and Enjoy
After the waiting period, your easy refrigerator pickled radishes are ready to be enjoyed! They’ll be delicious as a tangy complement to salads, sandwiches, and snacks. Refill your jar with more radishes as needed, and savor the bright flavors of your homemade pickles within 1-2 weeks for the best taste and texture.

Pickled Radishes Variations & Substitutions
Get creative and customize your pickled radishes with these delightful twists that will awaken your taste buds!
- Vinegar Variety: Swap out white vinegar for apple cider or rice vinegar for a different flavor twist!
- Herb Infusion: Add fresh herbs like basil or cilantro for a vibrant herbal note that complements the radishes beautifully.
- Spice It Up: Incorporate spices like coriander seeds or juniper berries to create a unique and aromatic brine.
- Crunchy Alternatives: Try replacing radishes with cucumbers or carrots for a completely different crunchy experience.
- Sweeten It: Adjust the sugar level to make your pickles sweeter or omit it for a tangier flavor profile.
- Heat Levels: For extra spice, increase red pepper flakes or add sliced jalapeños to the brine for a fiery kick!
- Garlic Lovers: Double the garlic cloves for a more robust and savory flavor that enhances the pickling brine.
- Dill Variations: Experiment with different fresh herbs like thyme or oregano instead of dill for a twist on this classic flavor.
With so many options, these pickled radishes can easily become your go-to side or snack, all while keeping the spirit of homemade goodness alive! If you’re curious about more exciting ways to elevate your meals, check out these delicious salads or our ultimate sandwich recipes for pairing suggestions. Happy pickling!
How to Store and Freeze Pickled Radishes
Fridge: Keep your pickled radishes in a sealed, sterilized glass jar to maintain their freshness. They’ll stay crisp and flavorful for about 1-2 weeks.
Avoid Room Temperature: It’s best not to store pickled radishes at room temperature, as it can affect their taste and safety. Always refrigerate for optimal enjoyment.
Freezer: Freezing is not recommended for pickled radishes because the texture may become mushy once thawed. Enjoy them fresh from the fridge!
Reheating: There’s no need to reheat pickled radishes; just enjoy them cold as a vibrant addition to your meals, straight from the jar.
Expert Tips for Pickled Radishes
Submerge Them Well: Ensure all radish slices are fully submerged in the brine to maintain their crunchy texture.
Use Clean Tools: Always use clean utensils when serving to avoid contamination and keep your pickled radishes fresh longer.
Experiment with Vinegars: Try different types of vinegar like apple cider or rice vinegar for unique flavor profiles that can enhance your pickled radishes.
Mind the Temperature: Store in the back of the fridge where the temperature is consistent; this helps preserve flavor and crispness over time.
Consume Fresh: For the best taste and texture, enjoy your pickled radishes within 1-2 weeks after making them.
What to Serve with Easy Refrigerator Pickled Radishes?
Transform your meals into a culinary delight by pairing these vibrant pickled radishes with a variety of dishes that enhance their zesty crunch.
- Creamy Avocado Toast: The rich, buttery taste of avocado balances the sharp tang of radishes, creating a fulfilling breakfast or snack.
- Spicy Tacos: With their peppery notes, pickled radishes add a refreshing crunch that perfectly complements the savory filling in your tacos.
- Grilled Chicken Salad: The crunch and acidity of these pickles brighten up grilled chicken, while adding a textural contrast to the tender greens.
- Cheesy Quesadillas: Nestled beside melted cheese, the sharpness of the radishes provides a delightful burst of flavor that elevates this comfort food classic.
- Asian Noodle Bowl: The tangy radishes contrast beautifully with noodles and stir-fried veggies, enhancing this dish with vibrant color and taste.
- Charcuterie Board: Serve them alongside cured meats and cheeses; their bright flavor cuts through richness, making every bite more exciting.
- Cold Beer: A crisp lager or pilsner pairs wonderfully, refreshing the palate and highlighting the snappy taste of the radishes.
- Fruit Forward Salad: Consider a salad with citrus segments or berries; the sweetness pairs surprisingly well with the tangy brightness of pickled radishes.
- Homemade Burgers: They’re fantastic as a cool, crunchy topping that cuts through the juicy richness, perfect for summer barbecues.
Make Ahead Options
These Easy Refrigerator Pickled Radishes are a fantastic option for meal prep enthusiasts! You can slice the radishes and prepare the brine up to 24 hours in advance, allowing you to enjoy the pickles whenever needed. Simply follow the first three steps of the recipe, then refrigerate the sliced radishes and brine separately. When you’re ready to finish, just layer the radishes in a jar, pour the brine over them, and let them soak for at least 24 hours to achieve that zesty tang. This method not only saves time but ensures that your pickled radishes are just as delicious and full of flavor whenever you serve them!
Easy Refrigerator Pickled Radishes Recipe FAQs
How do I select the best fresh radishes for pickling?
Absolutely! Look for bright, firm radishes without any dark spots or blemishes. The ideal radish should feel crisp to the touch; avoid those that are soft or have wrinkles. Uniform thin slices will help the radishes absorb the brine better, making for tastier pickles.
What is the best way to store pickled radishes?
To keep your pickled radishes fresh, store them in a sealed, sterilized glass jar in the refrigerator. They can stay crisp and flavorful for about 1-2 weeks. Just remember to refrigerate them promptly after making to maintain their quality!
Can I freeze pickled radishes for later use?
It’s not recommended to freeze pickled radishes, as the texture can become mushy once thawed. Enjoy them fresh from the fridge! If you have extra radishes, consider pickling them instead of freezing, as you’ll retain the delightful crunch and flavor that makes them appealing.
What should I do if my pickled radishes taste too salty or tangy?
If your pickled radishes turn out a bit too salty or tangy, it could be due to the ratio of brine ingredients. Don’t worry! To adjust, you can try adding a little bit more water and sugar to the brine to balance the flavors. If they taste overly sharp, let them chill in the fridge for a few more hours or even a day—sometimes flavors mellow nicely after resting.
Are pickled radishes safe for my pets or individuals with allergies?
Pickled radishes are not suitable for pets, as the brine can be too acidic or salty for them. If you’re serving them to someone with dietary restrictions, it’s important to check for any ingredient sensitivities—especially with spices like mustard seeds or garlic, which may affect some individuals. Always make sure you know who’s eating what!
How do I know when my pickled radishes are at their best?
For the best flavor and texture, enjoy your pickled radishes within 1-2 weeks of making them. They should have a vibrant ruby-red color and a satisfying crunch. If you notice any dark spots or an off smell, it’s best to err on the side of caution and discard them.
Zesty Pickled Radishes to Brighten Every Bite
Ingredients
Equipment
Method
- Wash the fresh radishes under cold water and slice them thinly into rounds.
- Combine vinegar, water, sugar, and salt in a saucepan; heat until dissolved.
- Add mustard seeds, black peppercorns, and smashed garlic to the brine.
- Layer sliced radishes in a glass jar, adding dill as desired.
- Pour hot brine over radishes, ensuring they are fully submerged.
- Cool at room temperature for 20-30 minutes before sealing and refrigerating.
- Refrigerate for at least 24 hours before enjoying the pickled radishes.
Leave a Reply