
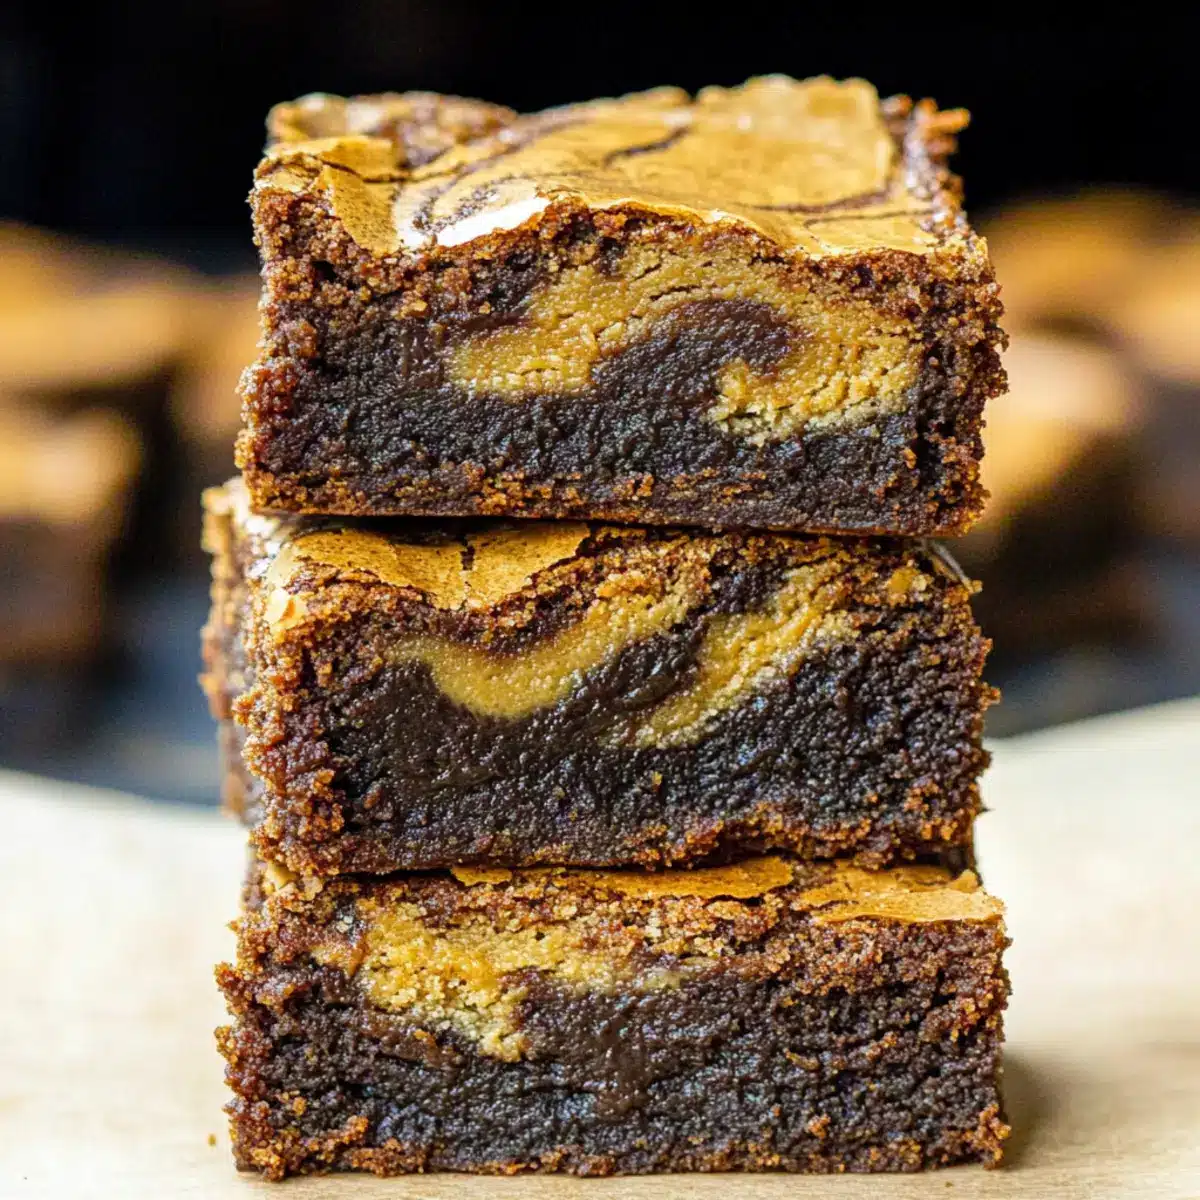
The moment the unmistakable aroma of melting butter and spiced cookie dough wafts through my kitchen, I know it’s the perfect time to whip up a batch of Fudgy Biscoff Brownies. These are not just any brownies; they’re a delightful fusion of rich chocolate and luscious Biscoff spreads, creating a treat that pleases both the eyes and the tastebuds. With their decadent cookie crust and those iconic swirls of cookie butter, these fudgy brownies are a showstopper at gatherings or a comforting bite to enjoy on a quiet evening. Plus, they’re quick to prepare and easy to customize, making them a fantastic go-to dessert for home chefs of all levels. Are you ready to dive into a world of blissful baking? Let’s get started!

Why are Biscoff Brownies a must-try?
Indulgence Awaits: These Biscoff brownies combine the richness of chocolate with the unique warmth of Biscoff cookies, creating a flavor fusion you won’t forget.
Effortless Preparation: Whipping up these delicious brownies is a breeze, perfect for bakers of all skill levels.
Versatile Options: With simple substitutions, you can easily tailor this recipe to your dietary needs, whether it’s gluten-free or vegan!
Great for Sharing: Their irresistible flavor makes them a hit at parties, potlucks, or cozy nights in.
Texture Heaven: Enjoy a perfect blend of fudgy centers and a crispy top, resulting in a brownie experience that’s simply divine.
Get ready to savor every bite of your new favorite treat with these delectable brownies!
Biscoff Brownie Ingredients
• A delightful blend for your treats!
For the Crust
- Crushed Biscoff Cookies — Provides a flavorful crust base; you can substitute with any spiced cookie or graham cracker crumbs for a different flavor profile.
- Salted Butter — Adds richness and moisture; can be replaced with unsalted butter or a non-dairy alternative like coconut oil.
For the Brownie Batter
- Large Eggs — Essential for structure and moisture; for an eggless version, use flaxseed eggs (2 tablespoons ground flaxseed mixed with 5 tablespoons water).
- Granulated Sugar — Sweetens the brownies and contributes to texture; coconut sugar can be used for a lower glycemic option.
- Brown Sugar — Adds moisture and a deeper flavor; light brown sugar is recommended, but dark brown sugar works perfectly too.
- Vanilla Extract — Enhances overall flavor; you can opt for vanilla bean paste as a fragrant alternative.
- All-Purpose Flour — Provides necessary structure; feel free to substitute with a 1:1 gluten-free flour blend.
- Unsweetened Cocoa Powder — Contributes a delicious chocolate flavor; using dark cocoa powder can elevate the richness.
- Baking Powder — Aids in leavening; if you prefer denser brownies, this could be omitted.
For the Famous Swirl
- Smooth Biscoff Spread — Swirled into the batter for added Biscoff flavor; gently heat it before use for a better swirl.
These Biscoff brownie ingredients promise a delicious outcome, enticing you to create a delightful treat that’s sure to impress!
Step‑by‑Step Instructions for Biscoff Brownies
Step 1: Preheat and Prepare the Pan
Start by preheating your oven to 350°F (175°C). While the oven warms up, grab an 8×8-inch baking pan and line it with parchment paper, allowing some overhang for easy removal later. This will ensure your Biscoff brownies come out perfectly and are easy to cut after baking.
Step 2: Make the Crust
In a mixing bowl, combine the crushed Biscoff cookies with melted salted butter, mixing until it resembles wet sand. Pour the mixture into the lined baking pan and press it firmly into the bottom with your fingers or the back of a measuring cup. This crust will provide a delicious base for your fudgy brownie layer.
Step 3: Beat the Eggs and Sugars
In a separate bowl, crack in the large eggs and add granulated and brown sugars. Using an electric mixer, beat on high speed for about 1 minute until the mixture turns light and creamy. This step is crucial as it helps create that signature crackly top on your Biscoff brownies.
Step 4: Incorporate Butter and Vanilla
Once your egg and sugar mixture is fluffy, pour in the melted butter and vanilla extract. Quickly mix them together until fully combined. The warm butter adds richness and moisture, which is essential for that fudgy texture we love in these brownies.
Step 5: Combine Dry Ingredients
Sift the all-purpose flour, unsweetened cocoa powder, and baking powder into the wet mixture. Gently fold the dry ingredients into the batter using a spatula or wooden spoon. Be careful to not overmix; you want to maintain a light and fluffy texture that will result in heavenly Biscoff brownies.
Step 6: Layer the Brownie Batter
Carefully spread the brownie batter over the prepared crust in the baking pan, using a spatula to create an even layer. This method ensures that every bite has a combination of the crust and rich brownie, giving you the perfect contrast and blend of flavors.
Step 7: Add the Biscoff Swirl
Now, slightly heat the smooth Biscoff spread in the microwave for about 5-10 seconds to make it easier to drop. Scoop spoonfuls of the warmed spread over the brownie batter, then use a knife to gently swirl it through the batter. This creates those beautiful, gooey ribbons of Biscoff throughout the brownies.
Step 8: Bake the Brownies
Place the pan in your preheated oven and let it bake for 22-25 minutes. When finished, a toothpick inserted into the center should come out mostly clean, indicating that the brownies are fudgy but set. Keep an eye on them, as overbaking can lead to dry brownies, taking away from their indulgent nature.
Step 9: Cool, Slice, and Serve
Once baked, remove the Biscoff brownies from the oven and allow them to cool completely in the pan on a wire rack. Once cooled, lift the brownies out using the parchment overhang, slice them into squares, and prepare to indulge in every rich, decadent bite they offer!
Expert Tips for Biscoff Brownies
-
Room Temperature Ingredients: Make sure all ingredients are at room temperature before mixing. This helps with optimal emulsification for fudgy Biscoff brownies.
-
Opt for Metal Pans: Use a metal pan for even baking. Adjust your baking time if using glass to prevent undercooking or overcooking.
-
Whip It Good: Whip eggs and sugar thoroughly until the mixture is light and creamy. A glossy, crackly top is a sign of perfectly baked Biscoff brownies.
-
Chill for Clean Cuts: If you want neat slices, chill the brownies in the fridge before cutting, and use a warm knife for cleaner edges.
-
Neat Swirls: To achieve gorgeous, defined swirls, slightly warm your Biscoff spread first. It will be easier to drop and swirl into the brownie batter.
How to Store and Freeze Biscoff Brownies
- Room Temperature: Store the brownies in an airtight container at room temperature for up to 3 days. This keeps them fresh while allowing those rich flavors to shine.
- Fridge: If you prefer a firmer texture, you can refrigerate the brownies for up to a week. Just ensure they are well-wrapped to avoid drying out.
- Freezer: For longer storage, freeze uncut brownies in an airtight container for up to 2 months. Thaw overnight in the refrigerator before enjoying your fudgy Biscoff brownies.
- Reheating: If you’d like to enjoy the brownies warm, microwave individual pieces for 10-15 seconds. This will revive their gooey, decadent allure!
Make Ahead Options
These delectable Biscoff brownies are perfect for meal prep, allowing you to save time on busy days! You can prepare the crust up to 24 hours in advance by pressing the crushed Biscoff cookies and melted butter into the lined pan, then store it in the refrigerator. Additionally, you can mix the brownie batter ahead of time (up to 3 days), but for the best results, hold off on swirling in the Biscoff spread until you’re ready to bake; this keeps the flavors fresh and vibrant. When you’re ready to finish, simply spread the batter over the chilled crust, create the swirl, and bake for a fabulous dessert that’s just as delicious as when freshly made!
Biscoff Brownie Variations & Substitutions
Feel free to make these Biscoff brownies your own with these delightful twists and swaps!
- Gluten-Free: Use a 1:1 gluten-free flour blend in place of all-purpose flour for a deliciously fudgy option. Your gluten-free friends will love every bite!
- Nutty Delight: Fold in chopped walnuts or pecans for a crunchy texture that complements the brownie’s richness. The added crunch brings an exciting contrast!
- Chocolate Boost: Mix in chocolate chips or chunks to intensify the chocolate experience. The melty pockets of chocolate add an irresistible allure.
- Coconut Twist: Swap out regular butter for coconut oil for a subtle tropical flavor that pairs beautifully with the spiced Biscoff. It gives a warm hint of paradise!
- Vegan Version: Replace large eggs with flaxseed eggs and use non-dairy chocolate chips for a fully plant-based treat that everyone can enjoy. Flaxseeds work magic in binding!
- Caramel Swirl: Drizzle warm caramel sauce over the brownie batter alongside the Biscoff spread for an additional layer of sweetness and decadence. Talk about indulgence!
- Spiced Surprise: Add a pinch of cinnamon or nutmeg to the brownie batter to enhance the spiced flavor profile. Each bite will carry a cozy warmth that feels like a hug!
- Minty Fresh: Incorporate peppermint extract into the batter for a refreshing twist on your traditional brownies, adding in festive cheer for the holidays or any time!
Each variation will allow you to enjoy the classic charm of these brownies while keeping it fresh and exciting! Whether you’re creating something special for family or indulging for yourself, these ideas will surely elevate your baking adventure.
What to Serve with Fudgy Biscoff Brownies?
Indulging in a warm slice of these fudgy delights opens the door to a world of enchanting pairings that will elevate your dessert experience.
-
Vanilla Ice Cream: A classic choice! The creamy texture melts beautifully into the warm brownies, bringing out their rich chocolate and spice flavors.
-
Espresso or Coffee: The boldness of brewed coffee cuts through the sweetness, enhancing the brownie’s depth while providing a comforting balance.
-
Fresh Berries: A burst of juicy raspberries or strawberries adds a refreshing contrast and brightens the overall palate, making every bite even more delightful.
-
Chocolate Sauce: For chocolate lovers, drizzling extra chocolate sauce creates an over-the-top indulgence, intensifying the rich cocoa notes of the brownies.
-
Whipped Cream: Light and airy, fresh whipped cream adds a smooth texture that contrasts beautifully with the dense brownies, making for a luscious treat.
-
Mint Tea: The soothing qualities and refreshing taste of mint tea create a pleasant contrast to the brownie’s rich flavors, perfect for winding down.
-
Caramel Sauce: A drizzle of salted caramel brings a decadent sweetness that pairs wonderfully with the Biscoff flavor, diving deep into dessert bliss.
Explore these pairings to create a memorable dining experience that will have everyone coming back for seconds!
Biscoff Brownies Recipe FAQs
How do I choose the right level of ripeness for my Biscoff cookies?
You’re in for a treat! When selecting Biscoff cookies, opt for packs that are firm and free from dark spots or visible damage. This ensures a consistent base for your brownies. Crushed cookies should hold together well when mixed with melted butter, creating a strong crust for that fudgy texture you’re craving!
What is the best way to store leftovers?
Absolutely! Store your Biscoff brownies in an airtight container at room temperature for up to 3 days to keep them soft and flavorful. If you’re not finishing them quickly, refrigerate them, wrapped well, where they can last for about a week. Just remember, a little chill can make them wonderfully firm and delicious!
Can I freeze Biscoff brownies?
Yes, indeed! For longer storage, freeze uncut Biscoff brownies in an airtight container for up to 2 months. To freeze, make sure to wrap them tightly in plastic wrap or foil before placing in a container. When you’re ready to enjoy, thaw them overnight in the refrigerator. For a freshly-baked taste, you can pop a square in the microwave for 10-15 seconds!
What should I do if my brownies seem too dry?
The more the merrier! If you’ve baked your brownies and they’re coming out dry, it might be due to overbaking. To troubleshoot, make sure to insert a toothpick and pull it out when it comes out mostly clean but with some moist crumbs; this ensures a fudgy texture. For future batches, set a timer for a couple of minutes less than the suggested baking time to find your brownie’s perfect doneness.
Are Biscoff brownies safe for people with nut allergies?
Very much so! Biscoff cookies and spread are generally nut-free, making them a delightful option for those with nut allergies. However, always check the packaging for specific allergen information, just to be safe. And if someone in your household has additional allergies, feel free to substitute with allergy-friendly ingredients to customize your brownies!
Indulgent Biscoff Brownies with a Cookie Butter Twist
Ingredients
Equipment
Method
- Preheat your oven to 350°F (175°C) and line an 8x8-inch baking pan with parchment paper.
- Combine the crushed Biscoff cookies with melted salted butter in a bowl until it resembles wet sand.
- Press the mixture into the bottom of the prepared baking pan.
- In a separate bowl, beat the eggs with granulated and brown sugars for about 1 minute until light and creamy.
- Add melted butter and vanilla extract to the egg mixture and mix until combined.
- Sift flour, cocoa powder, and baking powder into the mixture and fold gently.
- Spread the brownie batter over the crust in the baking pan.
- Heat the Biscoff spread slightly in the microwave and drop spoonfuls over the batter, swirling with a knife.
- Bake for 22-25 minutes until a toothpick comes out mostly clean.
- Cool completely, lift out using parchment overhang, slice into squares, and serve.
Leave a Reply