
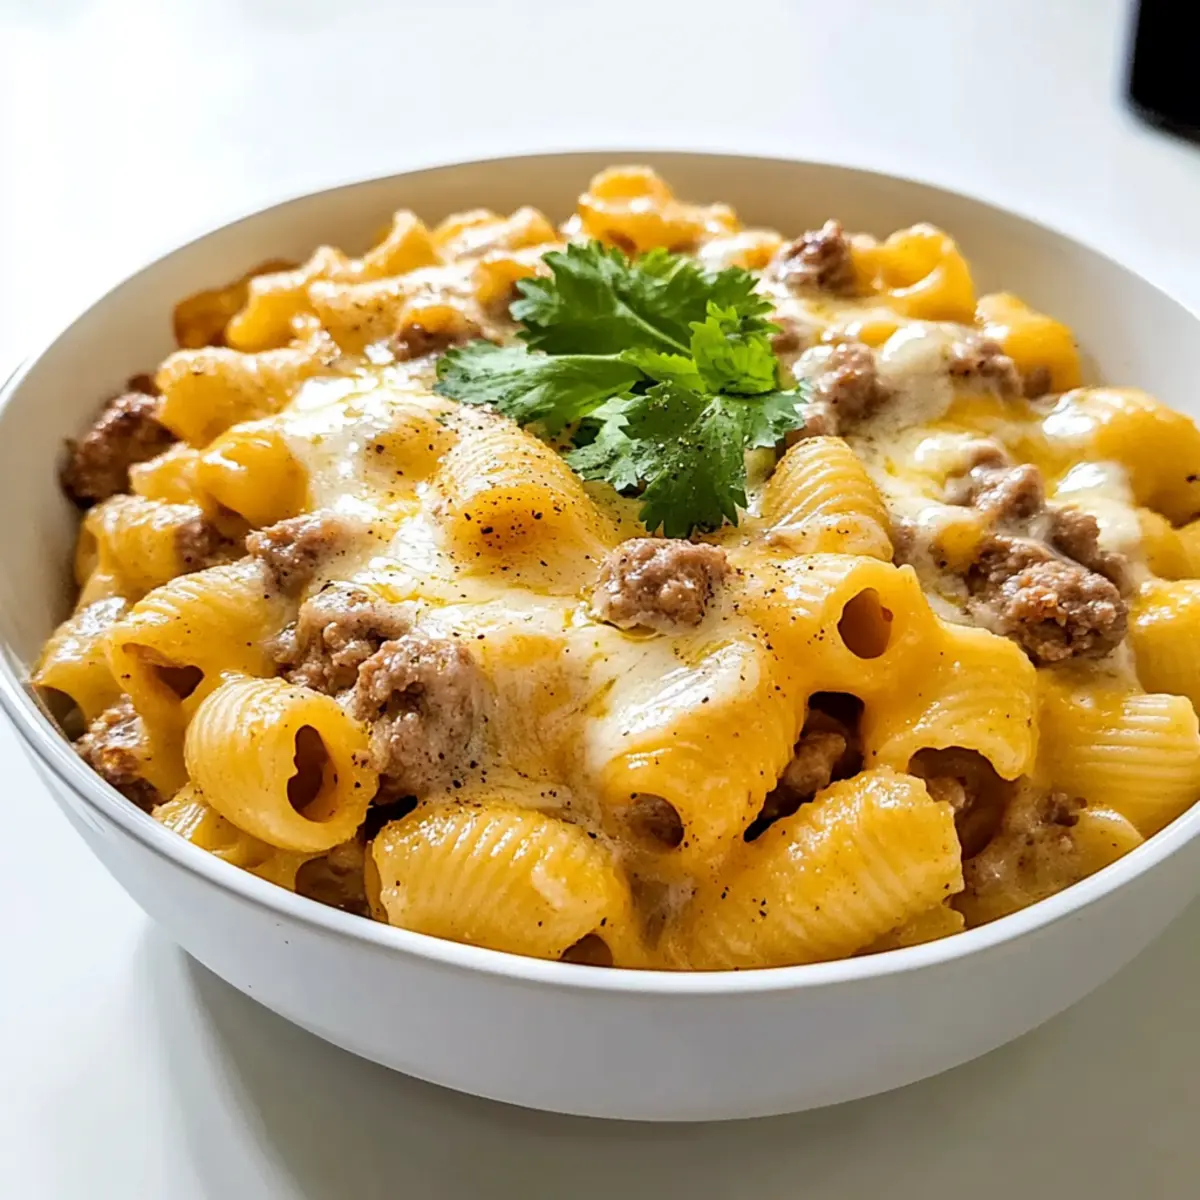
“Did you hear that? Taco night is about to get a deliciously cheesy upgrade!” When it comes to family dinners that leave everyone satisfied, Cheesy Taco Shells & Cheese is my go-to. This comforting casserole brings together the nostalgic creaminess of macaroni and cheese with a fun taco twist, making it a kid-friendly favorite that even adults can’t resist. With its quick prep time and ability to be made ahead, this dish becomes your secret weapon for stress-free weeknight meals or hosting friends. Picture a bubbly, golden masterpiece that combines hearty pasta, spiced ground beef, and a melty cheese sauce that warms the heart. Are you ready to transform taco night into a cheesy culinary adventure? Let’s dive in!
Why Will Taco Shells & Cheese Delight You?
Irresistible Comfort: This dish combines creamy mac and cheese with a taco twist, ideal for cozy family nights or casual gatherings.
Customization at Its Core: Tailor it to your taste by substituting proteins or adding veggies like corn or bell peppers for extra flavor and nutrition.
Quick and Easy: Simple prep and cooking steps make this casserole a weeknight hero, perfect for busy schedules.
Kid-Approved: The irresistible cheesy taste and fun taco vibes will make even the pickiest eaters ask for seconds!
Make-Ahead Magic: Assemble it in advance and bake when you’re ready, just like my delicious Cheesy Taco Potatoes that come together effortlessly.
Leftover Love: This dish holds up beautifully; enjoy it as a satisfying lunch the next day or freeze it for future cravings.
Taco Shells & Cheese Ingredients
For the Pasta
• Mini Shell or Elbow Pasta – This creates the base for the dish, providing a delightful bite; substitute with gluten-free pasta for a gluten-free option.
For the Filling
• Ground Beef – Adds protein and rich flavor; alternatives include ground turkey or plant-based meat for a lighter option or vegetarian twist.
• Chili Powder – The primary spice for warmth and depth; adjust to your spice preference.
• Ground Chipotle Chili Powder – Offers a smoky heat; use regular chili powder if you prefer less spice.
• Ground Cumin – Infuses a warm, earthy flavor into the mix.
• Dried Oregano – Enhances the overall flavor profile with herbal notes.
• Kosher Salt – Essential for elevating the dish’s flavors; adjust to taste.
• Ground Coriander – Adds a hint of citrusy brightness.
• Ground Cayenne Pepper – Provides additional heat; feel free to omit it for a milder flavor.
For the Cheese Sauce
• Whole Milk – Creates a creamy sauce; replace with plant-based milk for a dairy-free version.
• All-Purpose Flour – Thickens the cheese sauce for richness; can use gluten-free flour as a substitute.
• Sodium Citrate – Recommended for achieving a smooth melt; optional but enhances creaminess.
• Shredded White Cheese – The main flavor component; opt for cheeses like Monterey Jack or a creamy cheddar blend for the best results.
For the Garnish
• Iceberg Lettuce – Provides a fresh crunch on top; can swap with romaine or other greens.
• Cherry Tomatoes – Adds moisture and fresh flavor; substitute with diced bell peppers for variation if needed.
Step‑by‑Step Instructions for Taco Shells & Cheese
Step 1: Cook the Pasta
Begin by cooking your mini shell or elbow pasta in a large pot of boiling salted water according to the package instructions, usually about 8-10 minutes, until al dente. Drain the pasta thoroughly, giving it a gentle shake to remove excess water, and then set it aside in a large bowl to cool slightly. This pasta will be the hearty base for your Taco Shells & Cheese.
Step 2: Brown the Ground Beef
In a large skillet over medium heat, add your ground beef and cook for about 5-7 minutes, breaking it apart with a spatula until browned and no longer pink. Stir occasionally to ensure even cooking. Once browned, drain any excess fat from the skillet to keep your Taco Shells & Cheese flavorful without being greasy.
Step 3: Toast the Spices
Add chili powder, chipotle chili powder, cumin, oregano, salt, coriander, and cayenne pepper to the cooked beef in the skillet. Stir the spices together and toast them for about 2 minutes over medium heat, allowing the aromas to fill your kitchen. This step brings out the full flavor, creating a deliciously seasoned filling for your taco-inspired casserole.
Step 4: Prepare the Cheese Sauce
In a medium saucepan, whisk together whole milk and all-purpose flour over medium heat until completely smooth. Keep stirring as the mixture thickens. Once it reaches a gentle simmer, sprinkle in sodium citrate and stir until fully dissolved, then gradually add the shredded white cheese, stirring continuously until it melts into a creamy cheese sauce. This will create the signature cheesy layer for your Taco Shells & Cheese.
Step 5: Combine Ingredients
Gently mix the cooked pasta with the seasoned ground beef and the creamy cheese sauce in a large bowl. Ensure everything is well coated and evenly distributed, as every bite deserves that cheesy goodness! This combination of textures and flavors will form the heart of your delectable dish.
Step 6: Bake the Casserole
Preheat your oven to 350°F (175°C). Transfer the pasta, beef, and cheese mixture into a greased baking dish, spreading it evenly. Bake for 20-25 minutes, or until the top is bubbly and golden brown. The baking process melds the flavors together, creating a delightful crust on your Taco Shells & Cheese.
Step 7: Add Fresh Toppings
Once removed from the oven, let the dish sit for a few minutes before topping it with freshly shredded iceberg lettuce and quartered cherry tomatoes. These toppings will add a crisp, refreshing contrast to the warm casserole. Now, your Taco Shells & Cheese is ready to serve, inviting everyone to dig into this comforting meal!
What to Serve with Cheesy Taco Shells & Cheese
Transform your cozy dinner into a delightful feast with these tasty side dishes and drinks!
-
Fresh Garden Salad: A vibrant mix of greens and vegetables adds crunch and a refreshing contrast to the creamy casserole.
-
Guacamole: Smooth, creamy, and packed with flavor, guacamole pairs perfectly, enhancing the taco vibes of the meal.
-
Tortilla Chips: Crunchy and salty, they bring an irresistible texture that complements the soft, cheesy pasta beautifully. Serve with salsa for an extra kick!
-
Mexican Street Corn: This sweet and spicy treat adds a pop of flavor, balancing the richness of your Cheesy Taco Shells & Cheese.
-
Cilantro Lime Rice: Light and zesty, this rice dish serves as a neutral base that lets your casserole shine while adding a natural freshness.
-
Frozen Margarita: For a fun touch, a refreshing margarita will elevate the taco night experience, providing a tangy contrast to the cheesy goodness.
-
Churros with Chocolate Sauce: End on a sweet note with warm, crispy churros, offering a beloved dessert that rounds out your comforting meal perfectly.
Tips for the Best Taco Shells & Cheese
-
Don’t Overcook the Pasta: Cook until just al dente to prevent mushiness. It will absorb some moisture when mixed with the cheese sauce and baked.
-
Adjust Spices to Taste: Everyone’s spice tolerance is different; start with less chili powder and cayenne, adding more to achieve the flavor you love in your Taco Shells & Cheese.
-
Use a Cheese Blend: Mixing different cheeses like Monterey Jack and cheddar enhances the flavor and ensures a perfect melt. Stick to creamy textures for the best results.
-
Let It Rest Before Serving: Allowing the casserole to rest for a few minutes after baking helps it set, making servings neater and easier to enjoy.
-
Customize Toppings: Feel free to get creative with toppings! Consider adding diced avocados, jalapeños, or even a drizzle of sour cream for added flavor and freshness.
How to Store and Freeze Taco Shells & Cheese
-
Fridge: Store leftovers in an airtight container for up to 3 days to maintain freshness. Reheat in the oven for an evenly warmed meal, retaining the casserole’s cheesy goodness.
-
Freezer: Freeze portions in airtight containers or freezer bags for up to 2 months. To reheat, thaw overnight in the fridge and bake until heated through, ensuring not to lose any of the cheesy comfort.
-
Covering: When storing, cover your Taco Shells & Cheese tightly with foil or plastic wrap to prevent freezer burn and keep that rich flavor intact.
-
Make-Ahead: Assemble the casserole in advance, store unbaked in the fridge for up to 24 hours. Just add a few extra minutes to the baking time when you’re ready to bake!
Taco Shells & Cheese Variations
Feel free to customize your dish with a variety of delightful twists that will awaken your taste buds!
-
Gluten-Free: Substitute regular pasta with gluten-free pasta or even cauliflower florets for a low-carb option. You’ll still get that comforting texture without any regrets.
-
Plant-Based Delight: Replace ground beef with lentils or your favorite plant-based meat. This swap not only makes it vegetarian but also adds a lovely texture!
-
Extra Veggies: Toss in corn, diced bell peppers, or even spinach. These additions not only boost nutrition but also add vibrant colors to your dish.
-
Spice it Up: Add jalapeños or serrano peppers for an extra kick. Adjust to your family’s heat tolerance to keep everyone satisfied without overwhelming them.
-
Creamy Dream: Incorporate cream cheese or sour cream into the cheese sauce for an indulgent twist. It will create an extra layer of creaminess that’ll make every bite unforgettable.
-
Cheese Blends: Use a combination of cheeses like mozzarella, pepper jack, and cheddar for depth of flavor. Mixing different cheeses can create an irresistible melting pot of tastes.
-
Herbed Touch: Add fresh chopped cilantro or chives as a topping after baking. This fresh herbiness can brighten up your rich casserole and enhance the overall flavor.
Feel free to experiment with these variations, and who knows? You might stumble upon your new favorite combination! If you’re in the mood for something sweet later, consider making my Chocolate Chip Cottage as a delightful dessert to finish your family meal.
Make Ahead Options
These Cheesy Taco Shells & Cheese are perfect for busy home cooks looking to meal prep! You can assemble the entire dish up to 24 hours in advance. Simply prepare the pasta, brown the ground beef, and combine them with the cheese sauce, then transfer everything to a baking dish and refrigerate (cover to prevent drying out). When you’re ready to serve, just pop the unbaked casserole into a preheated oven at 350°F (175°C) and add an extra 5-10 minutes to the baking time to ensure it’s heated through and bubbly. This way, you’ll enjoy a comforting, homemade meal with minimal evening effort—just as delicious as when freshly made!
Taco Shells & Cheese Recipe FAQs
How do I choose the right pasta for Taco Shells & Cheese?
Absolutely! Mini shell or elbow pasta works best for this dish, as they catch the creamy cheese sauce beautifully. If you’re looking for a gluten-free option, simply substitute with gluten-free pasta, which holds up wonderfully in the casserole.
What’s the best way to store leftovers from Taco Shells & Cheese?
Leftovers can easily be stored in an airtight container in the fridge for up to 3 days. When reheating, I recommend placing the leftovers in the oven at 350°F (175°C) for about 15-20 minutes. This method helps retain the dish’s rich flavors and creamy texture.
Can I freeze Taco Shells & Cheese?
Yes, you can! To freeze, allow the casserole to cool completely, then transfer it to airtight containers or freezer bags. It can be frozen for up to 2 months. For best results, thaw overnight in the fridge before baking, then warm it in the oven until heated through, about 25-30 minutes at 350°F (175°C).
What should I do if my cheese sauce doesn’t come out smooth?
If your cheese sauce separates or doesn’t melt properly, it might be due to overcooking or too much heat. To tackle this, return the sauce to low heat and whisk in a splash of milk to loosen it up. Stir continuously until smooth, and keep the heat gentle. Using cheeses with good melting properties, like Monterey Jack or a cheddar blend, can also help prevent issues.
Are there any dietary considerations for Taco Shells & Cheese?
Of course! If you want to make it vegetarian, replace the ground beef with black beans or lentils, which not only add protein but also fantastic flavor. Additionally, be sure to check your cheese for allergens if you’re serving it to anyone with dairy sensitivities. There are excellent dairy-free cheese options available that melt nicely, too!
How can I customize Taco Shells & Cheese for picky eaters?
The more the merrier! You can easily incorporate sneaky veggies like finely chopped spinach or bell peppers into the filling. Another fun way to engage picky eaters is by letting them choose their toppings! Options like diced avocados, sour cream, or even pickled jalapeños can excite their taste buds while making the meal feel more interactive.
Ultimate Taco Shells & Cheese for Cozy Family Nights
Ingredients
Equipment
Method
- Cook the mini shell or elbow pasta in a large pot of boiling salted water for about 8-10 minutes until al dente. Drain and set aside.
- In a large skillet, brown the ground beef over medium heat for about 5-7 minutes. Drain excess fat.
- Add chili powder, chipotle chili powder, cumin, oregano, salt, coriander, and cayenne to the beef. Toast the spices for about 2 minutes.
- In a medium saucepan, whisk together whole milk and all-purpose flour over medium heat until smooth. Simmer and add sodium citrate, then stir in shredded cheese until melted.
- Combine the cooked pasta, beef, and cheese sauce in a large bowl, ensuring everything is well coated.
- Preheat oven to 350°F (175°C). Transfer the mixture to a greased baking dish and bake for 20-25 minutes until bubbly and golden.
- Let cool slightly before topping with iceberg lettuce and cherry tomatoes.
Leave a Reply