
As I stood in my kitchen, the scent of cocoa mingled with the tang of cream cheese frosting, I couldn’t help but feel a surge of nostalgia for my favorite cookie place. I decided to take a delicious leap and re-create those beloved, cake-like Red Velvet Cookies right at home. This Classic Crumbl Copycat recipe is not just a delightful treat that saves you a trip and expense; it’s also perfect for impressing guests during those cozy get-togethers or simply indulging on a quiet evening. Easy to whip up and incredibly satisfying, these cookies are the epitome of homemade comfort. Curious how to turn your kitchen into a cookie paradise? Let’s dive into this sweet adventure together!

Why Are These Red Velvet Cookies Irresistible?
Irresistible flavor: Soft and cake-like with rich chocolate undertones, these cookies are a dessert lover’s dream.
Easy to make: With straightforward steps and simple ingredients, you can bake up a batch without hassle.
Perfect for gatherings: Their vibrant color and creamy frosting will impress guests at any occasion.
Versatile serving options: Pair them with a cold glass of milk or enjoy them alongside a scoop of vanilla ice cream for a complete treat. For more sweet inspiration, check out these delightful Korean Honey Cookies and Almond Cherry Cookies.
Make ahead: Dough can be prepared in advance, making it easy to whip up fresh cookies whenever the craving hits!
Red Velvet Cookies Ingredients
For the Cookie Base
• Butter – Adds richness and moisture; use unsalted butter for better salt control.
• Sugar – Provides sweetness and texture; light brown sugar can be swapped for granulated sugar.
• Brown Sugar – Contributes to a chewy texture; always pack it tightly for accuracy.
• Egg – Binds ingredients together; let it reach room temperature for better mixing.
• Vinegar – Enhances the classic red velvet flavor; white distilled vinegar is preferred for its neutral taste.
• Red Food Color – Gives the cookies their signature red hue; stick to 2 teaspoons for the best results.
• Flour – Provides structure to the cookie; King Arthur all-purpose flour is recommended for best outcomes.
• Cocoa Powder – Adds rich chocolate flavor; natural cocoa is ideal for balance.
• Baking Soda & Baking Powder – Essential leavening agents; ensure they are fresh for optimal rise.
• Salt – Enhances depth of flavor; no substitutions recommended.
For the Cream Cheese Frosting
• Cream Cheese – Key frosting ingredient providing creaminess; full-fat varieties yield the best texture.
• Icing Sugar – Sweetens and thickens the frosting; sift to remove lumps for a smooth finish.
These Red Velvet Cookies are the kind of homemade delight that fills your kitchen with warmth and brings joy to any gathering. Happy baking!
Step‑by‑Step Instructions for Classic Crumbl Copycat Red Velvet Cookies
Step 1: Preheat the Oven
Start by preheating your oven to 375°F (190°C). This ensures that when your Red Velvet Cookies are ready to bake, the oven is hot enough to create a perfect oven spring. While the oven heats, gather your ingredients and baking sheets, lining them with parchment paper for easy cleanup.
Step 2: Mix the Dry Ingredients
In a medium bowl, whisk together the flour, cocoa powder, baking soda, baking powder, and salt until well combined. This step is crucial for ensuring even distribution of the leavening agents, which will help your cookies rise beautifully. Set the bowl aside as you move on to the next steps of this delightful cookie-making process.
Step 3: Cream the Butter and Sugars
In a large mixing bowl, beat together the softened butter, granulated sugar, and brown sugar until light and fluffy, about 2-3 minutes. Using a hand mixer or stand mixer will give you a smooth consistency, which contributes to the cake-like texture of your Red Velvet Cookies. Make sure to scrape down the sides of the bowl for even mixing.
Step 4: Incorporate the Wet Ingredients
Add the room-temperature egg, vinegar, red food color, and vanilla extract into the creamed butter and sugars. Mix on medium speed until all the ingredients are well incorporated, creating a vibrant mixture. The egg acts as a binder, helping the cookies maintain their shape while adding moisture for a rich flavor.
Step 5: Combine Dry and Wet Mixtures
Gently fold the dry mixture into the wet ingredients using a spatula. Stir until just combined, being cautious not to overmix, as this can lead to tough cookies. The dough should be thick and slightly sticky—this is a good sign that your Red Velvet Cookies will be soft and chewy.
Step 6: Chill the Dough
Cover the cookie dough with plastic wrap and refrigerate for 15-20 minutes. Chilling allows the flavors to meld together and helps prevent the cookies from spreading too much in the oven, ensuring they retain that desirable thick and chewy texture.
Step 7: Shape and Bake
Scoop the chilled dough and form it into large disks, placing them on the lined baking sheets. Bake in the preheated oven for 10-11 minutes, or until the edges are set while the centers remain slightly underbaked. You’ll know they’re ready when the edges look firm and the tops have begun to set but still look soft.
Step 8: Cool the Cookies
Once baked, remove the baking sheets from the oven and let the cookies cool on the sheets for about 5 minutes. This cooling time allows them to firm up slightly before you transfer them to a wire rack to cool completely—this helps maintain their soft texture for your Red Velvet Cookies.
Step 9: Prepare the Frosting
While the cookies are cooling, prepare the cream cheese frosting. In a mixing bowl, beat together softened cream cheese and butter until creamy and smooth. Gradually add the sifted icing sugar and a splash of vanilla extract, mixing until fluffy and well-combined, creating a luscious topping for your cookies.
Step 10: Decorate the Cookies
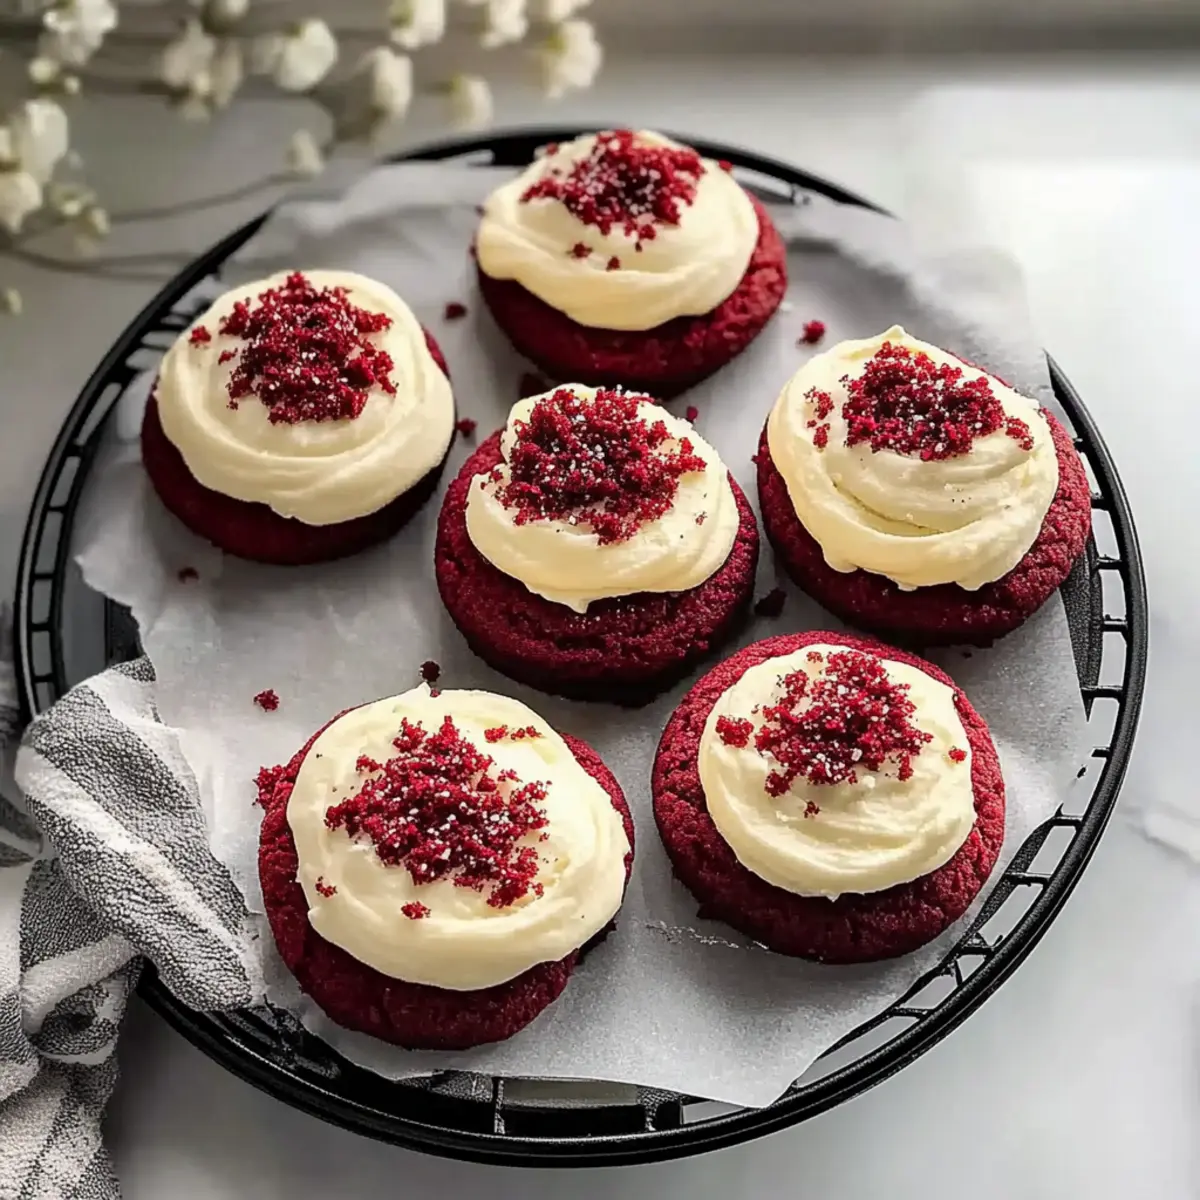
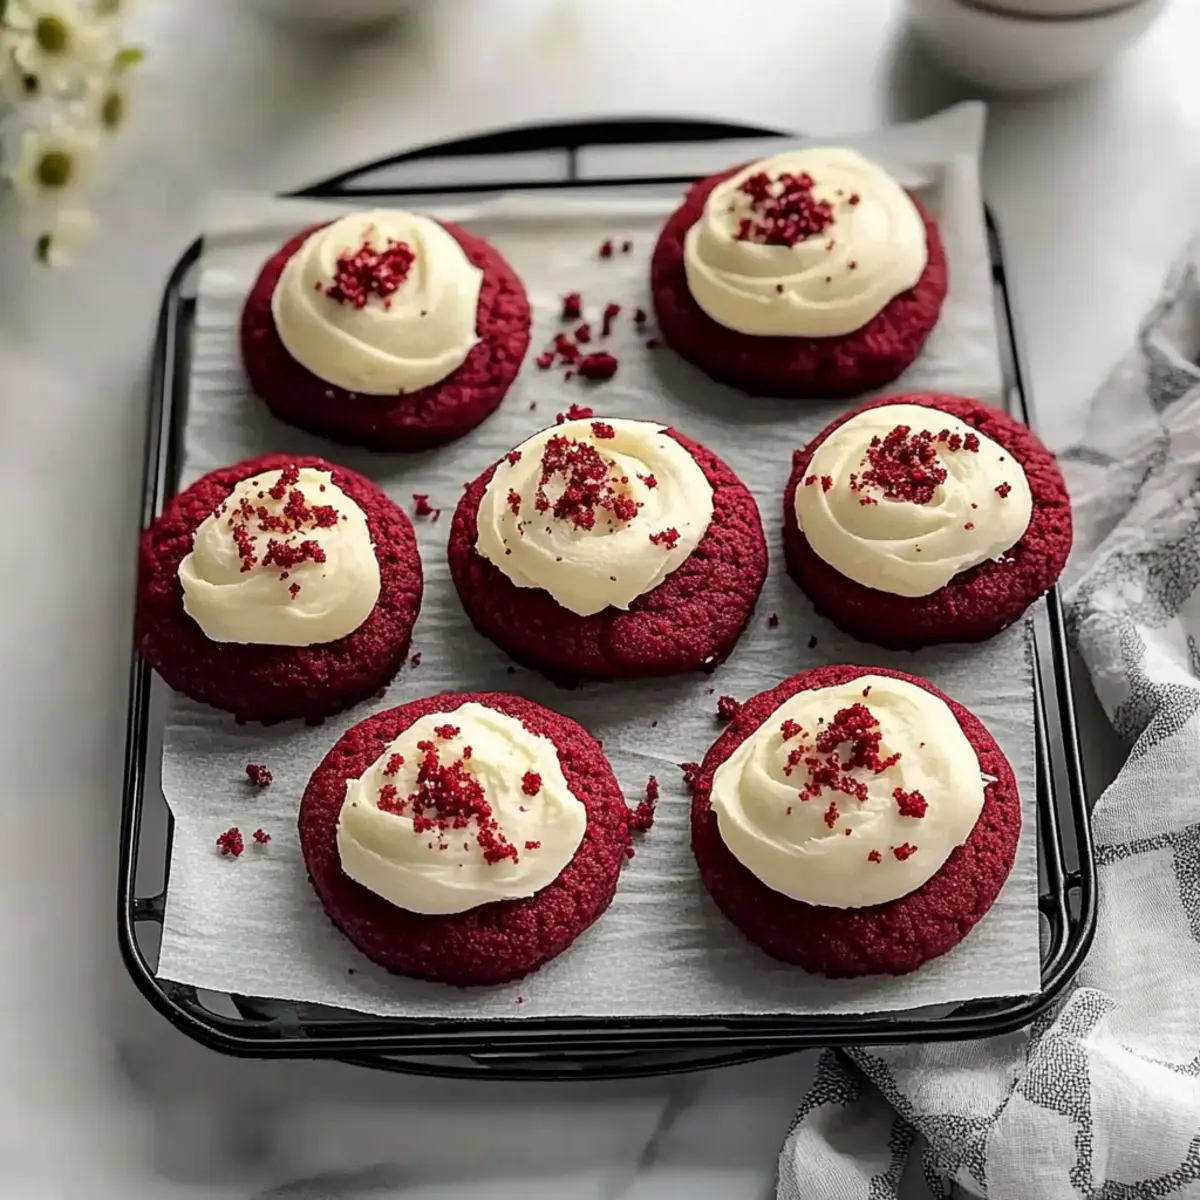
Once the cookies have completely cooled, pipe the cream cheese frosting generously onto each cookie, creating a delightful swirl on top. For an extra touch, crumble a small piece of baked dough and sprinkle it over the frosting to achieve a beautiful finish. Your Classic Crumbl Copycat Red Velvet Cookies are now ready to delight!
Red Velvet Cookies: Fun Variations
Feel free to get creative with these Red Velvet Cookies and customize them to match your taste buds!
-
Almond Extract: Swap vanilla extract for almond extract for a delightful twist that adds a nutty aroma.
-
Mini Cookies: Create mini versions of these cookies for bite-sized treats; just reduce the baking time to 8-10 minutes.
-
Nutty Addition: Add crushed walnuts or pecans to the dough for a satisfying crunch that wonderfully contrasts the soft texture.
-
Chocolate Chips: Stir in some semi-sweet or white chocolate chips for an extra layer of sweetness in every bite.
-
Spicy Kick: Incorporate a pinch of cayenne pepper or chili powder into the dough for a surprising heat that pairs beautifully with the sweetness.
-
Frosting Twist: Experiment with the frosting by adding crushed cookies or sprinkles on top for more color and texture.
-
Dairy-Free: Use coconut cream instead of cream cheese for frosting and substitute with dairy-free butter for a completely dairy-free treat.
-
Cocoa Variations: For a richer chocolate flavor, swap half the all-purpose flour with cocoa powder; this twist offers a deep, moody flavor.
These variations let you tailor your cookies for every mood or occasion, whether you’re whipping up a batch for a gathering or indulging yourself. For even more inspiration, don’t forget to check out these dreamy Korean Honey Cookies or these delightful Almond Cherry Cookies. Happy baking!
Expert Tips for Red Velvet Cookies
• Chill the Dough: Always refrigerate the dough for at least 15-20 minutes. This helps prevent spreading and keeps your cookies thick and chewy.
• Measure Flour Accurately: Spoon and level your flour instead of scooping directly from the bag. This avoids packing, which can lead to dense cookies.
• Check Freshness: Ensure your baking soda and baking powder are fresh. Expired leaveners can result in flat Red Velvet Cookies that lack the desired rise.
• Avoid Overmixing: When combining dry and wet ingredients, mix just until combined. Overmixing can result in tough cookies, detracting from their soft texture.
• Don’t Skip Frosting: The cream cheese frosting adds essential flavor and creaminess. Make sure it’s smooth by using room temperature ingredients before mixing.
Make Ahead Options
These Classic Crumbl Copycat Red Velvet Cookies are perfect for meal prep enthusiasts! You can prepare the cookie dough up to 24 hours in advance by refrigerating it. Simply cover the dough tightly with plastic wrap to prevent it from drying out. Alternatively, if you want to extend the prep time, freeze the dough for up to 3 months—just scoop it into disks and freeze on a baking sheet before transferring to an airtight container. When ready to bake, you can bake directly from frozen; just add a couple of minutes to your baking time. Remember, for the best results, frost these cookies just before serving for that irresistible, fresh taste!
How to Store and Freeze Red Velvet Cookies
Room Temperature: Store your Red Velvet Cookies in an airtight container at room temperature for up to 3 days to maintain their soft, chewy texture.
Fridge: For longer freshness, refrigerate the cookies in a container for up to 1 week; if frosted, allow them to sit at room temperature for a few minutes before serving.
Freezer: Freeze unfrosted cookies in a single layer on a baking sheet, then transfer to a freezer bag or airtight container for up to 3 months. Frost after thawing for the best flavor and texture.
Reheating: To enjoy chilled cookies warm, microwave them for about 10-15 seconds. This revives their softness and brings out the flavors beautifully!
What to Serve with Classic Crumbl Copycat Red Velvet Cookies
Indulging in the vibrancy and richness of these delightful cookies creates the perfect backdrop for a cozy and satisfying meal experience.
-
Cold Glass of Milk: The classic pairing enhances the cookie’s sweetness while contrasting its creamy frosting, a nostalgic favorite just like childhood days.
-
Rich Hot Chocolate: A warm beverage that complements the subtle cocoa undertones in your cookies, perfect for chilly evenings spent curled up at home.
-
Vanilla Ice Cream: The cold, creamy texture of ice cream balances the rich flavors of red velvet, creating a deliciously nostalgic dessert duo.
-
Fresh Strawberries: Juicy, ripe strawberries add a natural sweetness and bright acidity, enhancing the creamy notes of the frosting while adding freshness to every bite.
-
Coffee or Espresso: The robust flavors of a freshly brewed coffee or a shot of espresso beautifully contrast the sweetness, making for an indulgent afternoon treat.
-
Creamy Cheesecake: Serve alongside mini cheesecake bites for a decadent dessert spread, elevating your cookie experience with rich flavors and contrasting textures.
-
Chocolate Drizzle: A simple drizzle of melted chocolate over your cookies adds a luxurious touch, enhancing the overall visual appeal and flavor.
-
Lemonade: A refreshing glass of lemonade breaks the sweetness perfectly, introducing a tangy zest that sings in harmony with the cookie’s rich flavors.
-
Buttercream Frosting Dipping Sauce: For an extra layer of indulgence, serve these cookies with a small dish of buttercream frosting for dipping.

Classic Crumbl Copycat Red Velvet Cookies Recipe FAQs
How do I choose ripe ingredients for these cookies?
Absolutely! For the best flavor and texture, use room-temperature butter and eggs. This helps the cookies mix evenly, giving them that soft, cake-like texture. The butter should be softened, not melted, allowing it to cream beautifully with the sugars. Fresh ingredients, especially baking powder and soda, are key—ensure they’re within their expiry dates for the best rise.
How do I store my Red Velvet Cookies?
Very easy! Store your Red Velvet Cookies in an airtight container at room temperature for up to 3 days. If you want to extend their freshness, you can refrigerate them for up to 1 week. Just remember, if they’re frosted, let them sit out for a few minutes before serving if chilled, as this will enhance the frosting’s flavor.
Can I freeze these cookies? What’s the best method?
Absolutely! Freezing is a fantastic way to enjoy your cookies later. Freezing unfrosted cookies is best; place them in a single layer on a baking sheet until solid, then transfer them to a freezer bag or airtight container for up to 3 months. When you’re ready to enjoy them, thaw at room temperature and frost afterward for the best flavor and texture.
What should I do if my cookies turn out flat?
If your cookies spread too much, it’s likely due to the dough being too warm before baking. Always chill the dough for at least 15-20 minutes. Also, ensure your baking soda and baking powder are fresh. If they’re old, they may not leaven properly, resulting in flat cookies.
Are there any dietary considerations for these cookies?
Yes! These Red Velvet Cookies contain dairy and gluten, so they might not be suitable for those with lactose intolerance or gluten sensitivity. As an alternative, you could experiment with gluten-free flour blends and use a dairy-free cream cheese substitute for the frosting. Just remember, these substitutes might slightly change the cookie’s texture and flavor.
Irresistibly Soft Red Velvet Cookies with Creamy Frosting
Ingredients
Equipment
Method
- Preheat your oven to 375°F (190°C).
- In a medium bowl, whisk together the flour, cocoa powder, baking soda, baking powder, and salt.
- In a large mixing bowl, beat together the softened butter, granulated sugar, and brown sugar until light and fluffy, about 2-3 minutes.
- Add the room-temperature egg, vinegar, red food color, and vanilla extract into the creamed mixture and mix until well incorporated.
- Gently fold the dry mixture into the wet ingredients using a spatula.
- Cover the dough with plastic wrap and refrigerate for 15-20 minutes.
- Scoop the chilled dough and form it into large disks, placing them on lined baking sheets. Bake for 10-11 minutes.
- After baking, let the cookies cool on the sheets for about 5 minutes before transferring them to a wire rack.
- Beat together softened cream cheese and butter until creamy. Gradually add sifted icing sugar and mix until fluffy.
- Pipe the cream cheese frosting generously onto each cookie after they have completely cooled.
Leave a Reply