
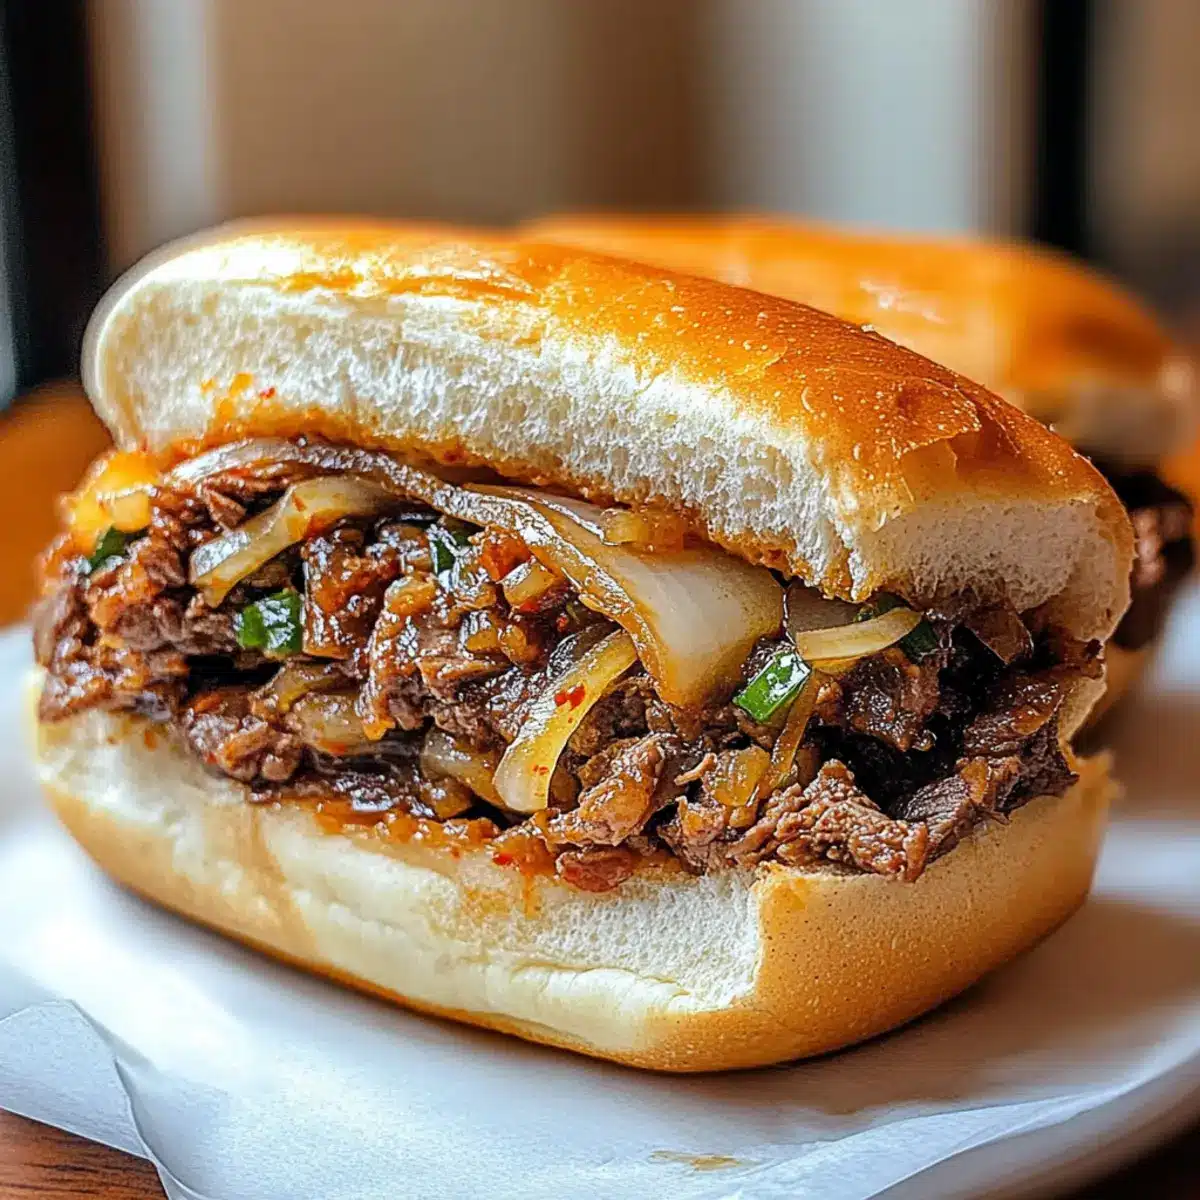
As I stood in my kitchen, the sizzling sound of beef hitting the hot skillet launched me into a delightful whirlwind of aromas. The Korean-Inspired Kimchi Bulgogi Cheesesteak is a mouthwatering fusion that brings together tender beef, crispy veggies, and the spicy punch of kimchi—all snuggled into a warm hoagie roll. This recipe is perfect for a cozy night in or game day gatherings, impressively coming together in just 30 minutes. With its customizable nature, you can tailor each cheesesteak to suit your cravings, whether you prefer adding extra spice or swapping out the protein. What’s your flavor blend for the perfect cheesesteak?
What Makes This Cheesesteak Irresistible?
Bold flavors: The fusion of Korean bulgogi and spicy kimchi elevates the traditional cheesesteak to new culinary heights.
Quick preparation: In just 30 minutes, you can serve up this crowd-pleaser, making it perfect for spontaneous gatherings.
Customizable: Whether you’re a meat lover or a vegetarian, this recipe allows for easy substitutions without sacrificing flavor.
Texture contrast: Enjoy the tender beef, crispy veggies, and gooey cheese all in one bite—absolutely satisfying!
Perfect pairing: Serve with crispy sweet potato fries or a light cucumber salad for a complete meal experience!
Kimchi Bulgogi Cheesesteak Ingredients
For the Beef Marination
- Beef Sirloin – A tender protein base that soaks up flavors beautifully; substitute with chicken or tofu for a different twist.
- Soy Sauce – Adds depth and umami; opt for gluten-free soy sauce if needed.
- Sesame Oil – Infuses a lovely nutty essence; can be replaced with olive oil in a pinch.
- Minced Garlic – Elevates the dish with aromatic flavor; fresh garlic works best, but garlic powder can be used if you’re in a hurry.
- Sugar – Balances the flavors by adding a hint of sweetness; brown sugar enhances the richness even more.
For the Veggies
- Onion – Provides a sweet, caramelized flavor; swap for shallots for a milder taste.
- Bell Peppers – Adds crunch and color; feel free to choose any variety you love for your cheesesteak.
- Kimchi – Brings that essential spicy tang; adjust the amount based on your heat preference for the kimchi bulgogi cheesesteak experience.
For Assembly
- Hoagie Rolls – Soft and fresh, they cradle the flavorful filling perfectly; gluten-free rolls work great too.
- Cheese (e.g., Provolone, American) – Melts exquisitely for a creamy finish; try cheddar or pepper jack for a twist on tradition!
Step‑by‑Step Instructions for Kimchi Bulgogi Cheesesteak
Step 1: Prepare Ingredients
Begin by thinly slicing the beef sirloin into strips, ensuring even thickness for quick cooking. Next, chop the onion and bell peppers into bite-sized pieces to add texture to your Kimchi Bulgogi Cheesesteak. This setup lays the foundation for your flavorful fusion dish, so take your time to ensure everything is prepped and ready to go.
Step 2: Marinate Beef
In a large bowl, combine soy sauce, sesame oil, minced garlic, and a pinch of sugar, mixing well to create a marinade. Add the sliced beef sirloin, tossing it gently to fully coat the meat. Let the beef marinate for at least 15 minutes, allowing the flavors to penetrate and tenderize the meat, which is key for a delicious cheesesteak.
Step 3: Sauté Veggies
Heat a tablespoon of vegetable oil in a large skillet over medium-high heat until shimmering. Add the chopped onion and bell peppers to the skillet, sautéing them for about 5 minutes until they soften and become slightly caramelized. This step creates a vibrant, flavorful base for your Kimchi Bulgogi Cheesesteak that balances beautifully with the meat.
Step 4: Cook Beef
Push the sautéed vegetables to one side of the skillet and add the marinated beef in a single layer. Let the beef sear without moving it for 2 minutes, then stir occasionally, cooking until it’s browned and cooked through, about 5 minutes. Mix the veggies back in as the sizzling aroma fills the kitchen, enhancing the dish’s delightful fusion essence.
Step 5: Add Kimchi
Once the beef is cooked, stir in the chopped kimchi, ensuring it’s evenly distributed throughout the meat and veggies. Continue cooking for an additional 2 minutes, allowing the kimchi to warm through and infuse its spicy, tangy flavor into the entire mixture. This step is crucial for achieving that signature kick in your Kimchi Bulgogi Cheesesteak.
Step 6: Assemble Cheesesteaks
Take your toasted hoagie rolls and spoon generous portions of the beef and kimchi mixture into each roll. Top with slices of cheese, allowing it to blanket the filling. Place the assembled cheesesteaks under the broiler for about 2 minutes or until the cheese is melted and bubbly. This final touch adds that creamy finish everyone loves!
Step 7: Serve and Enjoy
Once the cheese is beautifully melted, remove the cheesesteaks from the oven and let them cool for a minute. Slice them in half if desired and serve immediately, ideally with a side of crispy sweet potato fries or a light cucumber salad. Dive into these warm, flavorful Kimchi Bulgogi Cheesesteaks that are sure to impress family and friends!
Expert Tips for Your Kimchi Bulgogi Cheesesteak
Slice Against the Grain: Ensure you slice the beef sirloin against the grain for maximum tenderness, preventing the meat from becoming tough.
Marination Time Matters: For richer flavor, let the beef marinate longer than 15 minutes if you have the time—this enhances the taste of your Kimchi Bulgogi Cheesesteak.
Hot Skillet Required: Make sure the skillet is hot enough before adding the beef. This helps achieve that perfect sear and keeps the meat juicy.
Cheese Melting Tip: Broil the cheesesteaks just until the cheese is melted and bubbly. Keep an eye on them to avoid burning!
Customize and Personalize: Don’t hesitate to adjust the spiciness of your kimchi according to your taste or add more veggies for extra crunch in your Kimchi Bulgogi Cheesesteak.
What to Serve with Korean-Inspired Kimchi Bulgogi Cheesesteak
A delightful fusion meal deserves equally delicious accompaniments to complete the experience.
-
Crispy Sweet Potato Fries: The sweetness of the fries complements the savory flavors of the bulgogi cheesesteak, adding a satisfying crunch. Pairing them with a sprinkle of sea salt enhances their natural sweetness.
-
Light Cucumber Salad: This refreshing salad cuts through the richness of the cheesesteak, providing a cool, crisp contrast. Toss cucumbers with a dash of rice vinegar and sesame seeds for a zesty touch.
-
Garlic Butter Corn on the Cob: The sweet, buttery corn elevates the meal with its enjoyable texture. Plus, slathering garlic butter makes each bite a burst of flavor, resonating beautifully with the meal’s bold profile.
-
Kimchi Fries: Take your flavor experience up a notch by topping fries with kimchi, cheese, and scallions. This indulgent twist embraces the main dish’s essence while introducing exciting new textures.
-
Craft Beer: A refreshing craft beer, especially a light lager, perfectly balances the tangy and spicy notes of the cheesesteak, adding a fizzy contrast that makes for an enjoyable sip in between bites.
-
Matcha Green Tea: The earthy undertones of matcha create a serene balance against the bold flavors of the meal. Its antioxidant-rich properties provide a healthy complement, perfect for rounding out your dining experience.
-
Sesame-coated Edamame: A small bowl of edamame sprinkled with sesame seeds adds a nutty crunch and contributes to a delightful, healthy appetizer before indulging in the main event.
-
Mochi Ice Cream: For dessert, the chewy, sweet mochi ice cream provides a delightful texture to end the meal on a light note, with flavors like matcha or mango making a charming finish.
Make Ahead Options
These Kimchi Bulgogi Cheesesteaks are perfect for meal prep enthusiasts! You can marinate the beef up to 24 hours in advance, which allows the flavors to deepen and enhance tenderness. Simply combine the marinade ingredients and toss in the sliced beef, letting it sit in the refrigerator. Additionally, you can chop the veggies and store them in an airtight container for up to 3 days, keeping their freshness intact. When ready to serve, sauté the prepped veggies and cook the marinated beef as directed. Finish by adding kimchi and assembling the cheesesteaks just before broiling for melting cheese goodness. This way, you’ll enjoy restaurant-quality results with minimal effort!
How to Store and Freeze Kimchi Bulgogi Cheesesteak
Fridge: Store leftover Kimchi Bulgogi Cheesesteak in an airtight container for up to 3 days. This keeps the flavors intact while preventing moisture loss.
Freezer: For longer storage, wrap each cheesesteak tightly in plastic wrap and foil; freeze for up to 2 months. This helps avoid freezer burn and retains taste.
Reheating: To reheat, thaw in the fridge overnight and warm in the oven at 350°F for 10 minutes to maintain that delightful crunch and meltiness.
Assembly Tip: Reassemble the rolls before reheating for an authentic texture, layering the ingredients neatly to preserve flavors and freshness!
Kimchi Bulgogi Cheesesteak Variations
Feel free to let your culinary creativity flow and personalize this delicious recipe with unique twists and substitutions!
- Protein Swap: Use chicken or tofu instead of beef for a lighter or plant-based option. Either choice brings different delicious flavors to the mix!
- Extra Heat: Toss in jalapeños or Sriracha for an extra kick. If you’re a heat lover, these additions elevate the flavor profile beautifully.
- Cheese Variety: Experiment with cheddar or pepper jack to switch up the taste. Each cheese adds its own character, making the cheesesteak even more enjoyable.
- Veggie Boost: Add mushrooms or zucchini for extra texture and flavor. Mixing in additional veggies can enhance the dish’s nutritional value while providing a delightful crunch.
- Gluten-Free Options: Choose gluten-free hoagie rolls and tamari as a soy sauce substitute, making this delicious meal accessible for gluten-sensitive eaters.
- Tasteful Toppings: Elevate your cheesesteak with avocado or kimchi slaw. These toppings introduce a creamy texture and bright flavors that perfectly complement the savory filling.
- Unconventional Bread: Swap hoagie rolls for soft naan bread or pita pockets for a fun twist. This change transforms the classic American dish into a delectable fusion meal!
- Sweetness Factor: Drizzle some honey or gochujang mixed with honey for a touch of sweetness that enhances the savory flavors. It creates a delightful balance that keeps you coming back for more.
Embrace the joy of experimentation and make this Kimchi Bulgogi Cheesesteak your own! It’s a chance to express your taste preferences and elevate your dish. Enjoy the process, and happy cooking!
Kimchi Bulgogi Cheesesteak Recipe FAQs
What type of beef should I use for the Kimchi Bulgogi Cheesesteak?
For the Kimchi Bulgogi Cheesesteak, I recommend using beef sirloin as it’s tender and flavorful when marinated. If you prefer a different protein option, chicken or tofu are excellent substitutes that can soak up the delicious flavors just as well!
How should I store leftover Kimchi Bulgogi Cheesesteak?
Store any leftover cheesesteaks in an airtight container in the fridge for up to 3 days. This will help keep the ingredients fresh while preserving those wonderful flavors. When reheating, I suggest doing so in the oven at 350°F for about 10 minutes, which will keep the rolls crispy and the fillings warm.
Can I freeze Kimchi Bulgogi Cheesesteak?
Absolutely! To freeze, wrap each cheesesteak tightly in plastic wrap followed by aluminum foil to prevent freezer burn. You can store them in the freezer for up to 2 months. When ready to enjoy, simply thaw overnight in the fridge and reheat in the oven as mentioned above!
What should I do if my beef turns out tough?
To prevent tough beef, always slice the sirloin against the grain. Additionally, if possible, let the marinated beef rest for longer than 15 minutes for deeper flavor penetration and tenderness. It helps the beef become a lot more juicy and flavorful!
Can I customize the spice level in my Kimchi Bulgogi Cheesesteak?
Yes, you can definitely customize the spice level! Adjust the amount of kimchi based on your personal heat preference. If you want to kick it up a notch, feel free to add sliced jalapeños or a dash of hot sauce to the mix before assembling your cheesesteak.
Are there any allergy considerations with the ingredients?
Definitely! When preparing the Kimchi Bulgogi Cheesesteak, be mindful of allergies, especially regarding soy sauce if you or your guests have gluten sensitivities. There are gluten-free soy sauce options available. Additionally, be cautious with kimchi, as it can vary in ingredients—always check for any additional allergens like shrimp or garlic.
Irresistible Kimchi Bulgogi Cheesesteak: A Flavorful Twist
Ingredients
Equipment
Method
- Begin by thinly slicing the beef sirloin into strips. Chop the onion and bell peppers into bite-sized pieces.

- In a large bowl, combine soy sauce, sesame oil, minced garlic, and sugar. Add the beef sirloin, tossing gently to coat. Let marinate for at least 15 minutes.
- Heat a tablespoon of vegetable oil in a large skillet over medium-high heat. Add the onions and bell peppers, sautéing for about 5 minutes until softened.
- Push the sautéed vegetables to one side of the skillet and add the marinated beef in a single layer. Let sear for 2 minutes, then stir and cook until browned, about 5 minutes.
- Stir in the chopped kimchi and cook for an additional 2 minutes, ensuring even distribution.
- Take your toasted hoagie rolls and fill each with the beef and kimchi mixture. Top with cheese and broil for about 2 minutes until melted.
- Serve immediately, ideally with sweet potato fries or cucumber salad.
Leave a Reply