
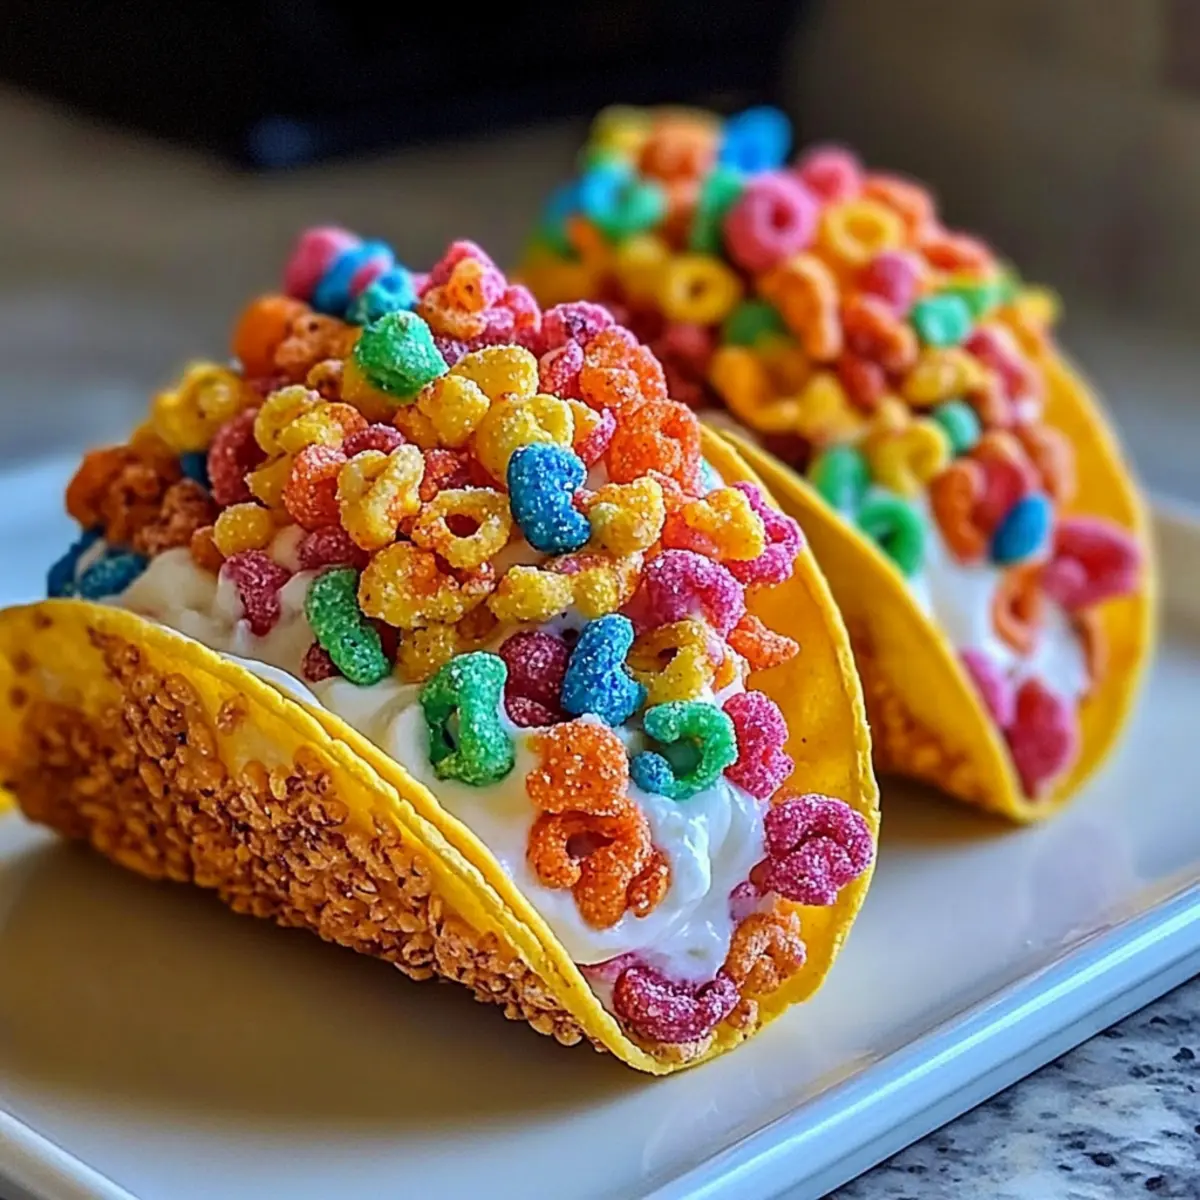
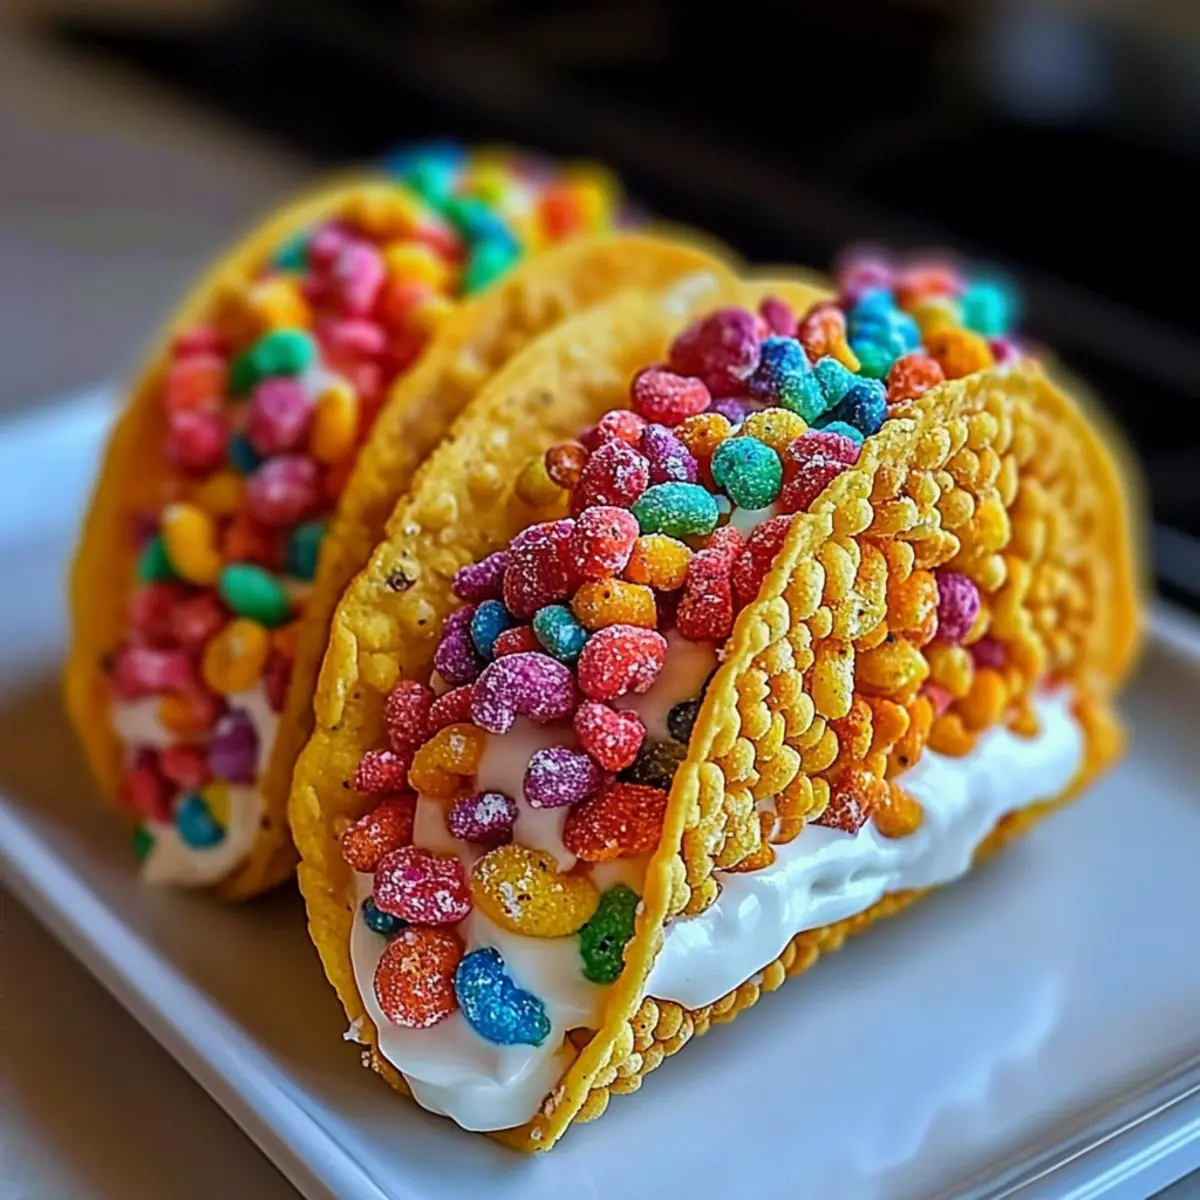
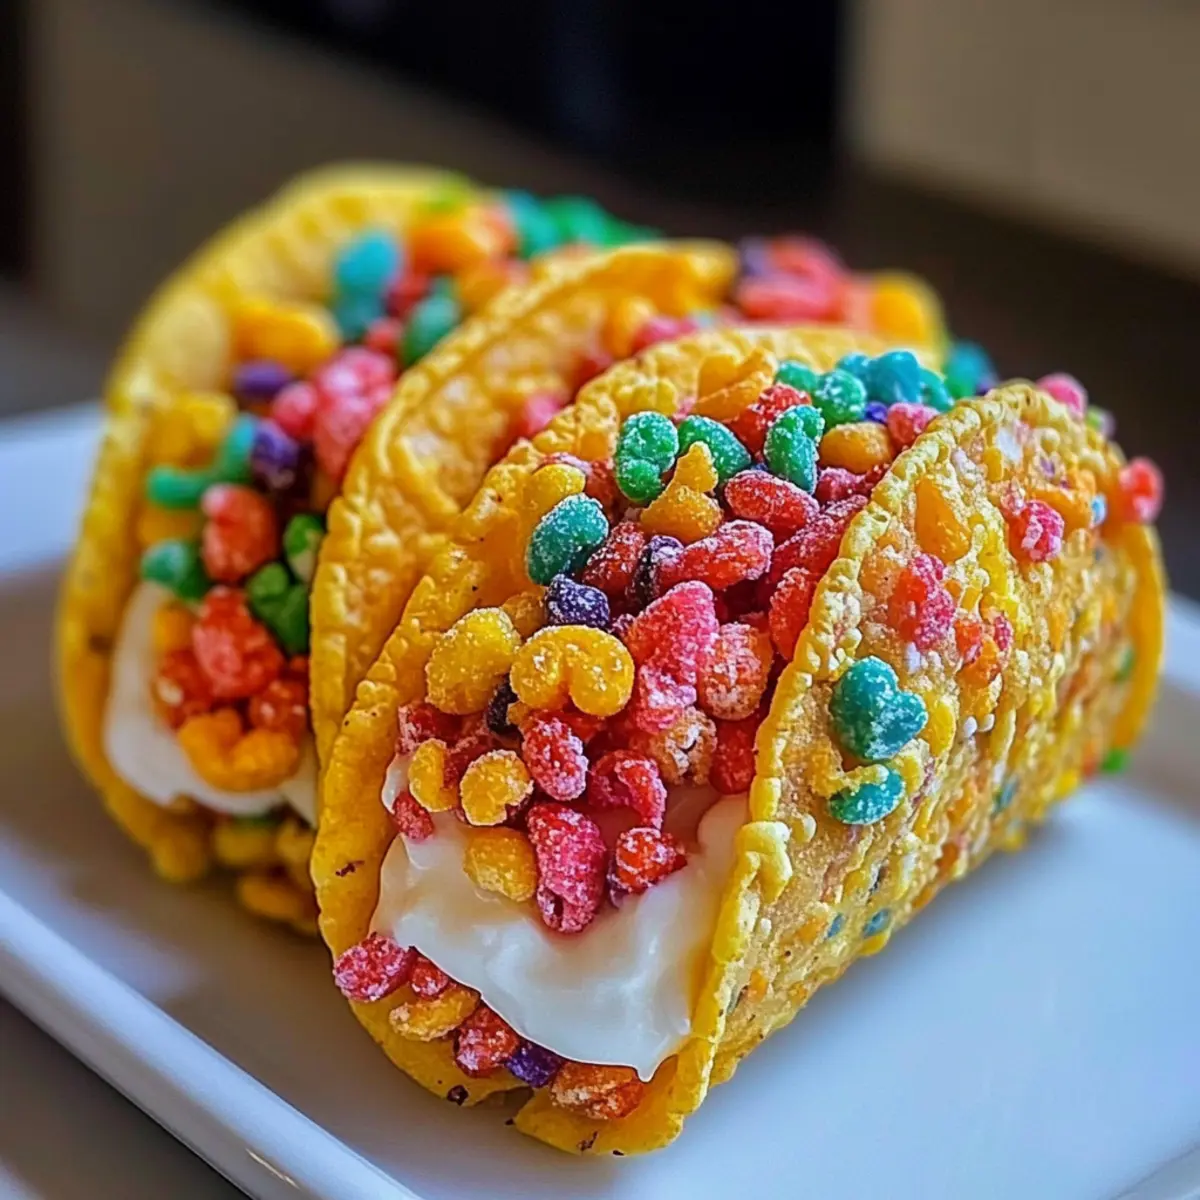
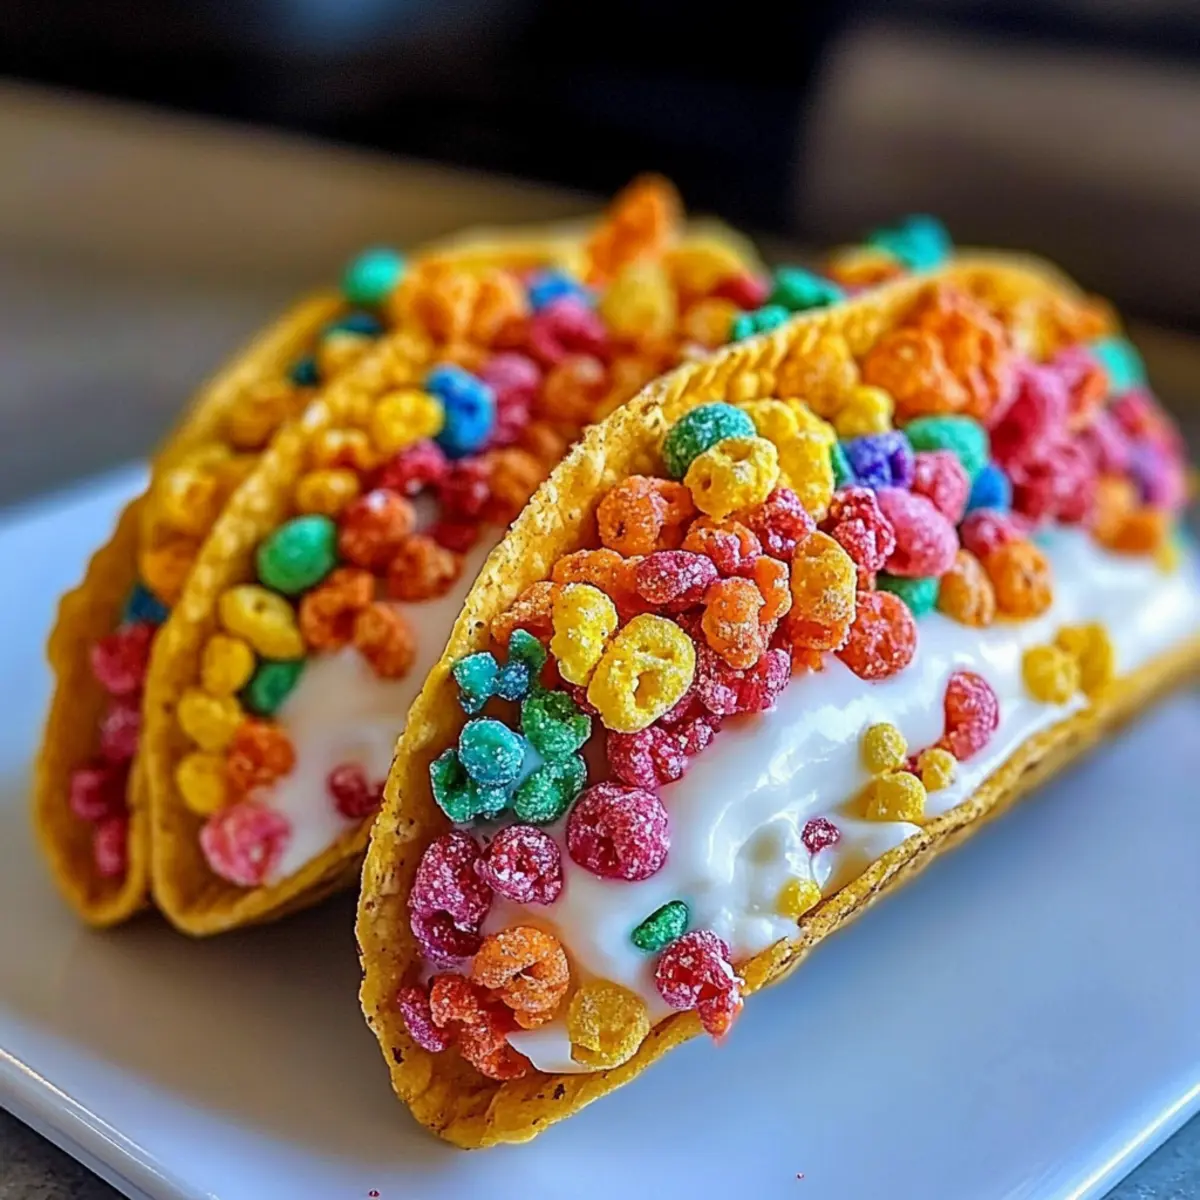
There’s a certain joy in mixing nostalgia with creativity, and today I’m excited to share my Fruity Pebbles Cheesecake Tacos—a whimsical no-bake dessert that transforms a classic breakfast treat into something entirely new! The combination of crunchy, colorful Fruity Pebbles and a rich, creamy cheesecake filling is guaranteed to be a crowd-pleaser at any gathering—especially birthdays and celebrations. Not only are these tacos quick to whip up, but they also offer a fun twist that lets you customize flavors and toppings to your heart’s desire. Imagine the delighted faces when you present these vibrant treats! How do you think your family would react to this unexpected dessert adventure?
Why Are Fruity Pebbles Cheesecake Tacos Amazing?
Nostalgic Fun: These Fruity Pebbles Cheesecake Tacos bring back childhood memories while being a creative dessert!
No-Bake Ease: With no oven required, you can whip these up in no time—perfect for those spontaneous gatherings!
Customizable Delight: Feel free to switch out toppings or use different cereals like Cocoa Pebbles for a unique flavor twist!
Colorful Presentation: Bright colors make these tacos visually stunning, sure to impress guests at any event.
Family Favorite: Kids and adults alike will love this playful take on classic cheesecake, making it a go-to for celebrations! Serve them chilled for a refreshing treat that everyone will adore!
Fruity Pebbles Cheesecake Tacos Ingredients
• Delight in the vibrant flavors of this colorful dessert!
For the Taco Shells
- Fruity Pebbles Cereal – Adds a bold crunch and bright color to the taco shell; substitute with Cocoa Pebbles or Rice Krispies for different flavors (but will lose the fruitiness).
- Mini Marshmallows – Creates a sticky mixture that holds the taco shells together; use vegan marshmallows for a dairy-free option.
- Unsalted Butter – Provides richness and a smoother texture in the taco shell mixture; no substitutions recommended for best results.
For the Cheesecake Filling
- Cream Cheese – The creamy base for a rich and tangy flavor; consider plant-based cream cheese for a dairy-free variant.
- Powdered Sugar – Sweetens the filling while keeping it smooth; no substitutes recommended.
- Vanilla Extract – Enhances the overall flavor of the cheesecake filling; use pure vanilla extract for the best taste.
- Heavy Whipping Cream – Whipped to create an airy texture; coconut cream can be used as a dairy alternative.
Enjoy these Fruity Pebbles Cheesecake Tacos that not only look good but taste even better!
Step‑by‑Step Instructions for Fruity Pebbles Cheesecake Tacos
Step 1: Melt the Mixture
In a medium saucepan, melt 3 tablespoons of unsalted butter over low heat until it’s completely liquid. Stir in about 2 cups of mini marshmallows, swirling gently until they melt into a smooth, sticky mixture—this should take around 2-3 minutes. Make sure there are no lumps, as this will be the glue for your taco shells.
Step 2: Add the Fruity Pebbles
Once your marshmallow mixture is hot and smooth, quickly add in 4 cups of Fruity Pebbles cereal. Carefully fold the cereal into the mixture with a spatula until every piece is well coated and colorful. The mixture will start to firm up quickly, so work swiftly to ensure everything is blended evenly.
Step 3: Shape the Taco Shells
Prepare a rolling pin or taco shell mold lined with parchment paper. While the mixture is hot, grab handfuls of it and press it firmly around the mold, shaping it into taco shells. Hold the mixture in place for about 30 seconds, allowing it to set before gently removing it. Repeat until you have enough taco shells for your Fruity Pebbles Cheesecake Tacos.
Step 4: Prepare the Cheesecake Filling
In a large mixing bowl, beat 8 ounces of softened cream cheese using an electric mixer until smooth and creamy—about 2 minutes. Gradually add in ½ cup of powdered sugar and 1 teaspoon of vanilla extract, mixing until everything is well combined and fluffy. This cheesecake filling will elevate your tacos with richness and flavor.
Step 5: Whip the Cream
In another bowl, pour in 1 cup of heavy whipping cream. Using a clean mixer, whip the cream on high speed until stiff peaks form, which should take around 3-5 minutes. Be careful not to overwhip; the cream should be airy and light, allowing for a delightful texture in your cheesecake filling.
Step 6: Combine the Mixtures
Gently fold the whipped cream into the cream cheese mixture using a spatula, being careful not to deflate the whipped cream too much. This step is vital for achieving that airy, fluffy consistency in your Fruity Pebbles Cheesecake Tacos. Mix until fully combined and silky smooth.
Step 7: Fill the Taco Shells
Using a piping bag or a spoon, fill each taco shell with the cheesecake filling, creating generous portions to make them irresistibly creamy. If you’re using a piping bag, you can decorate the tops for a fun presentation. Be sure to fill each shell just before serving to maintain freshness and crispness.
Step 8: Chill and Garnish
For a perfect finish, garnish your filled Fruity Pebbles Cheesecake Tacos with additional Fruity Pebbles on top for extra color and crunch. Place the tacos in the refrigerator for at least 30 minutes to set the filling and enhance the flavors. This chilling time makes the dessert even more enjoyable when served!
Fruity Pebbles Cheesecake Tacos Variations
Feel free to get creative with your Fruity Pebbles Cheesecake Tacos and make them your own!
- Gluten-Free: Substitute regular cereals with gluten-free cereal options to enjoy a safe, delightful treat for everyone.
- Dairy-Free: Use coconut cream instead of heavy cream and plant-based cream cheese for a delicious vegan option.
- Chocolate Delight: Swap out Fruity Pebbles with Cocoa Pebbles for a decadent chocolate version that’s rich and indulgent.
- Fruit Toppings: Add fresh strawberries, blueberries, or sliced bananas on top for an extra pop of flavor and nutrition.
- Citrus Zing: Incorporate a teaspoon of lemon or orange zest into the cheesecake filling for a refreshing, zesty surprise.
- Nutty Crunch: Mix chopped nuts like pecans or almonds into the filling for a delightful crunch that complements the creamy texture.
- Whipped Cream: Top with an extra layer of whipped cream for an even more indulgent dessert experience.
- Spiced Kick: Add a pinch of cinnamon or nutmeg to the cream cheese mixture for a warm, spiced flavor that elevates the entire taco.
These delightful variations will not only keep your dessert exciting but also cater to different tastes and dietary preferences. Speaking of delicious twists, have you ever tried making Pumpkin Pie Tacos? It’s another fun way to reinvent a classic!
What to Serve with Fruity Pebbles Cheesecake Tacos
Imagine a spread that delights both the eyes and the palate, complementing the fun of Fruity Pebbles Cheesecake Tacos.
- Creamy Vanilla Ice Cream: The smooth and velvety texture of ice cream pairs beautifully and enhances the dessert’s fun, colorful elements.
- Fresh Berries Medley: Add a burst of natural sweetness and a pop of color with strawberries, blueberries, and raspberries—perfect contrast to the crunchy tacos.
- Chocolate Drizzle: Elevate the children’s delight by drizzling warm chocolate sauce over the tacos, creating a rich, decadent flavor combo.
- Coconut Whipped Cream: For a tropical twist, serve with fluffy coconut whipped cream; it adds a luxurious lightness to the dessert experience.
- Mini Fruit Skewers: Assemble a rainbow of fruits on skewers for a fresh, vibrant side that kids can enjoy while indulging in the tacos.
- Fruit Punch: Refreshing fruit punch enhances the playful, colorful theme; serve it chilled for a perfect party drink that keeps the celebration going.
- Churro Bites: Offer bite-sized churros for an added crunchy sweetness; these also echo the taco shape and keep the theme fun.
- Rainbow Sprinkles: Provide a small bowl of sprinkles for extra customization—kids will love adding them to their toppings!
- Fruity Smoothie: Blend up a fruity smoothie for a refreshing, healthy drink that keeps within the colorful dessert experience and offers a balance to the richness.
How to Store and Freeze Fruity Pebbles Cheesecake Tacos
Room Temperature: Keep unfilled taco shells at room temperature in an airtight container for up to 3 days to maintain their crispness.
Fridge: Store filled Fruity Pebbles Cheesecake Tacos in the fridge for up to 24 hours. They are best enjoyed fresh but will last this long with proper storing.
Freezer: While freezing is not recommended for filled tacos due to texture changes, unfilled shells can be frozen for up to a month. Wrap them tightly in plastic wrap, then place in a freezer bag.
Reheating: There’s no need to reheat these delightful tacos! Simply assemble filled tacos right before serving for the best texture and flavor.
Expert Tips for Fruity Pebbles Cheesecake Tacos
- Work Quickly: The marshmallow mixture sets fast, so shape the taco shells immediately after mixing to achieve the best form.
- Prevent Sticking: Lightly spray your mold or line it with parchment paper to ensure easy removal of taco shells without tearing.
- Best Texture: Fill the taco shells with cheesecake mixture just before serving for a delightful contrast of crispy shell and creamy filling.
- Storage Tips: Keep unfilled taco shells at room temperature and filled tacos in the fridge; eat filled tacos within 24 hours for optimal taste.
- Experiment With Flavors: Don’t hesitate to customize your filling; adding lemon zest or switching cereals enhances the delicious experience of your Fruity Pebbles Cheesecake Tacos!
Make Ahead Options
These Fruity Pebbles Cheesecake Tacos are a fantastic choice for busy weeknights or preparing for a party! You can make the taco shells up to 24 hours in advance and store them in a sealed container at room temperature to maintain their crispness. For the cheesecake filling, prepare it ahead and store it in the refrigerator for up to 3 days. When you’re ready to serve, simply fill the taco shells with the chilled cheesecake mixture using a piping bag or spoon, and garnish with extra Fruity Pebbles for that delightful crunch and color. This approach not only saves time but ensures you have a whimsical dessert ready to impress your family and friends!
Fruity Pebbles Cheesecake Tacos Recipe FAQs
What’s the best way to choose ripe ingredients for this recipe?
Absolutely! For the best results, ensure your cream cheese is softened to room temperature for easy blending. If you choose to add fruits as toppings, select fresh ones without blemishes or dark spots. This will keep the presentation as vibrant as your Fruity Pebbles Cheesecake Tacos!
How should I store leftover Fruity Pebbles Cheesecake Tacos?
Filled tacos are best enjoyed fresh, but if you have leftovers, store them in the refrigerator in an airtight container for up to 24 hours. For unfilled taco shells, keep them wrapped tightly at room temperature for up to 3 days to maintain their crunchiness.
Can I freeze the taco shells? If so, how?
Yes! You can freeze unfilled taco shells. First, allow them to cool completely. Then, wrap them tightly in plastic wrap and place them in a freezer bag. They can be frozen for up to a month. Just remember, it’s best to fill the tacos right before serving for optimal texture!
What if my marshmallow mixture is too sticky or hard to work with?
Very! If your mixture becomes too sticky, light greasing on your hands or the mold can help shape the taco shells. Also, make sure the marshmallows are fully melted and combined with butter before adding the Fruity Pebbles, as mixing too early can lead to a clumpy texture.
Are there any dietary considerations I should be aware of for this recipe?
Indeed! If you’re catering to dietary restrictions, you can use vegan marshmallows and plant-based cream cheese for dairy-free options. Always check the labels on the cereals and ingredients for possible allergens.
What variations can I try for the cheesecake filling?
How fun! For a twist, omit powdered sugar and substitute it with honey or agave syrup for natural sweetness. You can also mix in flavors like cocoa powder or citrus zest to the cream cheese for a different character to your Fruity Pebbles Cheesecake Tacos!
Fruity Pebbles Cheesecake Tacos: A Fun No-Bake Treat!
Ingredients
Equipment
Method
- In a medium saucepan, melt 3 tablespoons of unsalted butter over low heat until completely liquid. Stir in about 2 cups of mini marshmallows and melt into a smooth mixture for 2-3 minutes.
- Quickly add in 4 cups of Fruity Pebbles cereal to the marshmallow mixture and fold to coat well.
- Press the mixture into taco shell molds lined with parchment paper to shape taco shells. Allow to set for 30 seconds before removing.
- Beat 8 ounces of softened cream cheese until smooth. Gradually add ½ cup of powdered sugar and 1 teaspoon of vanilla extract, mixing until fluffy.
- Whip 1 cup of heavy whipping cream until stiff peaks form in about 3-5 minutes.
- Gently fold the whipped cream into the cream cheese mixture until smooth and fluffy.
- Fill each taco shell with cheesecake filling using a piping bag or spoon before serving.
- Garnish filled tacos with additional Fruity Pebbles and chill for at least 30 minutes before serving.
Leave a Reply