
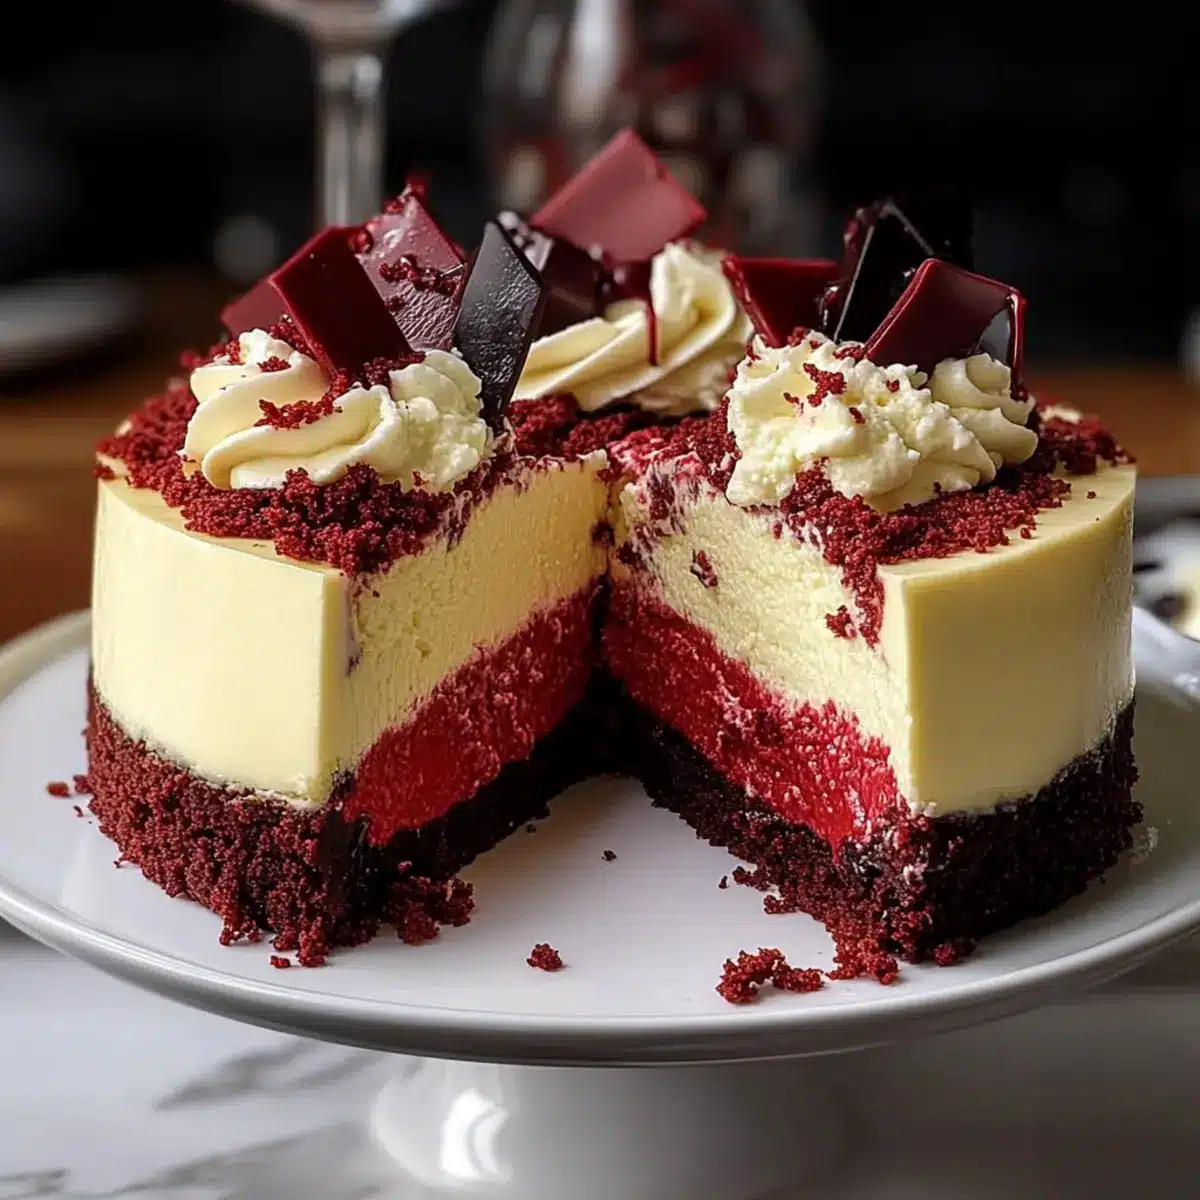
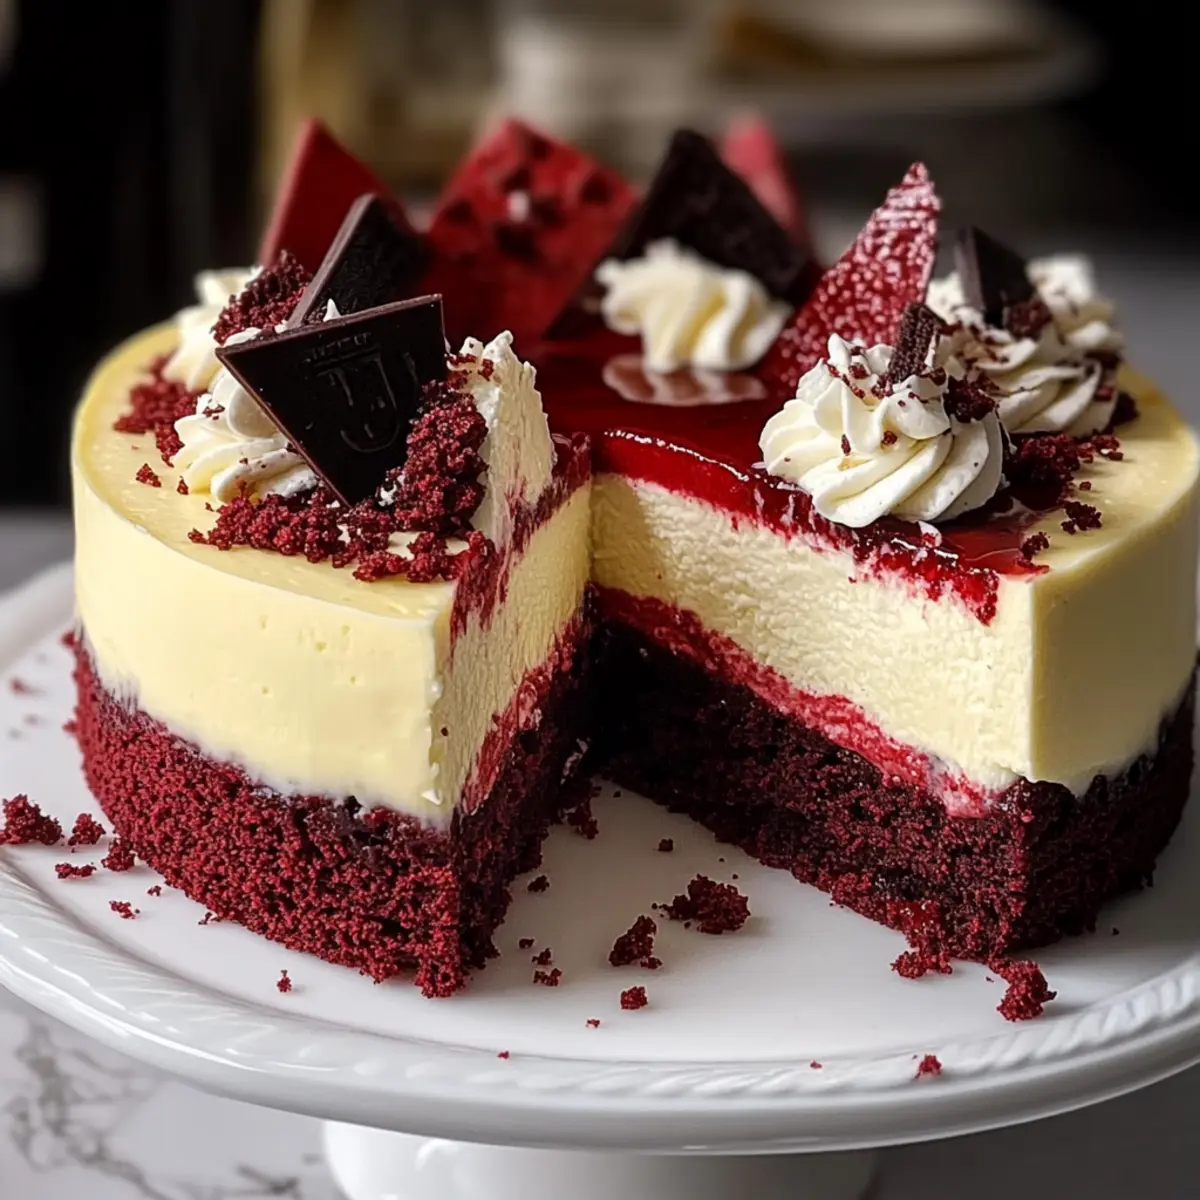
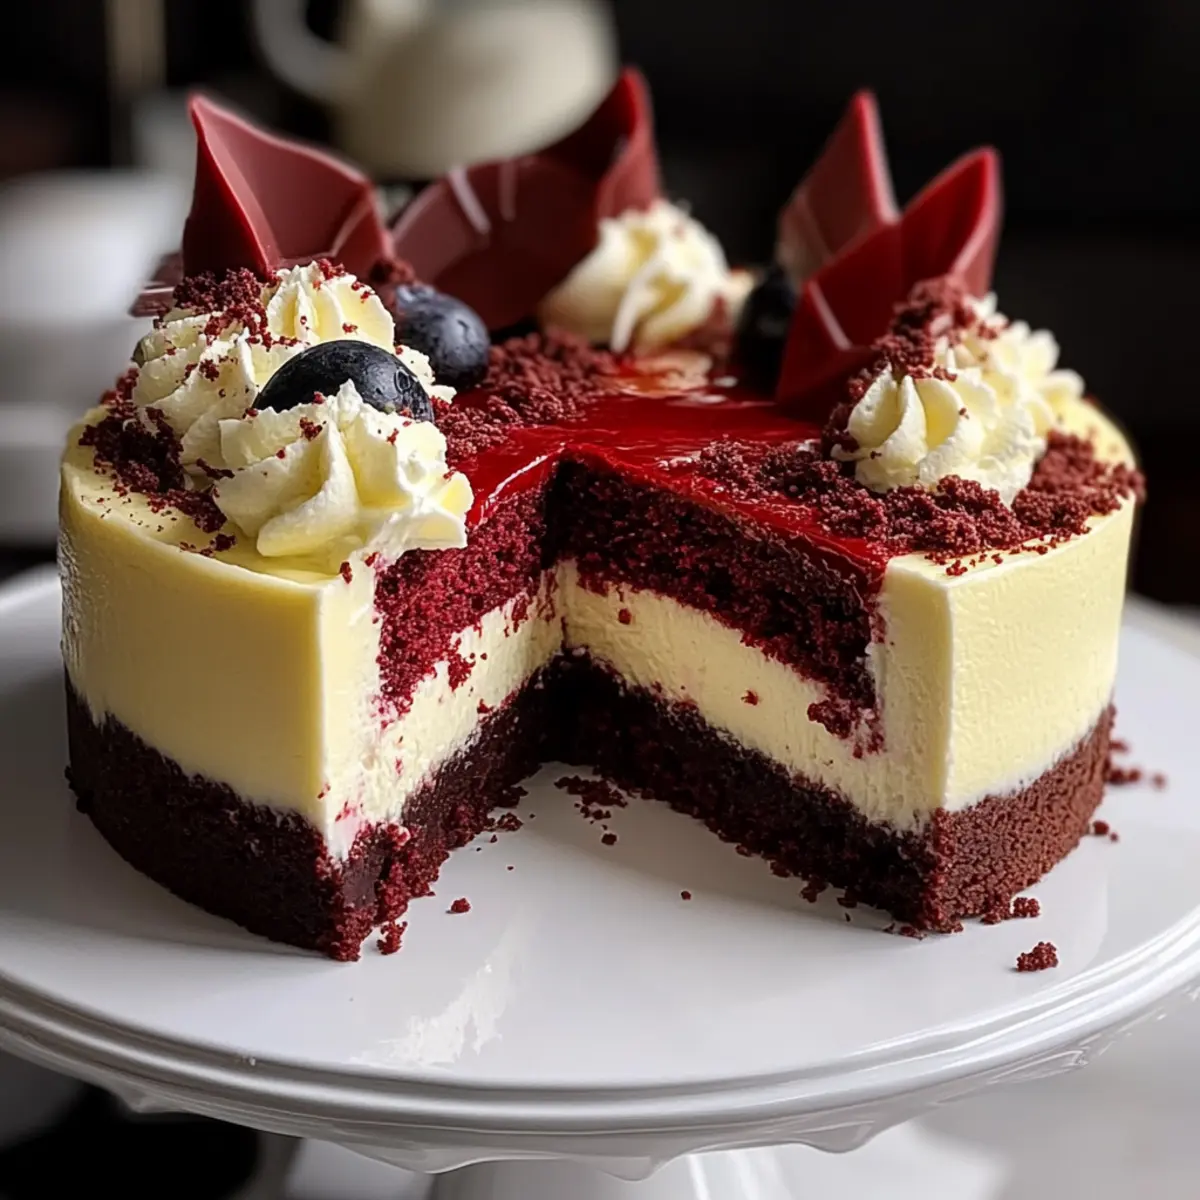
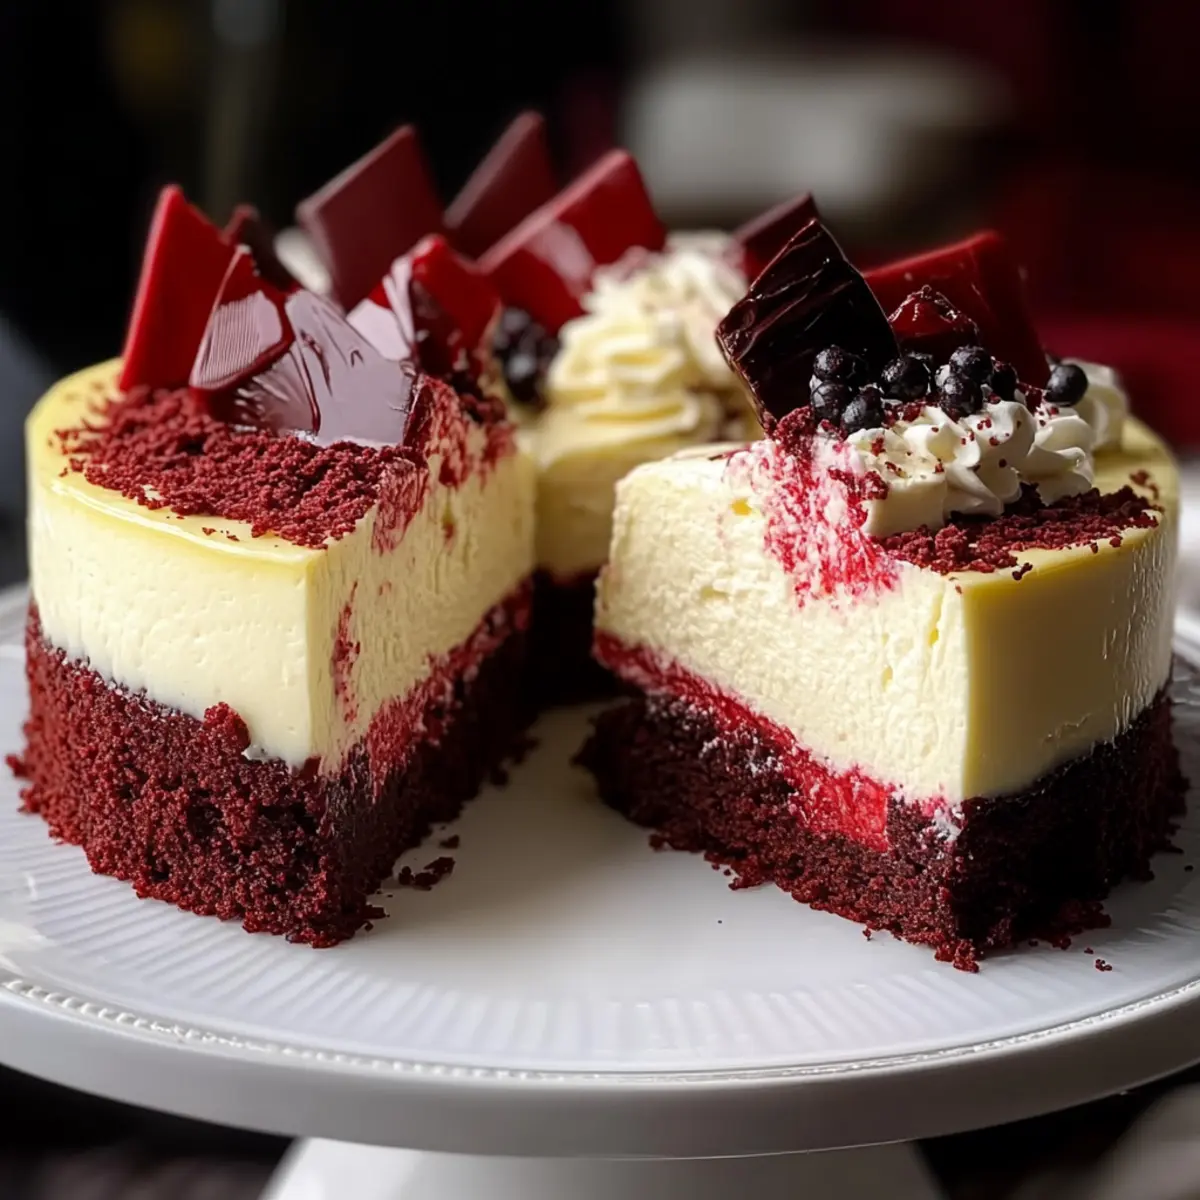
Standing in my kitchen, I couldn’t help but feel a rush of excitement as I whipped up The Ultimate Red Velvet Cheesecake. This showstopper dessert is the perfect blend of rich red velvet and creamy cheesecake, a combination that transforms any occasion into a celebration. What I love most about this recipe is how effortlessly it becomes the star of the table, with the vibrant colors and tantalizing flavors that promise to impress your guests. Plus, it’s customizable—feel free to add your twist to the classic flavors! Whether you’re celebrating a special event or simply indulging on a weekend, this cheesecake is a delightful escape from fast food and a testament to the love of homemade desserts. Are you ready to create a masterpiece that will leave everyone asking for seconds? Let’s dive in!
Why is Red Velvet Cheesecake a Must-Try?
Decadent Layers: The perfect combination of a rich red velvet crust and creamy cheesecake filling creates a flavor profile that is simply irresistible.
Eye-Catching Appeal: Its striking appearance makes this cheesecake a stunning centerpiece at any gathering, guaranteed to grab attention and spark conversation.
Customizable Delight: Switch up the flavors by adding almond extract or chocolate chips for a fun twist, making it your own!
Effortless Baking: While it looks impressive, the process is straightforward, allowing both novice bakers and seasoned chefs to shine.
Crowd-Pleasing Dessert: A guaranteed hit for birthdays, holidays, and celebrations, similar to a show-stopping Sugar Cookie Cheesecake and other classics. You simply can’t go wrong with this delightful treat!
Red Velvet Cheesecake Ingredients
For the Red Velvet Crust
- All-Purpose Flour – Provides the structure for the crust; sift for a lighter texture.
- Cocoa Powder – Enhances the chocolate flavor; use unsweetened for the best results.
- Granulated Sugar – Sweetens the crust, balancing flavors beautifully.
- Buttermilk – Adds moisture and a slight tang; you can substitute with regular milk mixed with vinegar.
- Egg – Binds the ingredients together; helps to achieve the perfect crumb.
- Vegetable Oil – Keeps the crust moist and tender; can be replaced with melted butter.
- Red Food Coloring – Gives that iconic vibrant color; consider using beet juice for a natural alternative.
For the Cheesecake Filling
- Cream Cheese – The star ingredient for creaminess; use full-fat for the best texture.
- Granulated Sugar – Sweetens the filling; adjustments can be made to taste.
- Sour Cream – Adds tang and richness; Greek yogurt is a great substitute.
- Eggs – Creates a rich, custardy texture; add them one at a time for the best blending.
- Vanilla Extract – Infuses flavor; try almond extract for a unique twist.
For the Cream Cheese Frosting
- Cream Cheese – Provides the creamy base for the frosting; don’t skip on quality.
- Powdered Sugar – Sweetens and thickens the frosting; sift before using to avoid lumps.
- Butter – Adds richness; can be replaced with margarine if needed.
- Vanilla Extract – Enhances flavor; optional but recommended for a homemade touch.
For Decorative Toppings
- Fresh Berries – Add a burst of freshness and color to your presentation.
- Chocolate Shavings – Elevate the dessert’s look and add extra chocolate flavor.
- Sprinkles – Fun and festive; perfect for celebrations and special occasions.
Feel free to mix and match these ingredients to create your perfect Red Velvet Cheesecake masterpiece!
Step‑by‑Step Instructions for The Ultimate Red Velvet Cheesecake
Step 1: Prepare Red Velvet Crust
Preheat your oven to 350°F (175°C). In a mixing bowl, whisk together sifted all-purpose flour, cocoa powder, and granulated sugar until well combined. Create a well in the center and mix in buttermilk, vegetable oil, and the egg until smooth. Pour this luscious batter into a greased springform pan and bake for 25-30 minutes, or until a toothpick inserted in the center comes out clean and the edges are firm.
Step 2: Make Cheesecake Filling
While the crust cools, prepare the cheesecake filling. In a large bowl, beat softened cream cheese and granulated sugar until creamy and smooth, about 3-4 minutes. Add in eggs one at a time, mixing thoroughly after each addition. Finally, stir in sour cream and vanilla extract until well blended. Pour this creamy filling over your cooled red velvet crust, smoothing the top with a spatula.
Step 3: Bake the Cheesecake
Turn the oven down to 325°F (160°C). To help prevent cracking, place a shallow dish of water on a lower rack in the oven as you bake the cheesecake. Bake the cheesecake for 55-65 minutes; it should have a slightly wobbly center. When done, turn off the oven, crack the door open, and let the cheesecake cool slowly for one hour, which further helps set the texture.
Step 4: Chill and Set
Once the cheesecake has cooled, transfer it to the fridge and chill for at least 4 hours, or preferably overnight. This allows the flavors to meld beautifully and enhances the creamy texture of your Ultimate Red Velvet Cheesecake. Before serving, carefully run a knife around the edge of the pan to help release it without damage.
Step 5: Prepare and Assemble Toppings
While your cheesecake is chilling, whip up the cream cheese frosting by beating together softened cream cheese, butter, and powdered sugar until fluffy. Once the cheesecake is completely chilled, spread an even layer of the frosting on top. Feel free to get creative with decorative toppings; fresh berries, chocolate shavings, or colorful sprinkles add a delightful touch for a stunning presentation!
Step 6: Serve and Enjoy
Slice your irresistible Red Velvet Cheesecake into generous pieces and serve chilled. Garnish each slice with additional decorative toppings if desired. This decadent dessert is perfect for celebratory occasions or simply as a treat to enjoy with loved ones—each bite promises a delightful blend of creamy cheesecake and moist red velvet!
Make Ahead Options
These Ultimate Red Velvet Cheesecakes are fantastic for busy home cooks looking to save time! You can prepare the red velvet crust up to 24 hours in advance; simply store it wrapped tightly in plastic wrap at room temperature. Additionally, you can make the creamy cheesecake filling a day ahead and refrigerate it in an airtight container. This allows the flavors to meld beautifully, enhancing the taste. When you’re ready to serve, assemble the cheesecake by pouring the cheesecake filling over the cooled crust and baking it. After baking, let it chill for at least 4 hours or overnight, ensuring it stays just as delicious and creamy for your guests!
What to Serve with The Ultimate Red Velvet Cheesecake
Ready to transform a decadent dessert into a delightful meal experience? Pair your cheesecake creations with these complementary dishes that boost flavor and texture harmony.
-
Fresh Fruit Salad: Bright, refreshing flavors from seasonal fruits balance the rich cheesecake beautifully, adding a splash of color to your plate.
-
Creamy Mashed Potatoes: The velvety texture contrasts nicely with the cheesecake. Their richness creates a comforting vibe for any gathering.
-
Chocolate-Dipped Strawberries: This classic pairing amplifies your dessert’s chocolatey flavors while adding a fun, interactive element to your feast.
-
Crispy Green Salad: A light, crunchy salad introduces a fresh element, cutting through the cheesecake’s richness and enhancing overall enjoyment.
-
Sparkling Lemonade: Serve with this refreshing, zesty drink to cleanse the palate, making each bite of cheesecake even more delightful.
-
Homemade Whipped Cream: A luscious dollop on top of the cheesecake enhances its creamy allure, perfect for those who crave extra indulgence.
-
Coffee or Espresso: The bold flavors of coffee bring out the best in the cheesecake, making for a cozy, satisfying conclusion to any meal.
Red Velvet Cheesecake Variations
Get ready to make this delightful dessert even more special with a few creative touches that enhance its charm and flavor!
-
Nutty Twist: Add toasted pecans or walnuts into the red velvet layer for a delightful crunch. The nuttiness pairs beautifully with the creamy cheesecake.
-
Decadent Chocolate: Mix in chocolate chips into the cheesecake filling for a richer experience. Each slice will be a surprise bliss with melty pockets of chocolate.
-
Creamy Fruit: Top the cheesecake with a layer of whipped cream mixed with fresh strawberries or raspberries. This not only adds a pop of color but also a refreshing taste.
-
Almond Joy: Substitute almond extract for vanilla for a delicious and aromatic flavor twist. The hint of nuttiness adds another layer of complexity you’ll love.
-
Fusion with Citrus: Incorporate lemon or orange zest into your cheesecake mixture for a bright, zesty contrast. The citrus will enhance the overall flavor, making it more adventurous.
-
Vegan Version: Replace cream cheese with a vegan substitute and use ground flaxseed as an egg replacement for a plant-based version of this classic dessert.
-
Spiced Up: Add a pinch of cinnamon or nutmeg to the crust or filling for a warm, spicy depth. It brings a cozy warmth that complements the sweet flavors nicely.
-
For those who crave creativity, check out this fantastic Pistachio Mushroom Cheesecake for a unique twist that’ll certainly impress at your next gathering!
Expert Tips for Red Velvet Cheesecake
-
Water Bath Magic: Use a water bath during baking to prevent cracking. This helps maintain the cheesecake’s smooth texture for a flawless finish.
-
Cool Slowly: Allow the cheesecake to cool gradually in the oven with the door ajar for an hour. This prevents temperature shock that can lead to cracks.
-
Chill Thoroughly: Give your Red Velvet Cheesecake ample chilling time—at least 4 hours or overnight. This enhances flavor and helps it set perfectly.
-
Quality Ingredients: Always opt for high-quality cream cheese and fresh ingredients. This elevates the overall taste and creamy texture of your dessert.
-
Fix Cracks Easily: If cracks do appear, don’t fret! Use cream cheese frosting to cover them up—it’s a simple fix to keep your cheesecake looking beautiful.
How to Store and Freeze Red Velvet Cheesecake
Fridge: Store your Red Velvet Cheesecake in the refrigerator, covered tightly with plastic wrap or in an airtight container, for up to 5 days. This keeps it fresh while maintaining its creamy texture.
Freezer: To freeze, wrap individual slices or the whole cheesecake securely in plastic wrap and aluminum foil. It can be frozen for up to 2 months. Thaw in the fridge overnight before serving.
Make-Ahead: You can prepare the cheesecake one to two days in advance for the best flavor melding. Just remember to chill it in the refrigerator until you’re ready to serve.
Reheating: If desired, let your cheesecake sit at room temperature for about 30 minutes before serving to enhance its creamy goodness. Enjoy the delightful combination of flavors!
Red Velvet Cheesecake Recipe FAQs
How do I choose ripe ingredients for my Red Velvet Cheesecake?
Absolutely! When selecting ingredients, fresh and high-quality components make all the difference. For the red velvet crust, ensure your eggs are fresh and your buttermilk is within its expiry date for the best moisture. If using beets for coloring, look for firm, blemish-free beets.
What’s the best way to store my Red Velvet Cheesecake?
You can store your Red Velvet Cheesecake in the refrigerator, covered tightly with plastic wrap or in an airtight container, for up to 5 days. Keeping it chilled helps maintain its creamy texture while preserving the flavors.
Can I freeze Red Velvet Cheesecake, and if so, how?
Yes, you can freeze it! Wrap your cheesecake securely in plastic wrap and then in aluminum foil to prevent freezer burn. Individual slices can also be wrapped separately. It will maintain its quality for up to 2 months. When you’re ready to enjoy, simply thaw it in the fridge overnight.
What should I do if my cheesecake cracks during baking?
Very! If cracks appear, they can usually be covered with your delicious cream cheese frosting for a seamless look. To prevent cracking in the future, consider using a water bath during baking. This method helps stabilize the temperature and keeps the cheesecake moist.
Are there any dietary considerations I should keep in mind?
It’s important to note that this Red Velvet Cheesecake contains dairy and gluten, making it unsuitable for those with lactose intolerance or gluten sensitivity. Additionally, if you’re providing slices to guests or family members with dietary restrictions, you might want to have alternative desserts on hand.
Can I make this cheesecake ahead of time?
Absolutely! In fact, I recommend preparing your Red Velvet Cheesecake one to two days in advance. This allows the flavors to meld beautifully. Once chilled, just store it covered in the fridge, and it will be ready to shine at your gathering!
Irresistible Red Velvet Cheesecake: A Celebration in Every Bite
Ingredients
Equipment
Method
- Preheat oven to 350°F (175°C). Whisk together flour, cocoa powder, and sugar. Mix in buttermilk, oil, and egg. Pour into greased pan and bake for 25-30 minutes.
- Ensure a toothpick comes out clean before removing from oven.
- Beat cream cheese and sugar until creamy. Add eggs one at a time, mixing thoroughly before each addition. Stir in sour cream and vanilla.
- Pour filling over cooled crust and smooth the top.
- Lower oven temperature to 325°F (160°C) and bake cheesecake for 55-65 minutes to slightly wobbly center.
- Cool in the oven for one hour with door cracked.
- Chill cheesecake in the fridge for at least 4 hours or overnight.
- Run a knife around the edge before serving.
- Whip cream cheese, butter, and powdered sugar until fluffy. Spread evenly over chilled cheesecake.
- Decorate with fresh berries, chocolate shavings, or sprinkles.
- Slice and serve chilled, garnishing with additional toppings as desired.
Leave a Reply