
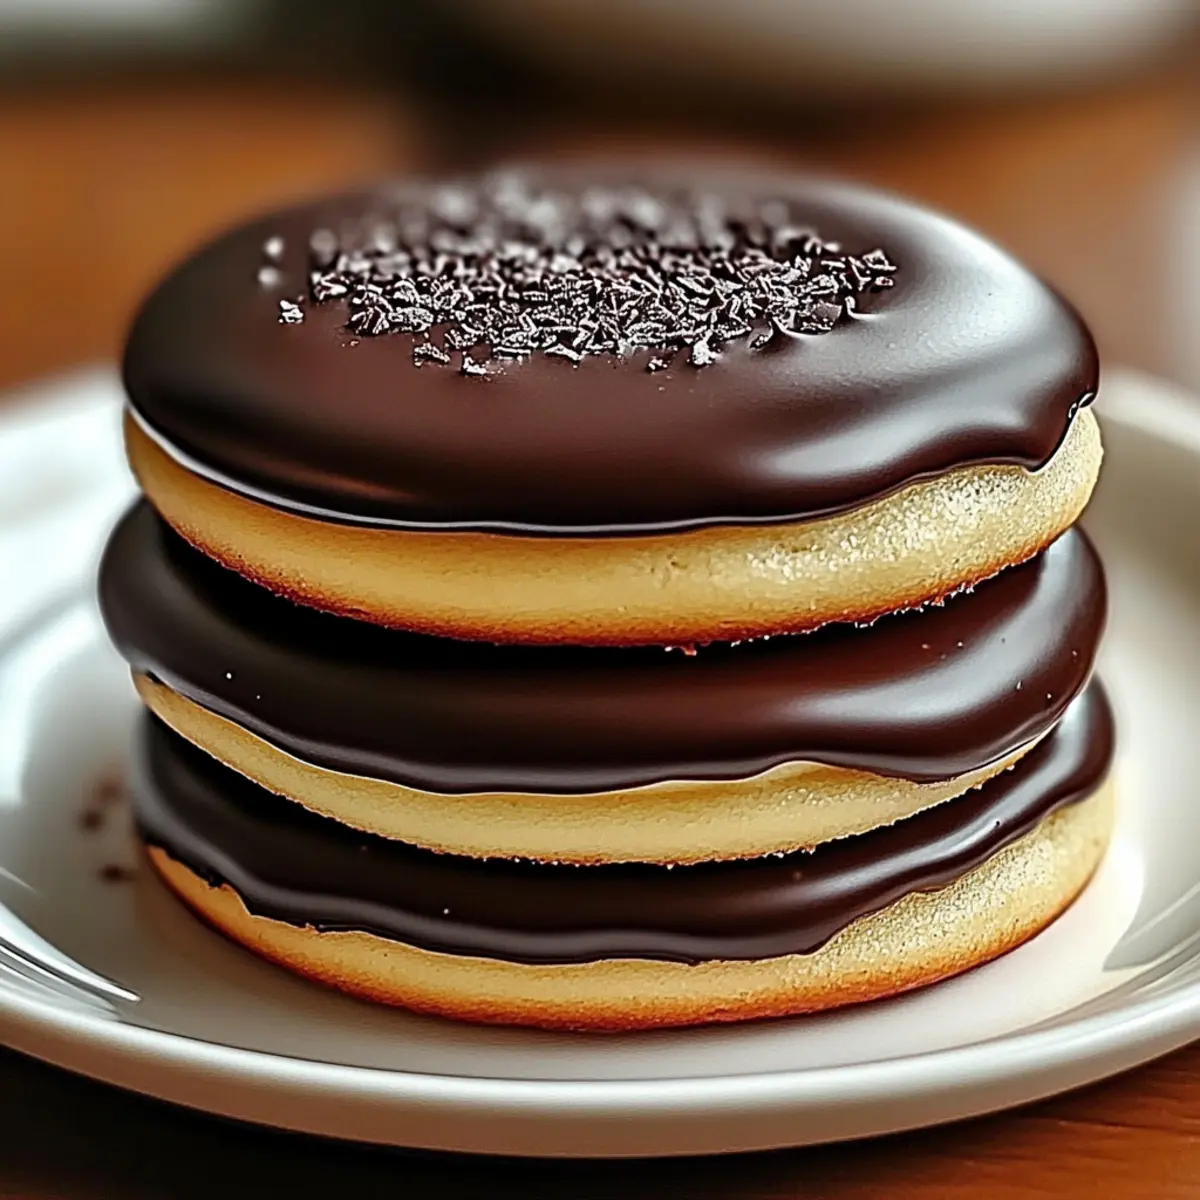
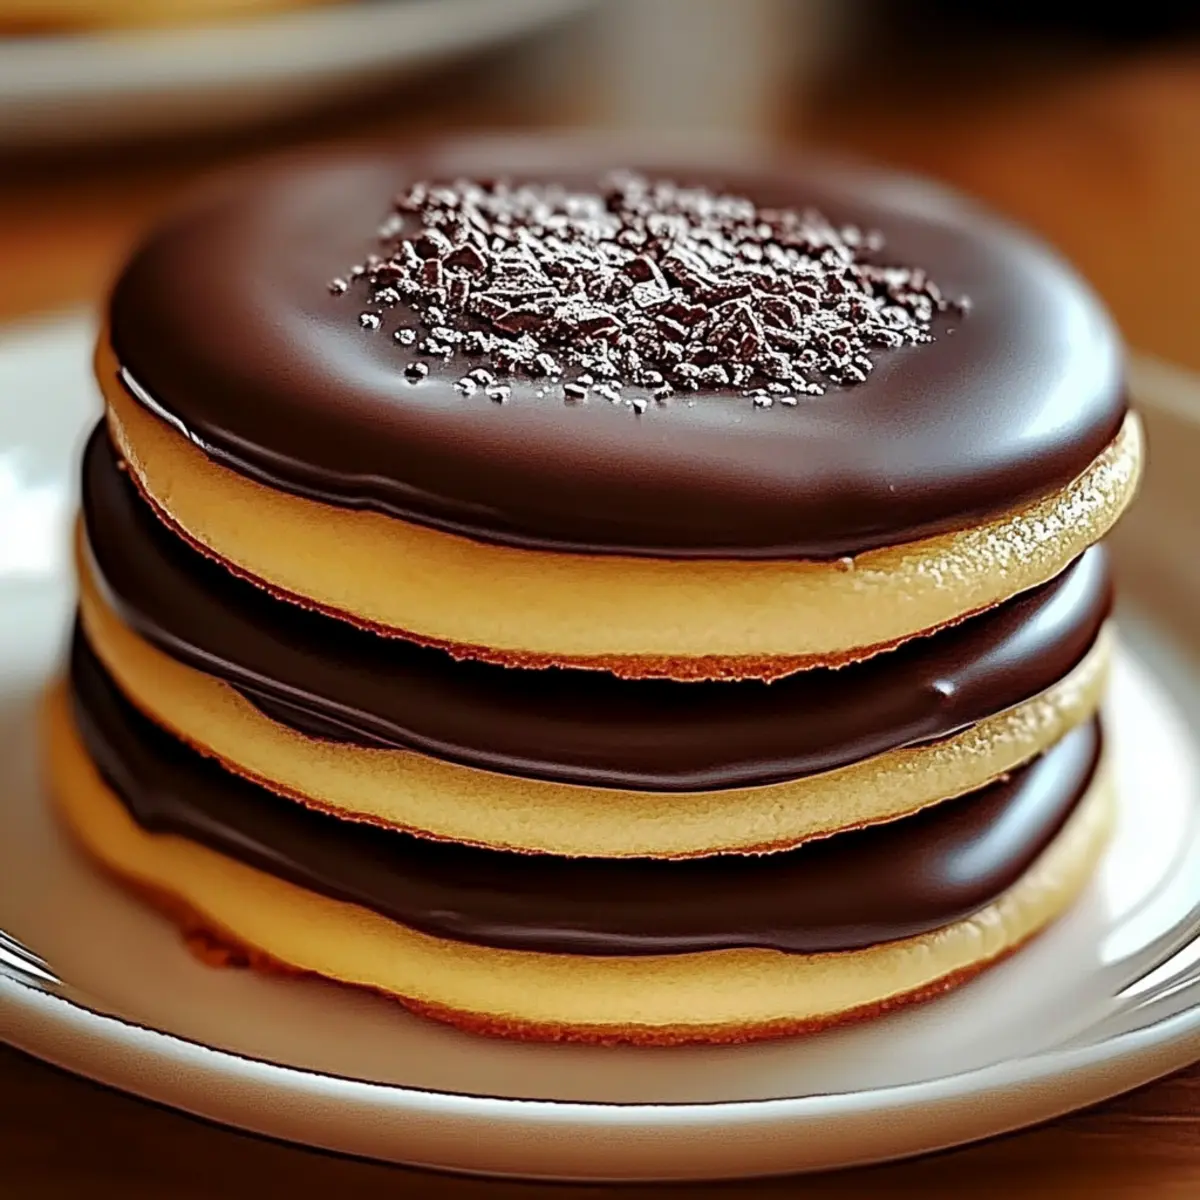
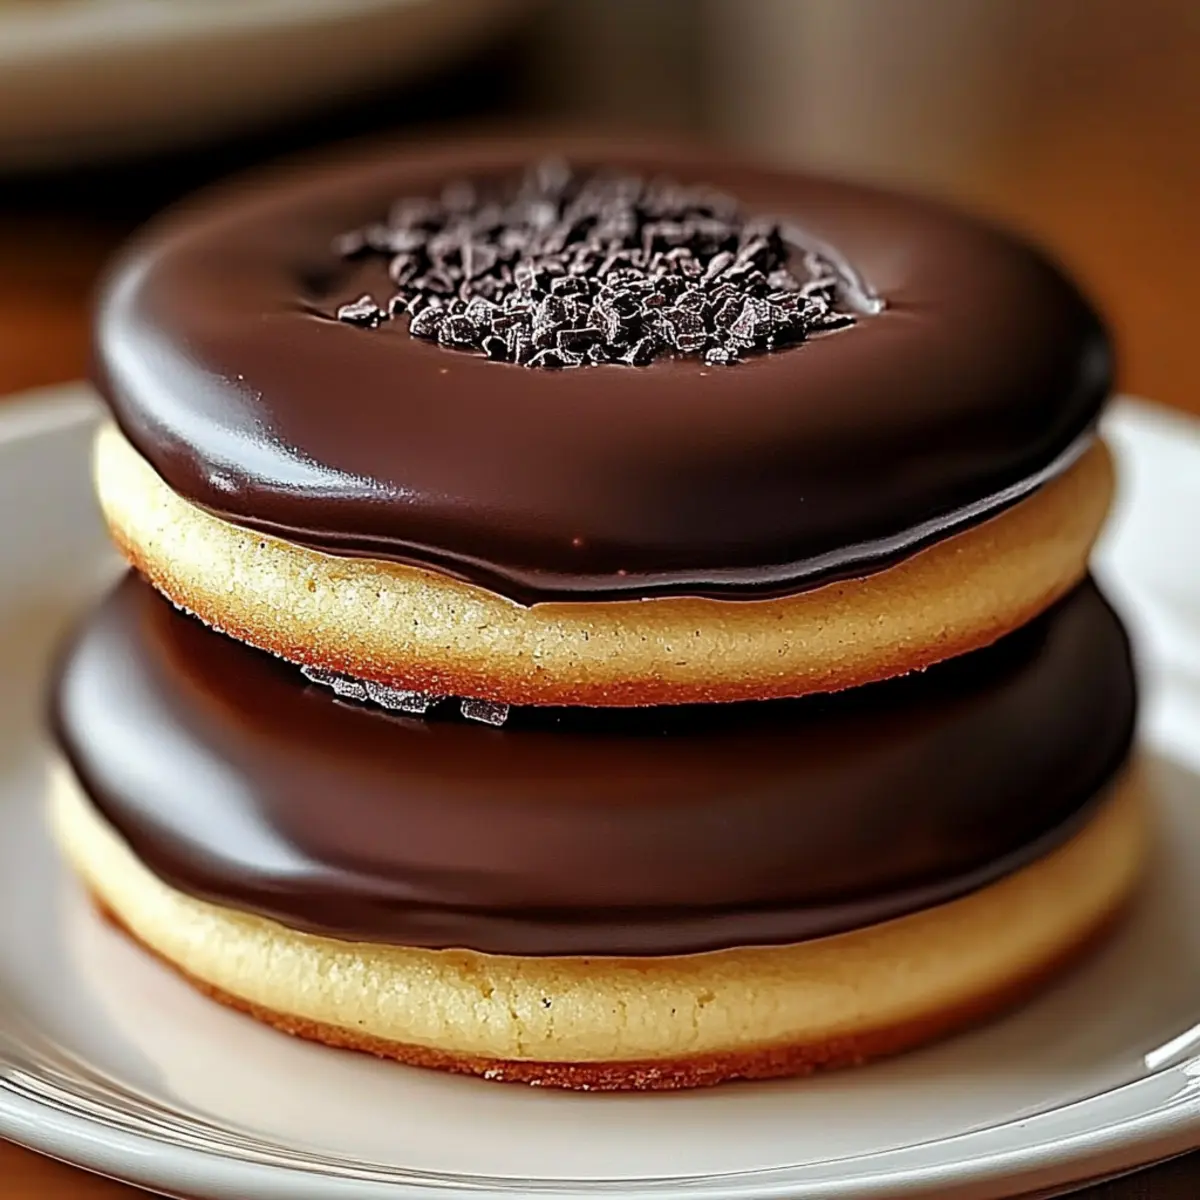
As I stood in the kitchen, I couldn’t shake the craving for something indulgent—a sweet treat that would bring comfort and nostalgia. That’s when I decided to reinvent a classic: Boston Cream Pie Cookies. This delightful recipe transforms the beloved Boston Cream Pie into a fun, bite-sized cookie that’s perfect for any occasion. With their soft, buttery texture laced with creamy filling and drizzled in rich chocolate glaze, these cookies aren’t just a crowd-pleaser; they also come together in a snap, making them an ideal choice for those busy weeknight cravings or last-minute gatherings. Curious about how to whip up these deliciously unique goodies? Let’s dive into the world of Boston Cream Pie Cookies!
Why are these cookies a must-try?
Indulgent Delights: Sink your teeth into soft, buttery cookies that bring the creamy goodness of Boston Cream Pie straight to your hands.
Quick and Easy: With a simple process, you can whip these up with just a few ingredients—perfect for busy weekdays or unexpected guests.
Versatile Treat: Top them with your choice of glaze—go for rich chocolate, or mix it up with white chocolate for a fun twist.
Nostalgic Appeal: These cookies capture the essence of the classic dessert, making them a hit with both kids and adults alike.
Make Ahead Magic: Bake and store them in an airtight container, enjoying the deliciousness all week long—just assemble before serving! If you’re in the mood for another classic, check out my delicious Pumpkin Pie Tacos for a seasonal twist!
Boston Cream Pie Cookies Ingredients
For the Cookies
- Unsalted Butter – Adds richness and moisture to the cookies; substitute with margarine if needed.
- Granulated Sugar – Provides sweetness and contributes to cookie structure, ensuring a delightful bite.
- Large Eggs – Binds the ingredients together, adding moisture; a flax egg can serve as a vegan alternative.
- Vanilla Extract – Enhances flavor; for the best taste, use pure vanilla extract.
- All-Purpose Flour – Forms the foundation of the cookies; can be substituted with a gluten-free flour blend for a tasty alternative.
- Baking Powder – Leavens the cookies; ensure it’s fresh for optimal rise.
- Baking Soda – Helps cookies rise and works in harmony with the cream filling’s acidity.
- Salt – Balances sweetness and is essential for enhancing overall flavor.
For the Pastry Cream Filling
- Heavy Cream – Used to create a luscious pastry cream filling; evaporated milk can work in a pinch.
- Powdered Sugar – Sweetens and thickens the cream filling for that indulgent taste.
For the Chocolate Glaze
- Semi-Sweet Chocolate Chips – Provides a rich glaze on top; dark chocolate chips can be used for a more decadent flavor.
- Vegetable Oil – Used to thin the chocolate for the glaze; coconut oil can add a delightful hint of flavor.
Whether you’re a seasoned chef or a budding home cook, these Boston Cream Pie Cookies are sure to become your next favorite indulgent treat!
Step‑by‑Step Instructions for Boston Cream Pie Cookies
Step 1: Prepare Cookie Dough
Begin by creaming together 1 cup of softened unsalted butter and 1 cup of granulated sugar in a large mixing bowl until light and fluffy, about 3-5 minutes. Next, beat in 2 large eggs, one at a time, along with 2 teaspoons of vanilla extract until fully incorporated. In a separate bowl, whisk together 2 cups of all-purpose flour, 1 teaspoon of baking powder, 1/2 teaspoon of baking soda, and 1/4 teaspoon of salt. Gradually add the dry ingredients to the wet mixture, mixing until just combined. Chill the dough for 30 minutes to firm up.
Step 2: Make Cream Filling
While the cookie dough chills, prepare the luscious pastry cream filling. In a mixing bowl, whip together 1 cup of heavy cream and 1 cup of powdered sugar using an electric mixer. Whip the mixture until soft peaks form, which should take about 3-5 minutes. Add in an additional teaspoon of vanilla extract for flavor and gently fold until well combined. Set aside in the refrigerator to keep it cool and fluffy until you’re ready to assemble the Boston Cream Pie Cookies.
Step 3: Bake Cookies
Preheat your oven to 350°F (175°C) and line two baking sheets with parchment paper. Once the dough is chilled, use a cookie scoop to portion out the dough, placing the mounds on the prepared baking sheets about 2 inches apart. Bake in the preheated oven for 12-15 minutes, or until the edges turn golden and the centers are slightly soft. Allow the cookies to cool on the baking sheets for 5 minutes before transferring them to wire racks to cool completely.
Step 4: Prepare Chocolate Glaze
To make the shiny chocolate glaze, combine 1 cup of semi-sweet chocolate chips and 1 tablespoon of vegetable oil in a microwave-safe bowl. Heat in the microwave in 30-second intervals, stirring in between, until the chocolate is melted and smooth. This should take about 1-2 minutes total, keeping an eye out to avoid overheating. Once fully melted and homogenous, let the glaze cool slightly before use.
Step 5: Assemble Cookies
Now it’s time to bring your Boston Cream Pie Cookies together! Take one cookie and spread a generous dollop of the whipped cream filling on its underside. Place another cookie on top to create a sandwich. Repeat for all cookies, ensuring the filling is evenly distributed. Drizzle the chocolate glaze over the assembled cookies or dip the tops into the glaze for a beautiful finish. Let the glaze set before serving to enjoy these delightful treats!
Expert Tips for Boston Cream Pie Cookies
-
Temperature Matters: Ensure your butter is at room temperature; this makes creaming it with sugar easier, resulting in a lighter cookie.
-
Don’t Overmix: Gently mix your cookie dough until ingredients are just combined to keep them tender and avoid a tough texture.
-
Cool Completely: Allow cookies to fully cool before adding the chocolate glaze; this prevents melting and ensures a beautiful finish.
-
Use a Piping Bag: For a neat filling, consider using a piping bag to sandwich the cream between the cookies, creating a professional look.
-
Storage Secrets: Keep your Boston Cream Pie Cookies in an airtight container for up to a week; assemble them just before serving to maintain the cream’s freshness.
Boston Cream Pie Cookies Variations
Feel free to personalize your Boston Cream Pie Cookies with these fun twists that will elevate your cookie experience!
-
Gluten-Free: Substitute all-purpose flour with a gluten-free flour blend for a tasty treat that everyone can enjoy.
This way, those with dietary restrictions can fully indulge without missing out on flavor or texture. -
Vegan: Use coconut oil in place of butter, and opt for a flax egg to make a dairy-free delight everyone will love.
These swaps keep the essence of the cookies while catering to plant-based eaters! -
Coconut Flavor: Stir in shredded coconut into the pastry cream for an added tropical twist.
The combination of coconut and chocolate is a match made in dessert heaven that will transport you to a sunny paradise. -
Fruit Filling: Swap out the pastry cream for a fruit-flavored filling, such as strawberry or raspberry, for a refreshing variation.
This fruity twist brightens the cookies and adds a splash of color to your dessert table! -
Chocolate Cookie Base: Replace part of the flour with cocoa powder for a rich chocolate cookie base.
Just picture biting into a decadent chocolate cookie, filled with cream and topped with glaze—pure bliss! -
Crunchy Texture: Add chopped nuts or toffee bits into the cookie dough for added crunch and flavor.
That satisfying crunch contrasts beautifully with the soft, creamy filling, creating a delightful texture experience. -
Spiced Cookies: Incorporate warm spices like cinnamon or nutmeg into the dough for a hint of warmth and coziness.
These spices can transform your cookies into a comforting treat, perfect for chilly evenings. -
Dipped Cookies: Instead of drizzling, dip the entire cookie in chocolate glaze for a fully coated experience.
It’s an indulgent way to enjoy the chocolate and ensures every bite is utterly decadent!
With these variations, your Boston Cream Pie Cookies will not only cater to different preferences but also inspire creativity in the kitchen! If you’re in the mood for more delicious ideas, don’t forget to check out my tasty Korean Honey Cookies for another delightful recipe.
Make Ahead Options
These Boston Cream Pie Cookies are perfect for meal prep enthusiasts! You can prepare the cookie dough and store it in the refrigerator for up to 24 hours, allowing for easy baking on busy days. Additionally, the pastry cream filling can be made in advance and kept in the fridge for up to 3 days. Just remember to cover it tightly to avoid any drying out. When you’re ready to serve, bake the cookies, and once they’ve cooled completely, assemble them with the pastry cream and drizzle with the chocolate glaze for that irresistible finish. This way, you can enjoy mouthwatering cookies without the last-minute rush!
How to Store and Freeze Boston Cream Pie Cookies
-
Room Temperature: Keep cookies in an airtight container at room temperature for up to 3 days, allowing you to enjoy your homemade treats without refrigeration.
-
Fridge: If you prefer a colder snack, store the filled cookies in the refrigerator for up to 5 days; the pastry cream stays fresh, but the cookies may become firmer.
-
Freezer: For longer storage, freeze unfilled cookies individually wrapped for up to 2 months. Thaw at room temperature and then fill with cream right before serving.
-
Reheating: If desired, gently reheat unfilled cookies in a 300°F oven for 5-7 minutes to restore softness before adding the cream filling. Enjoy every bite of your Boston Cream Pie Cookies!
What to Serve with Boston Cream Pie Cookies?
Elevate your cookie experience with delightful pairings that complement the sweet indulgence of these creamy treats.
-
Vanilla Ice Cream: A scoop of creamy vanilla ice cream brings a cool, velvety contrast to the rich chocolate glaze and luscious cream filling.
-
Coffee or Espresso: The deep, robust flavors of coffee enhance the sweetness of the cookies, making each bite even more satisfying and indulgent.
-
Fresh Berries: Juicy strawberries or raspberries add a refreshing burst of tartness that cuts through the richness of the cookie filling, providing balance to the palate.
-
Whipped Cream: A dollop of freshly whipped cream serves as a light, airy counterpart to the dense cookies, amplifying their decadent nature without heavying up the experience.
-
Chocolate Milkshake: For a nostalgia trip, pairing these cookies with a frosty chocolate milkshake makes for a delightful treat, amplifying the nostalgic flavors of childhood desserts.
-
Mint Tea: A warm cup of mint tea soothes the senses and refreshes the palate, perfectly balancing the sweet tastes of the cookies with its herbal notes.
-
Caramel Sauce: Drizzle warm caramel over the cookies before serving for an extra layer of sweetness that pairs beautifully with the chocolate glaze and creamy filling.
These pairings guarantee a complete and delightful dessert experience, leaving everyone at your table asking for more!

Boston Cream Pie Cookies Recipe FAQs
What type of butter should I use for the cookies?
Absolutely! I recommend using unsalted butter for the best flavor and texture. It adds richness and moisture to the cookies. If you’re in a pinch, margarine can also be used as a substitute, but the flavor may differ slightly.
How should I store Boston Cream Pie Cookies?
You can keep your cookies in an airtight container at room temperature for up to 3 days. If you’re opting for a chilled treat, they can be stored in the refrigerator for up to 5 days, but note that the cookies may become a bit firmer. Just remember to assemble the filled cookies just before serving to maintain that luscious creaminess!
Can I freeze Boston Cream Pie Cookies?
Certainly! For freezing, I recommend freezing the unfilled cookies individually wrapped in plastic wrap or placed in a freezer-safe bag for up to 2 months. When you’re ready to enjoy them, simply thaw them at room temperature, and fill with cream right before serving for the best texture and taste.
What if my cookies spread too much while baking?
Very common! If you find that your cookies spread excessively, ensure that your butter is sufficiently chilled before mixing, and try chilling the dough for a bit longer before baking. Additionally, check that your baking powder is fresh, as expired leavening agents can affect how your cookies rise and spread.
Are there any dietary considerations for the ingredients?
I often make these cookies with different dietary needs in mind! For a vegan option, you can replace the eggs with a flax egg (1 tablespoon of ground flaxseed mixed with 2.5 tablespoons of water, allowed to sit until gel-like). Also, for gluten-free alternatives, use a gluten-free flour blend instead of all-purpose flour without compromising the deliciousness of the Boston Cream Pie Cookies!
What are some tips for achieving the perfect pastry cream filling?
For the fluffiest cream filling, make sure to whip the heavy cream until soft peaks form, which usually takes about 3-5 minutes. Be careful not to overwhip it, as it can turn grainy. Adding an extra teaspoon of vanilla extract enhances the flavor beautifully. Mixing it gently with your powdered sugar until combined will create a sweet filling that’s simply irresistible!
Boston Cream Pie Cookies: Your New Favorite Indulgent Treat
Ingredients
Equipment
Method
- Cream together the softened unsalted butter and granulated sugar in a large bowl until light and fluffy, about 3-5 minutes.
- Beat in the large eggs one at a time and then add in the vanilla extract until fully incorporated.
- In a separate bowl, whisk together all-purpose flour, baking powder, baking soda, and salt.
- Gradually add the dry ingredients to the wet mixture, mixing until just combined. Chill the dough for 30 minutes.
- Whip together heavy cream and powdered sugar using an electric mixer until soft peaks form, about 3-5 minutes, adding vanilla extract. Refrigerate until ready to use.
- Preheat oven to 350°F (175°C) and line baking sheets with parchment paper. Portion out chilled dough and place on sheets, 2 inches apart.
- Bake for 12-15 minutes until edges are golden and centers slightly soft. Allow to cool on baking sheets for 5 minutes before transferring to wire racks.
- Combine chocolate chips and vegetable oil in a microwave-safe bowl and heat in intervals until melted and smooth. Let cool slightly.
- Spread cream filling on one cookie and sandwich with another. Drizzle or dip tops in chocolate glaze and let set before serving.
Leave a Reply