
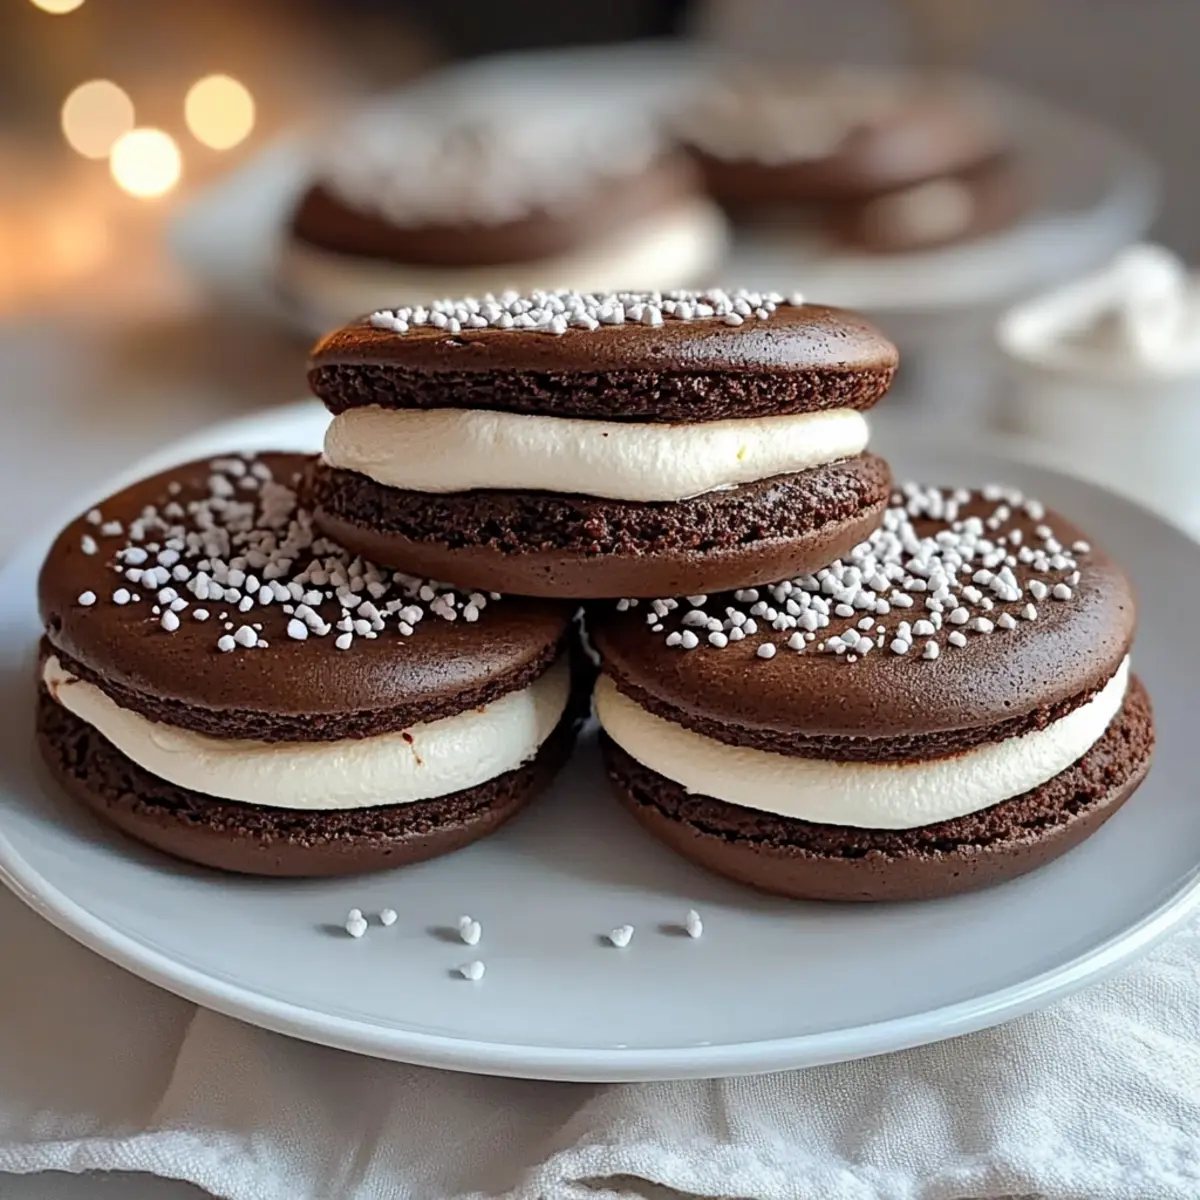
As I pulled a tray of freshly baked Maine Whoopie Pies from the oven, the rich chocolate aroma wafted through my kitchen, instantly transporting me back to childhood bake-offs and family gatherings. This Whoopie Pies recipe perfectly captures that blissful nostalgia, featuring soft, pillowy cakes filled with a heavenly light cream. Not only are these delightful treats quick to prepare, they’re also incredibly versatile—ideal for customizing fillings to suit your taste or dietary needs, including gluten-free options! Whether you’re hosting a festive gathering or simply craving something sweet, these whoopie pies are sure to bring smiles all around. So, are you ready to whip up some delicious memories?
Why Are Whoopie Pies So Irresistible?
Decadent, these Whoopie Pies are a chocolate lover’s dream, with their rich cocoa flavor melting into a fluffy cream filling. Quick to make, you’ll enjoy having a delightful treat ready in no time. Versatile at heart, customize your filling to match your preferences—consider a lighter cream or even a gluten-free alternative! Nostalgic charm shines through each bite, bringing back memories of family gatherings. Perfect with a glass of milk or a warm drink, these delightful pies are bound to impress at any event or as a cozy afternoon snack. If you’re looking for other comforting recipes, check out this Apple Cider Potatoes and Only Goulash!
Whoopie Pies Recipe Ingredients
• Here’s what you need to create these delightful Whoopie Pies!
For the Cake
• All-Purpose Flour – Provides structure to the cakes; for a gluten-free version, use gluten-free 1:1 baking flour instead.
• Unsweetened Cocoa Powder – Adds that rich chocolate flavor we all crave.
• Baking Powder – Ensures the cakes rise and become light and fluffy.
• Salt – Balances the sweetness, enhancing the overall flavor.
• Granulated Sugar – Sweetens the mixture beautifully.
• Eggs – Adds moisture and helps bind the ingredients together.
• Milk – Contributes moisture and improves the batter’s texture.
• Vanilla Extract – Enhances the overall flavor profile of the cakes.
• Unsalted Butter – Provides richness and moisture; make sure it’s softened for easier mixing.
For the Filling
• Heavy Cream – Creates a luscious, rich cream filling; you can use milk for a lighter option, though it won’t be as rich.
• Marshmallow Fluff – Delivers that sweet and fluffy filling we adore; consider using store-bought marshmallow cream as a convenient alternative.
With these delightful ingredients in hand, you’re just a step away from whipping up some delightful Whoopie Pies!
Step‑by‑Step Instructions for Whoopie Pies Recipe
Step 1: Preheat the Oven
Begin by preheating your oven to 350°F (175°C) and prepare two baking sheets by lining them with parchment paper. This will ensure the Whoopie Pies bake evenly and release easily once done. While your oven warms up, gather all your ingredients so everything is ready for mixing.
Step 2: Mix Dry Ingredients
In a large mixing bowl, combine all-purpose flour, unsweetened cocoa powder, baking powder, and salt. Whisk them together thoroughly to ensure there are no clumps and that the baking powder is evenly distributed. This step sets the foundation for the rich chocolate flavor in your Whoopie Pies.
Step 3: Cream Butter and Sugar
In a separate bowl, cream the granulated sugar and softened unsalted butter together using an electric mixer on medium speed. Mix until the mixture is light and fluffy, about 2–3 minutes. This will introduce air into the batter, creating a delightful, fluffy texture for your Whoopie Pies.
Step 4: Add Eggs and Wet Ingredients
Once your butter and sugar are well combined, beat in the eggs one at a time, followed by the vanilla extract and milk. Mix until everything is well incorporated and a smooth batter forms. The wet ingredients will help create a rich and moist Whoopie Pie cake.
Step 5: Combine Wet and Dry Mixtures
Gradually add the dry ingredients to the wet mixture, stirring gently with a spatula or wooden spoon until just combined. Avoid overmixing, as that can make your Whoopie Pies tough; you want a soft and tender batter filled with delightful chocolate goodness.
Step 6: Scoop the Batter
Using a cookie scoop or a spoon, drop rounded tablespoons of batter onto the prepared baking sheets, leaving enough space between each dollop to allow for spreading. Aim for uniform sizes to ensure even baking, creating that signature Whoopie Pie look once they’re done.
Step 7: Bake the Whoopie Pies
Place the baking sheets in the preheated oven and bake for 10–12 minutes, or until the cake springs back lightly when pressed. Keep an eye on them, as you want them to be fluffy and soft, not overbaked. The delightful aroma of chocolate will fill your kitchen as they bake.
Step 8: Cool the Cakes
Once baked, carefully remove the Whoopie Pies from the oven and let them cool on the baking sheets for about 5 minutes. After that, transfer them to a wire rack to cool completely. This cooling process is essential for a perfect structure and texture when they are filled.
Step 9: Prepare the Filling
While your cakes cool, whip together the heavy cream and marshmallow fluff in a mixing bowl until smooth and fluffy. Using an electric mixer on medium speed will help achieve the right consistency, making the filling light and airy—perfect for your Whoopie Pies.
Step 10: Assemble the Whoopie Pies
Once the cakes are completely cool, turn half of them flat side up. Spread or pipe the creamy filling onto the flat side of each cake and then sandwich with another cake, flat side down. Press gently to ensure the filling spreads to the edges, creating that classic Whoopie Pie look.
Step 11: Serve and Store
Your Whoopie Pies are now ready to share and enjoy! They can be served immediately or stored in an airtight container at room temperature for up to 5 days. For best freshness, refrigerate them for up to a week—if they last that long!
Whoopie Pies Recipe Variations
Feel free to get creative and make this Whoopie Pies recipe your own with these delicious twists!
-
Gluten-Free: Use a gluten-free 1:1 baking flour instead of all-purpose flour for a delightful gluten-free version.
-
Lighter Filling: Swap heavy cream for lighter whipping cream for a filling that’s a bit less rich, yet still delicious.
-
Flavor Twists: Add extracts like almond or mint to the filling for an exciting twist that elevates the classic taste.
-
Add-ins: Sprinkle some mini chocolate chips or colorful sprinkles into the filling to add fun and delightful bursts of flavor.
-
Nutty Crunch: Incorporate finely chopped nuts, such as walnuts or pecans, into the filling for a satisfying crunch and added texture.
-
Fruit-Flavored Filling: Blend in fruit purees, like raspberry or strawberry, with the marshmallow fluff for a refreshing take on the filling.
-
Cocoa Powder Swap: Experiment with white cocoa powder in place of unsweetened cocoa powder for a unique flavor twist on the cakes themselves.
-
Spicy Kick: For those who love a bit of heat, consider adding a pinch of cayenne or chili powder to the cake batter for an unexpected zing.
Discover more ways to make your meals special by checking out this delightful Banitsa Bulgarian Breakfast or refreshing Crunchy Ranch Cucumber dish!
Expert Tips for Whoopie Pies Recipe
-
Room Temperature Butter: Make sure your unsalted butter is at room temperature for easy creaming, creating a lighter texture in your Whoopie Pies.
-
Don’t Overmix: Combine the wet and dry ingredients until just incorporated. Overmixing can lead to dense Whoopie Pies instead of the light, fluffy treat you desire.
-
Scoop Evenly: Use a cookie scoop for uniform batter portions; this helps ensure each Whoopie Pie bakes evenly, resulting in consistent texture and taste.
-
Watch the Baking Time: Keep a close eye on your Whoopie Pies while baking. They can overbake quickly; look for a soft spring-back when gently pressed.
-
Cool Completely: Allow the cakes to cool fully before assembling. Filling warm cakes can lead to a runny filling and messy Whoopie Pies.
Storage Tips for Whoopie Pies Recipe
Room Temperature: Keep your Whoopie Pies in an airtight container at room temperature for up to 5 days to maintain their soft texture and flavor.
Fridge: If you want to extend freshness, refrigerate the Whoopie Pies for up to a week. Just remember to seal them properly to prevent drying out.
Freezer: For longer storage, freeze the Whoopie Pies individually wrapped in plastic wrap and then placed in a freezer bag for up to 3 months. Thaw at room temperature before enjoying.
Reheating: If you’d like to bring back some softness, microwave a Whoopie Pie for about 10-15 seconds. This will make the cake tender again!
Make Ahead Options
These Whoopie Pies are perfect for busy cooks looking to save time during the week! You can prepare the cake components up to 24 hours in advance. Simply bake and cool the cakes, then store them in an airtight container at room temperature. For the filling, whip the heavy cream and marshmallow fluff together just before serving to maintain its light fluffiness. Alternatively, you can mix the filling and refrigerate it for up to 3 days; just remember to give it a quick whisk to restore its texture before using. This way, you’ll have delicious homemade Whoopie Pies ready to delight your family with minimal last-minute effort!
What to Serve with Maine Whoopie Pies
There’s nothing quite like the joy of pairing a sweet treat with comforting sides that elevate your dessert experience.
-
Cold Glass of Milk: A classic companion, milk enhances the chocolatey goodness of whoopie pies, providing a creamy contrast that’s simply irresistible.
-
Rich Hot Chocolate: Indulge in velvety hot chocolate for a cozy pairing, creating a warm and comforting atmosphere for dessert time.
-
Vanilla Ice Cream: The creamy, cool ice cream balances the sweetness, making each bite feel extra luxurious and delightful.
-
Fresh Berry Medley: Bright, tangy berries cut through the richness of the whoopie pies, adding a fresh and vibrant contrast to each decadent bite.
-
Coffee or Espresso: A robust coffee or espresso enhances the chocolate flavor beautifully, offering a delightful lift and balance with every nibble.
-
Fruit Salad: A light and refreshing fruit salad provides a healthy contrast, complementing the rich flavors while adding a burst of freshness to the meal.
-
Cheesecake Bites: For those who can’t resist a little extra sweetness, mini cheesecake bites are a rich and creamy addition, taking your dessert spread to the next level.
-
Chocolate Milkshake: A thick chocolate milkshake creates a retro dessert experience, evoking nostalgic memories alongside your homemade whoopie pies.
-
Caramel Popcorn: Crunchy and sweet, caramel popcorn makes for a playful snack that contrasts the soft texture of the whoopie pies and adds a whimsical touch.
Whoopie Pies Recipe FAQs
What kind of flour should I use for Whoopie Pies?
For traditional Whoopie Pies, all-purpose flour is ideal as it provides the necessary structure. However, if you’re looking for a gluten-free option, I recommend using a gluten-free 1:1 baking flour. This substitution will yield a similar texture and flavor, ensuring everyone can enjoy this delightful treat!
How should I store Whoopie Pies?
Absolutely! To keep your Whoopie Pies fresh and soft, store them in an airtight container at room temperature for up to 5 days. If you want to extend their lifespan, refrigerate them where they will stay good for up to a week. Just make sure to seal them tightly to prevent any drying out—it will help you enjoy those tasty bites longer!
Can I freeze Whoopie Pies?
Yes, you can certainly freeze Whoopie Pies for later enjoyment! Wrap each pie individually in plastic wrap and then place them in a freezer-safe bag. They can be stored in the freezer for up to 3 months. When you’re ready to enjoy, simply thaw them at room temperature for about 1 hour, or microwave for 10-15 seconds to restore their soft texture.
What if my Whoopie Pies turn out dense or dry?
If your Whoopie Pies are dense or dry, the main culprit is usually overmixing the batter. Be sure to combine the wet and dry ingredients just until incorporated—no more! Additionally, if they are overbaked, they may lose their moisture. Watch them carefully in the oven and do the gentle spring-back test to check for doneness. Each pie should be soft and fluffy!
Can I add flavor variations to the filling of my Whoopie Pies?
Very much so! The filling of Whoopie Pies is wonderfully customizable. You can mix in different extracts, such as almond or mint, for a unique twist. You might also consider folding in some sprinkles or chocolate chips for an exciting visual and textural enhancement. Adding these twists is a fun way to make your Whoopie Pies your own!
Are there any dietary considerations I should keep in mind?
Absolutely! When making Whoopie Pies, be mindful of common allergens such as eggs and dairy. For a vegan alternative, you can replace eggs with flax eggs or applesauce, and use a dairy-free cream for the filling. Always check ingredient labels for gluten-free products if you’re catering to those with gluten sensitivities. Happy baking!
These Whoopie Pies Recipe FAQs should help guide you through any questions or concerns you may have, ensuring a delightful baking experience!
Decadent Whoopie Pies Recipe for a Sweet Nostalgic Treat
Ingredients
Equipment
Method
- Preheat your oven to 350°F (175°C) and prepare two baking sheets by lining them with parchment paper.
- In a large mixing bowl, combine all-purpose flour, unsweetened cocoa powder, baking powder, and salt. Whisk them together thoroughly.
- In a separate bowl, cream the granulated sugar and softened unsalted butter together using an electric mixer on medium speed until light and fluffy, about 2–3 minutes.
- Beat in the eggs one at a time, followed by the vanilla extract and milk. Mix until a smooth batter forms.
- Gradually add the dry ingredients to the wet mixture, stirring gently until just combined. Avoid overmixing.
- Using a cookie scoop or spoon, drop rounded tablespoons of batter onto the prepared baking sheets.
- Bake for 10–12 minutes, or until the cake springs back lightly when pressed.
- Carefully remove the Whoopie Pies from the oven and let them cool on the baking sheets for about 5 minutes.
- Whip together the heavy cream and marshmallow fluff in a mixing bowl until smooth and fluffy.
- Once the cakes are completely cool, spread or pipe the creamy filling onto the flat side of each cake and sandwich with another cake.
- Serve immediately or store in an airtight container at room temperature for up to 5 days.
Leave a Reply