
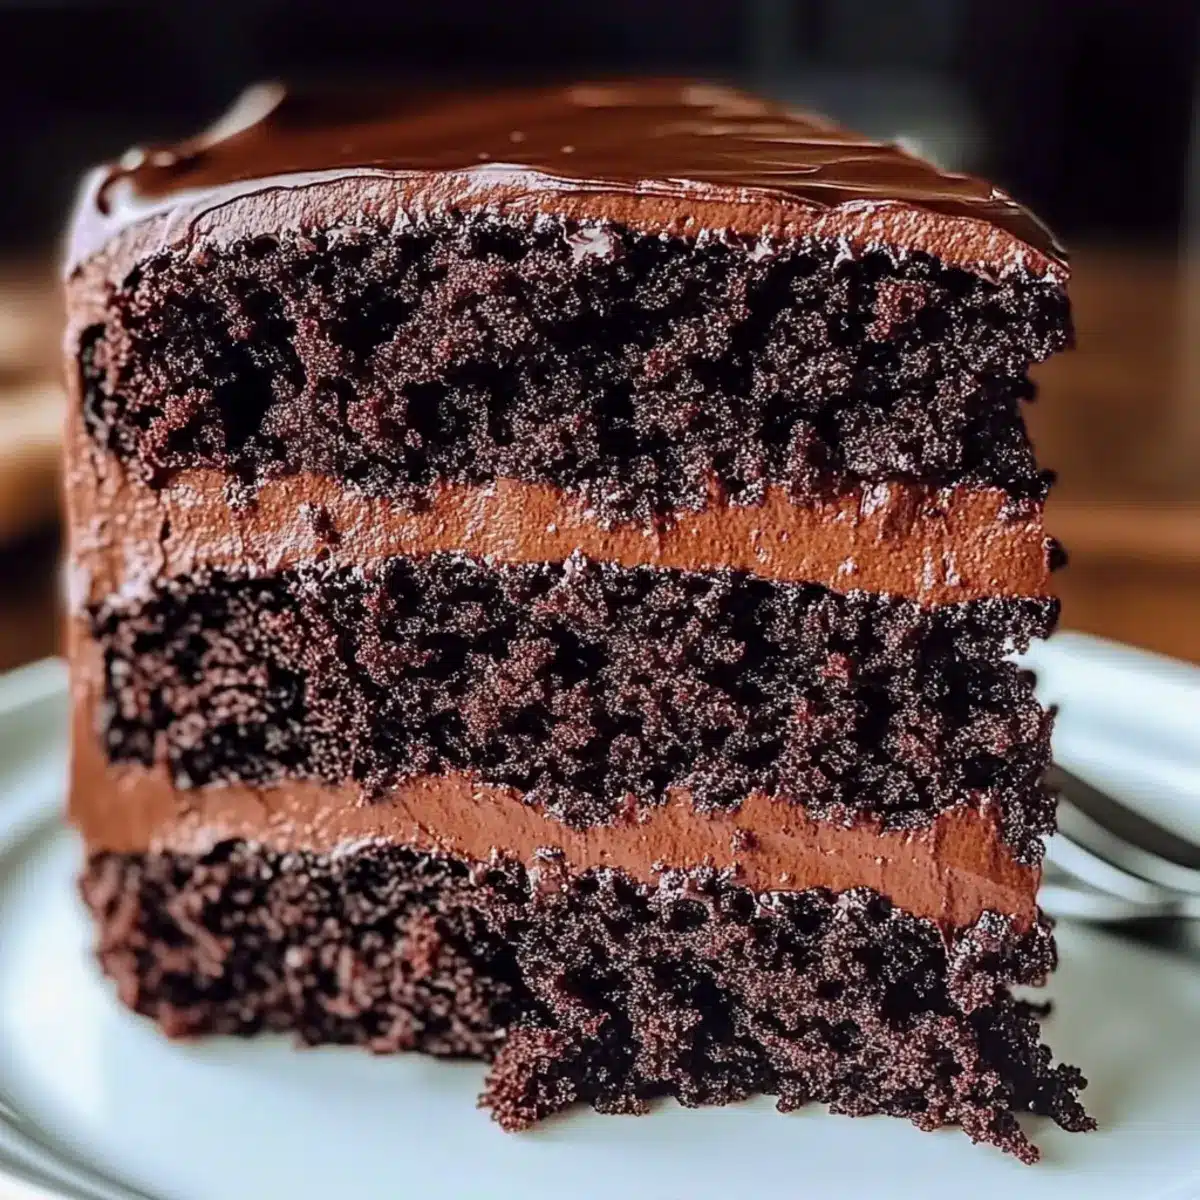
As I stood in my kitchen, the aroma of melting dark chocolate wafted through the air, taking me back to that unforgettable scene in Matilda where Bruce Bogtrotter triumphantly devours an enormous chocolate cake. This is my inspiration for the Ultimate Triple Matilda Chocolate Cake – an indulgent, rich chocolate cake that’s not just a feast for the eyes but also a delight for the taste buds. With its moist, fudgy texture, this cake promises to be a crowd-pleaser for birthdays, celebrations, or simply cozy movie nights at home. Plus, it’s easily adaptable for any dietary needs, making it a versatile choice for everyone. Are you ready to create a showstopper that will leave your guests begging for seconds?
Why is Matilda Chocolate Cake a Must-Try?
Indulgent, it’s a chocolate lover’s dream, combining rich dark chocolate and velvety textures for an unforgettable experience. Versatile, you can easily customize this delightful treat with gluten-free alternatives or flavored extracts to suit any dietary preference. Simplicity, with straightforward steps and easily sourced ingredients, this cake is perfect for both novice and seasoned bakers. Crowd-Pleasing, it’s bound to steal the show at parties, just like Bruce Bogtrotter’s iconic dessert! Don’t forget to pair it with a scoop of vanilla ice cream or fresh berries for that extra touch of decadence. Whether you’re celebrating a birthday or enjoying a cozy night in, this cake is guaranteed to impress!
Matilda Chocolate Cake Ingredients
For the Cake
- Dark Chocolate – Adds deep flavor and richness; substitute with semi-sweet chocolate for a sweeter taste.
- Dutch-Processed Cocoa Powder – Provides a rich chocolate flavor and darker color; unsweetened cocoa can be used, but results may vary slightly.
- All-Purpose Flour – The structure for the cake; gluten-free all-purpose flour blend can be used for a gluten-free version.
- Granulated Sugar – Adds sweetness; use light brown sugar for a deeper caramel flavor.
- Light Brown Sugar – Contributes moisture; a good balance with granulated sugar enhances the flavor.
- Unsalted Butter – Provides richness and moisture; ensure it’s at room temperature for proper creaming.
- Large Eggs – Essential for structure and moisture; always use room temperature for best results.
- Buttermilk – Adds acidity which tenderizes the cake; substitute with yogurt or a milk/lemon juice mixture as an alternative.
- Baking Soda – A leavening agent that helps the cake rise perfectly.
- Baking Powder – Works alongside baking soda for the right lift in the cake.
- Espresso Powder – Optional, but enhances the chocolate flavor beautifully.
- Pure Vanilla Extract – Adds aroma and depth; for a more intense flavor, consider vanilla bean paste.
- Salt – Balances sweetness and enhances overall flavors.
- Semi-Sweet Chocolate Chips – Provides delightful texture and richness throughout the cake.
For the Ganache
- Heavy Cream – Necessary for a luscious, smooth ganache consistency.
- Chopped Dark Chocolate – Use quality chocolate for the best ganache flavor; mix with butter and vanilla for richness.
- Unsalted Butter – Adds gloss and smoothness to the ganache; ensure it’s at room temperature for easy mixing.
This decadent Matilda Chocolate Cake is perfect for satisfying sweet tooth cravings and versatile enough to accommodate dietary preferences. Enjoy baking this classic dessert!
Step‑by‑Step Instructions for Matilda Chocolate Cake
Step 1: Preheat the Oven
Begin by preheating your oven to 350°F (175°C). While the oven warms up, take two 9-inch round cake pans and line the bottoms with parchment paper, then grease them with unsalted butter or cooking spray. This ensures your Matilda Chocolate Cake can be effortlessly removed once baked, creating a perfect base for your decadent dessert.
Step 2: Melt the Chocolate
Next, break the dark chocolate into pieces and place it into a heatproof bowl. Melt the chocolate gently in the microwave in 30-second intervals, stirring in between until smooth. Allow it to cool slightly before moving on; this melted chocolate will add richness and depth to your cake’s flavor, making it truly indulgent.
Step 3: Cream the Butter and Sugars
In a large mixing bowl, combine room temperature unsalted butter with granulated sugar and light brown sugar. Using a hand mixer or stand mixer, beat the mixture on medium-high speed for about 3-5 minutes until it becomes light and fluffy. The creaming process incorporates air, which helps the Matilda Chocolate Cake rise beautifully during baking.
Step 4: Add Eggs and Vanilla
With the mixer on low speed, add the large eggs one at a time, ensuring each egg is fully incorporated before adding the next. Follow this by mixing in the pure vanilla extract and the slightly cooled melted chocolate. The mixture should now be well combined and rich in aroma, setting the stage for an incredibly moist cake.
Step 5: Combine Dry Ingredients
In a separate bowl, whisk together the all-purpose flour, Dutch-processed cocoa powder, baking soda, baking powder, espresso powder (if using), and salt. This step is crucial for evenly distributing the leavening agents throughout the dry ingredients, ensuring an even rise for your Matilda Chocolate Cake.
Step 6: Alternately Mix Wet and Dry Ingredients
Gradually add the dry mixture to the wet ingredients, alternating with the buttermilk. Start and end with the dry mixture, mixing gently on low speed just until combined. It’s important not to overmix here, as you want to keep the cake’s texture light and tender while avoiding a dense outcome.
Step 7: Fold in Chocolate Chips
Once combined, gently fold in the semi-sweet chocolate chips using a spatula. This adds melted pockets of chocolate throughout the cake, enriching the overall experience. Make sure to incorporate them evenly without overworking the batter, preserving the fluffy consistency of the cake.
Step 8: Bake the Cakes
Divide the batter evenly between the prepared cake pans. Place them in the preheated oven and bake for 30-35 minutes. A toothpick inserted into the center should come out with moist crumbs, not wet batter, indicating that your Matilda Chocolate Cake is perfectly baked and ready to cool.
Step 9: Cool the Cakes
Once baked, remove the pans from the oven and allow them to cool in the pans for about 10 minutes. Carefully run a knife around the edges to loosen the cakes, then invert them onto wire racks to cool completely. This cooling step is essential for achieving that perfect, fudgy texture.
Step 10: Prepare the Ganache
While the cakes cool, heat the heavy cream in a small saucepan over medium heat until it begins to simmer. Pour it over the chopped dark chocolate in a bowl, letting it sit for a few minutes before whisking in the unsalted butter and vanilla extract until the mixture is smooth and glossy. This ganache will provide a luscious finish to your cake.
Step 11: Assemble the Cake
With the cakes completely cooled, place one layer on a serving plate. Spread a generous amount of ganache between the two layers and top with the second cake. Use the remaining ganache to cover the top and sides of the cake, creating a beautiful, shiny exterior that brings your Matilda Chocolate Cake to life.
How to Store and Freeze Matilda Chocolate Cake
Room Temperature: Store the cake in an airtight container for up to 3 days at room temperature. This keeps it moist and rich, ready for whenever cravings strike!
Fridge: If you want to extend its life, refrigerate the cake for up to a week in an airtight container. Be cautious, as refrigeration might slightly alter the texture but it will still be delectably fudgy.
Freezer: For longer-term storage, freeze slices wrapped tightly in plastic wrap followed by aluminum foil for up to 2 months. When ready to enjoy, let it thaw in the fridge overnight for the best texture.
Reheating: To bring back that fresh-out-of-the-oven feel, gently warm individual slices in the microwave for 10-15 seconds. Enjoy your Matilda Chocolate Cake warm for that comforting experience!
Matilda Chocolate Cake Variations
Feel free to get creative with your Matilda Chocolate Cake and make it your own with these delightful twists!
-
Milk Chocolate: Substitute dark chocolate with a blend of dark and milk chocolate for a sweeter, creamier cake. It’s an easy switch that still delivers deep chocolate flavors.
-
Gluten-Free: Use a gluten-free all-purpose flour blend in place of regular flour to ensure everyone can enjoy the cake. Your friends and family won’t even notice the difference!
-
Vegan Delight: Swap eggs with flaxseed meal mixed with water and replace buttermilk with a dairy-free milk alternative combined with lemon juice. You can indulge in a sumptuous vegan version without compromising flavor.
-
Peppermint Twist: Add a few drops of peppermint extract to the batter for a festive flair. This works wonderfully during the holidays, creating a refreshing chocolate cake that’s sure to impress!
-
Chocolate Hazelnut: Mix in chopped hazelnuts or a scoop of hazelnut spread to the cake batter for a nutty flavor boost. The combination of chocolate and hazelnut is akin to your favorite chocolate spread in cake form!
-
Spicy Chocolate: Introduce a hint of heat by adding a teaspoon of cayenne pepper or chili powder into your dry ingredients. This unexpected kick can create an exciting balance with the sweetness of the chocolate.
-
Espresso Boost: For an extra punch of coffee flavor, increase the amount of espresso powder or add a splash of brewed coffee to the batter. It enhances the richness without overwhelming the chocolate notes.
-
Flavored Ganache: Change up the ganache by using flavored chocolate or adding a splash of your favorite liqueur, such as Bailey’s or Kahlua. This elevates the ganache, taking your cake to a gourmet level.
Experiment with these variations and see which ones resonate with your taste buds. And if you’re in the mood for something fruity, you might enjoy a delightful slice of Lemon Cloud Cake or the light texture of Angel Cake Churro. Happy baking!
What to Serve with Matilda Chocolate Cake?
This indulgent dessert can shine even brighter with the right pairings, creating a memorable experience for every occasion.
- Vanilla Ice Cream: The creamy, cool texture beautifully offsets the rich chocolate cake, creating a delightful contrast that delights the palate.
- Fresh Berries: A medley of raspberries or strawberries adds a refreshing tartness, cutting through the cake’s sweetness for a balanced bite.
- Whipped Cream: Fluffy and light, whipped cream enhances the decadent flavors of the cake, making each slice feel even more indulgent.
- Espresso or Coffee: A warm cup of coffee marries perfectly with the fudgy richness, enhancing the chocolate flavor while providing a comforting warmth.
- Chocolate Sauce Drizzle: For the ultimate chocolate lover, a drizzle of chocolate sauce on top brings an extra layer of decadence and allure.
- Mint Chocolate Ganache: A unique twist, mint-infused ganache adds a refreshing flavor that elevates the chocolate experience while keeping it fun.
- Caramel Sauce: A sweet, buttery caramel sauce drizzled on slices offers a luxurious touch for those who crave extra sweetness.
- Nutty Crunch: Pair with toasted nuts, like walnuts or pecans, to introduce a delightful crunch that complements the cake’s texture wonderfully.
- Herbal Tea: A soothing cup of herbal tea, like peppermint or chamomile, can balance the cake’s richness with relaxation and warmth.
- Milkshake: For a fun and indulgent treat, serve a rich chocolate milkshake on the side, capturing the essence of childhood joy.
Expert Tips for Matilda Chocolate Cake
Room Temperature Ingredients: Ensure your butter, eggs, and buttermilk are all at room temperature; this allows for better mixing and a fluffier cake texture.
Quality Chocolate Matters: Use high-quality dark chocolate (60-70% cocoa) to elevate the flavor of your Matilda Chocolate Cake. It truly makes a difference!
Avoid Overmixing: Once you combine the wet and dry ingredients, mix gently until just combined. Overmixing can lead to a dense and tough cake.
Check for Doneness: Use a toothpick to test for doneness; it should come out with moist crumbs, not wet batter. This ensures your cake is perfectly baked.
Chill Before Ganache: Allow your baked cakes to cool completely before applying the ganache. This prevents melting and helps the layers hold their shape when stacked.
Storing Leftovers: Keep any leftover cake in an airtight container at room temperature for up to 3 days or refrigerate for up to a week—all without losing that fudgy goodness!
Make Ahead Options
These Matilda Chocolate Cakes are perfect for busy home cooks looking to save time! You can prepare the cake layers up to 24 hours in advance; simply bake and let them cool completely before wrapping each layer in plastic wrap and storing them in the refrigerator. The ganache can also be made up to 3 days ahead—just reheat it gently until it’s pourable before using, to maintain that glossy finish. When you’re ready to serve, simply assemble the cake by spreading the chilled ganache between the layers and over the top for a mouthwatering presentation that tastes just as delicious, creating a showstopper dessert with minimal last-minute effort!
Matilda Chocolate Cake Recipe FAQs
What type of dark chocolate should I use for this cake?
Absolutely! For this Matilda Chocolate Cake, I recommend using high-quality dark chocolate with 60-70% cocoa content. This range provides the perfect balance of richness and sweetness. If you’re looking for a sweeter option, semi-sweet chocolate can be used instead, but you may lose some of the deep, intense chocolate flavor.
How should I store leftover Matilda Chocolate Cake?
Very! To keep your cake fresh, store leftovers in an airtight container at room temperature for up to 3 days. If you need to keep it longer, you can refrigerate it for up to a week. Just be aware that refrigeration might slightly change the cake’s texture, but it will still be deliciously fudgy.
Can I freeze this cake, and if so, how?
Absolutely! To freeze your Matilda Chocolate Cake, wrap individual slices tightly in plastic wrap, then follow with aluminum foil to prevent freezer burn. It’s good for up to 2 months. When you’re ready to enjoy, simply transfer a slice to the fridge overnight to thaw. For an extra treat, warm it gently in the microwave for about 10-15 seconds before serving.
What if my cake doesn’t rise properly?
No worries! If you find your cake has not risen well, a common culprit could be expired leavening agents like baking soda or baking powder. Always check their expiration dates before baking. Additionally, ensure that you’re using room temperature ingredients and mixing gently to avoid overworking the batter, which can lead to a denser cake.
Can I adapt this recipe for dietary restrictions, such as gluten-free?
Definitely! For a gluten-free version of the Matilda Chocolate Cake, simply substitute all-purpose flour with a gluten-free all-purpose flour blend. This makes it accessible for those avoiding gluten while maintaining that moist, fudgy texture we all love. Just make sure to read the instructions on your gluten-free flour package for best results!
Is this cake safe for pets or allergy-prone individuals?
It’s important to remember that chocolate is toxic to dogs and other pets, so please be cautious when serving this cake. As for allergies, if someone is sensitive to gluten or dairy, use the suggested substitutions like gluten-free flour or dairy alternatives in this Matilda Chocolate Cake recipe to accommodate them.
Decadent Matilda Chocolate Cake for Your Sweet Tooth Cravings
Ingredients
Equipment
Method
- Preheat your oven to 350°F (175°C). Line and grease two 9-inch round cake pans with parchment paper and unsalted butter.
- Melt the dark chocolate gently in a heatproof bowl using a microwave, stirring until smooth. Let it cool slightly.
- In a mixing bowl, cream room temperature unsalted butter with granulated sugar and light brown sugar until light and fluffy.
- Add the large eggs one at a time, incorporating fully before adding the next. Then mix in the pure vanilla extract and melted chocolate.
- Whisk together all-purpose flour, cocoa powder, baking soda, baking powder, espresso powder (if using), and salt in a separate bowl.
- Gradually add the dry ingredients to the wet mixture, alternating with buttermilk, mixing gently until just combined.
- Fold in the semi-sweet chocolate chips using a spatula until evenly distributed.
- Divide the batter between the prepared cake pans and bake for 30-35 minutes. A toothpick inserted should come out with moist crumbs.
- Allow cakes to cool in the pans for 10 minutes, then invert onto wire racks to cool completely.
- Heat heavy cream until simmering, pour over chopped dark chocolate, whisk in the unsalted butter and vanilla extract until smooth.
- Place one cooled cake layer on a serving plate, spread ganache in between layers, then cover the top and sides with remaining ganache.
Leave a Reply