
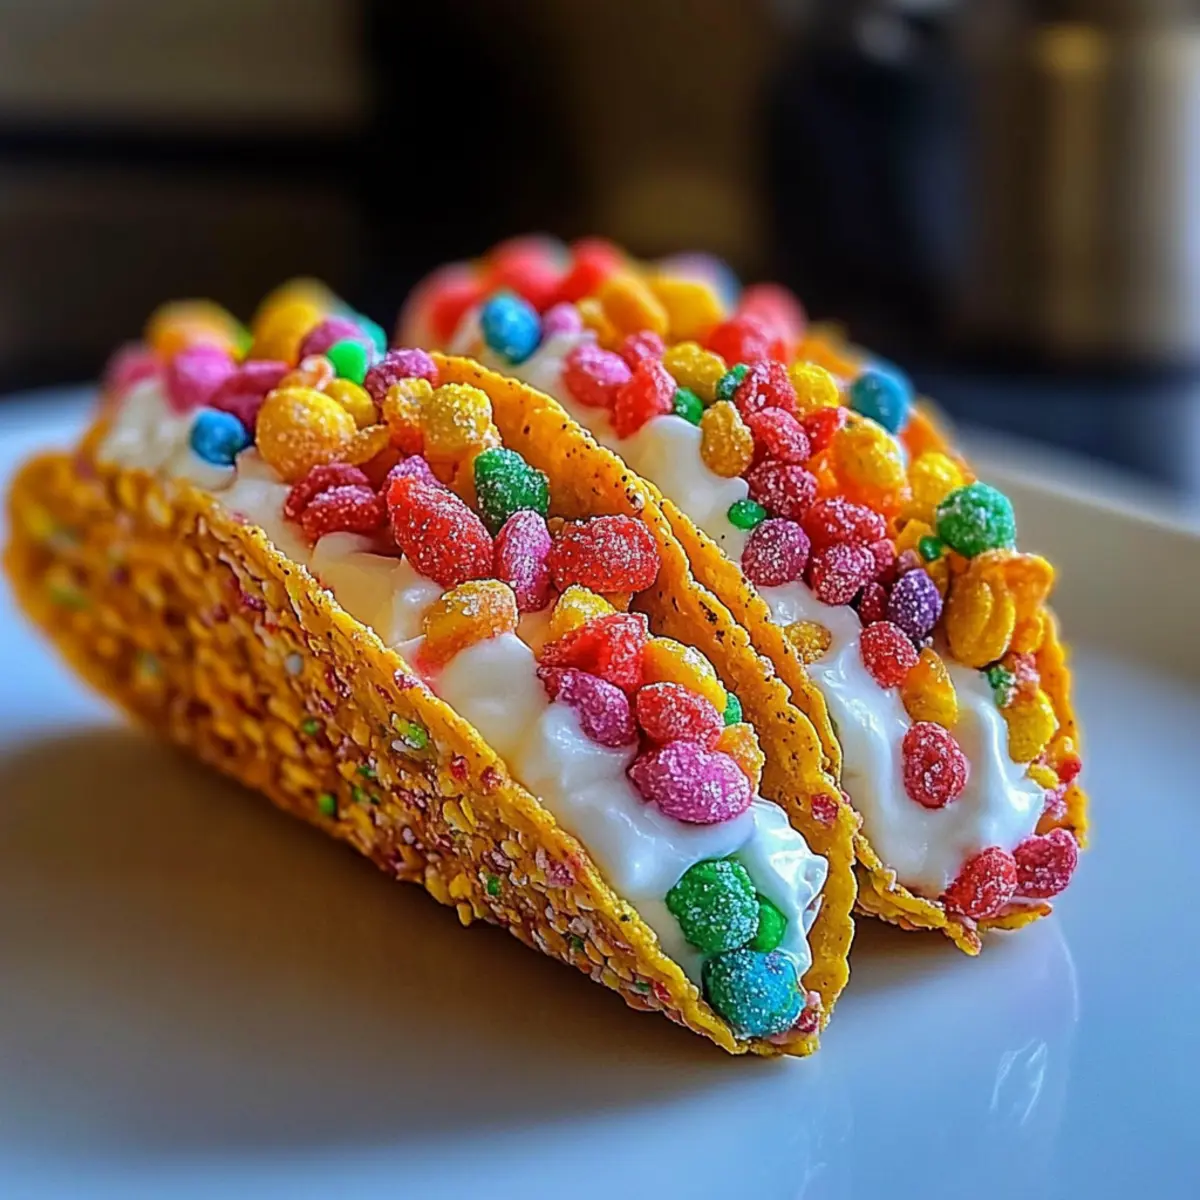
As I rummaged through my pantry, a vibrant box caught my eye—Fruity Pebbles! The colorful cereal sparked a whirlwind of nostalgia and creativity, inspiring me to whip up something playful and memorable. Enter the Fruity Pebbles Cheesecake Tacos—a delightful no-bake dessert that’s perfect for those moments when you want to impress without spending hours in the kitchen. With a crunchy shell that contrasts beautifully with a creamy filling, these tacos offer a fun and customizable treat for both kids and adults alike. Whether you’re hosting a birthday party or just craving something sweet, these tacos promise to turn an ordinary day into a celebration. Curious about how to create this whimsical dessert? Let’s dive in!
Why Make Fruity Pebbles Cheesecake Tacos?
Whimsical Fun: These tacos bring joy to the table, fusing colorful Fruity Pebbles with a creamy cheesecake filling that appeals to all ages.
No-Bake Delight: Skip the oven! This recipe is a breeze to prepare, making it perfect for last-minute desserts or casual gatherings.
Customizable Treat: Make it your own by swapping ingredients. Try using vegan options or different cereals for a unique spin!
Eye-Catching Presentation: Serve them at parties—each taco is a mini masterpiece that looks as good as it tastes. Consider pairing with a refreshing Pumpkin Pie Tacos for a festive spread!
Quick to Assemble: You’ll have these ready in no time, leaving you free to enjoy the fun with friends and family. Dive into the whimsical world of desserts with these delightful tacos!
Fruity Pebbles Cheesecake Tacos Ingredients
For the Taco Shells
• Fruity Pebbles Cereal – Adds a colorful crunch and fruity flavor; consider using Cocoa Pebbles for a chocolate twist.
• Mini Marshmallows – Create the perfect chewy texture for taco shells; make sure to melt them completely for best results.
• Unsalted Butter – Enhances richness and helps bind the shell together; always melt with the marshmallows.
For the Cheesecake Filling
• Cream Cheese – Acts as the base for the filling, providing a creamy and tangy taste; let it soften for easy mixing.
• Powdered Sugar – Provides sweetness while keeping the texture smooth; sift before measuring for best results.
• Vanilla Extract – Deepens the flavor profile of the cheesecake; opt for pure vanilla for the best taste.
• Heavy Whipping Cream – Adds lightness and volume when whipped; ensure it’s very cold for better consistency.
Optional Garnish
• Extra Fruity Pebbles – Sprinkle on top for added color and crunch; it enhances the presentation and fun factor.
• Chocolate Drizzle – A sweet drizzle can elevate flavor and visual appeal; consider using melted chocolate or fudge sauce.
With these Fruity Pebbles Cheesecake Tacos Ingredients at your fingertips, you’re just a whisk away from a delightful no-bake adventure! Enjoy the process, and let your creativity shine.
Step‑by‑Step Instructions for Fruity Pebbles Cheesecake Tacos
Step 1: Prepare Taco Shells
In a medium saucepan over low heat, melt 3 tablespoons of unsalted butter. Once melted, add 4 cups of mini marshmallows, stirring continuously until the mixture is smooth and glossy. Remove from heat and quickly fold in 4 cups of Fruity Pebbles cereal until every piece is evenly coated and vibrant.
Step 2: Mold Shells
While the mixture is still warm, scoop portions into your hands and shape them around a rolling pin or taco shell mold lined with parchment paper. Press firmly to create a taco shape, holding it for about 30 seconds to set. Once formed, gently remove them from the mold and let cool completely.
Step 3: Make Cheesecake Filling
In a mixing bowl, beat 8 ounces of softened cream cheese with an electric mixer on medium speed until smooth. Gradually add ½ cup of powdered sugar and 1 teaspoon of vanilla extract, continuing to beat until creamy. In a separate bowl, whip 1 cup of heavy cream until stiff peaks form, then gently fold this into the cream cheese mixture until well combined.
Step 4: Assemble Tacos
Transfer the cheesecake mixture into a piping bag or use a spoon to fill each Fruity Pebbles shell generously with the creamy filling. Make sure to pack it in well for an indulgent bite. For a fun garnish, sprinkle extra Fruity Pebbles on top, adding to both texture and visual appeal.
Step 5: Chill Before Serving
Place the assembled Fruity Pebbles Cheesecake Tacos in the refrigerator for at least 30 minutes. This chilling step allows the cheesecake filling to firm up, ensuring a delightful contrast between the creamy filling and the crunchy shell. Serve chilled and enjoy the fun of this whimsical dessert!
Variations & Substitutions for Fruity Pebbles Cheesecake Tacos
Feel free to let your creativity roam! Customizing these delightful tacos will not only emphasize your unique taste but also elevate the fun.
-
Chocolate Twist: Swap Fruity Pebbles for Cocoa Pebbles to create a rich chocolate flavor that will entice any dessert lover. It’s a delightful way to turn this treat into a chocolate lover’s dream!
-
Vegan-Friendly: Use vegan marshmallows, plant-based butter, and dairy-free cream cheese for a delicious version that everyone can enjoy. Friends and family will never guess it’s dairy-free!
-
Add Fresh Fruit: Top with sliced strawberries, bananas, or other seasonal fruits for a refreshing burst of flavor. The juiciness of the fruit pairs beautifully with the creamy filling, creating a vibrant and colorful presentation.
-
Nutty Crunch: Incorporate crushed nuts, like almonds or walnuts, into the taco shell mixture for an added crunch and nutty flavor that complements the sweetness. It gives a lovely contrast to the soft cheesecake!
-
Spicy Kick: Add a pinch of cinnamon or a dash of cayenne for a surprisingly delightful spicy kick in the cheesecake filling. It’s a delicious twist that adds depth to the flavors.
-
Extra Creamy: For an even creamier filling, consider adding a bit of sour cream or Greek yogurt to the cheesecake mixture. This adds a delightful tanginess and makes each bite even more luscious.
-
More Colorful Cereals: Feel free to mix in or replace with other colorful cereals like Trix or Lucky Charms for fun and varied flavors! This way, you can choose your favorite cereal for a unique twist.
-
Holiday Flair: During festive seasons, incorporate seasonal spices like pumpkin spice or eggnog flavor into the filling for a holiday twist. These variations can bring a cheerful spirit to your dessert table.
Let your imagination run wild, and don’t forget to check out some delightful recipes like Irish Tacos Corned or treat yourself to a slice of Pistachio Mushroom Cheesecake for more exciting combinations!
What to Serve with Fruity Pebbles Cheesecake Tacos?
Elevate your dessert experience with colorful and delightful companions that complement the playful sweetness of these whimsical tacos.
- Fresh Berries: A mix of strawberries, blueberries, and raspberries adds a juicy burst of flavor and a refreshing contrast to the creamy cheesecake.
- Chocolate Dipping Sauce: This sweet, molten addition creates a decadent experience when you dip your tacos, enhancing their deliciousness.
- Vanilla Ice Cream: The smooth creaminess of vanilla ice cream makes a perfect pairing, balancing the crunchiness of the taco and adding a comforting touch.
- Whipped Cream: Light and airy, whipped cream brings an extra layer of softness that enhances each bite of your Fruity Pebbles Cheesecake Tacos.
- Coconut Macaroons: Their chewy texture and subtle sweetness mirror the playful spirit of the tacos, making for a delightful dessert duo.
- Rainbow Sprinkles: Add a whimsical touch with colorful sprinkles on top of your tacos or ice cream for extra fun and festivity.
- Sparkling Lemonade: A zesty, bubbly drink offers a refreshing palate cleanser that brightens the dessert experience.
- Fruit Salad: A light and colorful fruit salad made with tropical fruits perfectly balances the richness of the cheesecake-filled tacos.
These pairing suggestions not only enhance flavor but also add visual delight to your dessert spread. Enjoy the cheerful whimsy of your Fruity Pebbles Cheesecake Tacos accompanied by these delightful treats!
Make Ahead Options
These Fruity Pebbles Cheesecake Tacos are ideal for meal prep, allowing you to enjoy a delightful dessert without last-minute stress! You can prepare the taco shells up to 24 hours in advance; just mold them as directed and store in an airtight container at room temperature to maintain their crunch. For the cheesecake filling, prepare it 1-3 days ahead and refrigerate it in an airtight container to keep it fresh and creamy. When you’re ready to serve, simply fill the taco shells with the chilled cheesecake mixture, and if desired, garnish with extra Fruity Pebbles for added flair. This way, you’ll have a fun and impressive dessert ready in no time, perfect for busy weeknights or gatherings!
Storage Tips for Fruity Pebbles Cheesecake Tacos
-
Room Temperature: These delightful tacos are best enjoyed fresh. If left at room temperature, they should be consumed within 2 hours to maintain quality.
-
Fridge: Store any leftover Fruity Pebbles Cheesecake Tacos in an airtight container in the fridge for up to 3 days. This will help preserve their flavor and texture.
-
Freezer: While not recommended, you can freeze the taco shells (without filling) for up to 1 month. Wrap them tightly in plastic wrap. Thaw before filling to keep the crunchy texture intact.
-
Reheating: If you’ve stored filled tacos, enjoy them chilled as they are! Refrain from reheating, as it can affect the creamy cheesecake filling.
Helpful Tricks for Fruity Pebbles Cheesecake Tacos
-
Work Fast: When molding the taco shells, act quickly. The mixture hardens as it cools, making it challenging to shape if you take too long.
-
Grease Well: Ensure your molds or rolling pins are lightly greased or lined with parchment paper. This helps in the easy release of the taco shells without crumbling.
-
Chill to Perfection: Always chill the assembled Fruity Pebbles Cheesecake Tacos for at least 30 minutes. This helps firm up the filling, enhancing the overall texture and taste.
-
Fill Before Serving: For the best crunch, fill the shells just before serving. This keeps the taco shells crispy and prevents them from getting soggy.
-
Creative Variations: Don’t hesitate to experiment! Try using different cereals or adding unique toppings to make the Fruity Pebbles Cheesecake Tacos your own!

Fruity Pebbles Cheesecake Tacos Recipe FAQs
What type of Fruity Pebbles should I use for the best flavor?
Absolutely! I recommend using classic Fruity Pebbles cereal for that vibrant color and fruity flavor that define this dessert. However, feel free to substitute with Cocoa Pebbles for a chocolate twist or Rice Krispies if you’re looking for something less sweet—though this may sacrifice some visual appeal.
How long can I store leftover Fruity Pebbles Cheesecake Tacos in the fridge?
You can enjoy these delicious tacos within 3 days. Store them in an airtight container in the fridge to maintain their flavor and freshness. If you want to keep them crispy, I suggest filling the taco shells right before serving!
Can I freeze the taco shells for later use?
Certainly! You can freeze the taco shells without the filling for up to 3 months. To do this, let them cool completely, wrap them tightly in plastic wrap, and store them in a freezer-safe bag. When you’re ready to enjoy, simply thaw them at room temperature before filling.
What should I do if my taco shells are too sticky or difficult to mold?
If your taco shell mixture is a bit too sticky, it might be because the marshmallows weren’t melted thoroughly or the mixture cooled too much. If this happens, you can slightly warm the mixture over low heat until it becomes easier to mold. Always remember to grease your hands and molds lightly—this helps a lot in shaping!
Are there any dietary alternatives for this recipe?
Very! You can create a vegan version by using dairy-free cream cheese, plant-based butter, and vegan marshmallows. This way, everyone can enjoy the whimsy of Fruity Pebbles Cheesecake Tacos, without worrying about dietary restrictions.
Fruity Pebbles Cheesecake Tacos for a Whimsical Dessert Adventure
Ingredients
Equipment
Method
- In a medium saucepan over low heat, melt the unsalted butter. Once melted, add mini marshmallows, stirring continuously until smooth and glossy. Remove from heat and fold in Fruity Pebbles until coated.
- While the mixture is warm, scoop portions into your hands and shape around a rolling pin or taco shell mold lined with parchment paper. Press firmly for 30 seconds to set, then remove and let cool completely.
- In a mixing bowl, beat softened cream cheese until smooth. Gradually add powdered sugar and vanilla extract, beating until creamy. In a separate bowl, whip heavy cream until stiff peaks form, then fold into the cream cheese mixture.
- Transfer the cheesecake mixture into a piping bag or use a spoon to fill each taco shell generously. Pack it in well for an indulgent bite. Sprinkle extra Fruity Pebbles on top for garnish.
- Place the tacos in the refrigerator for at least 30 minutes to firm up the filling. Serve chilled.
Leave a Reply