
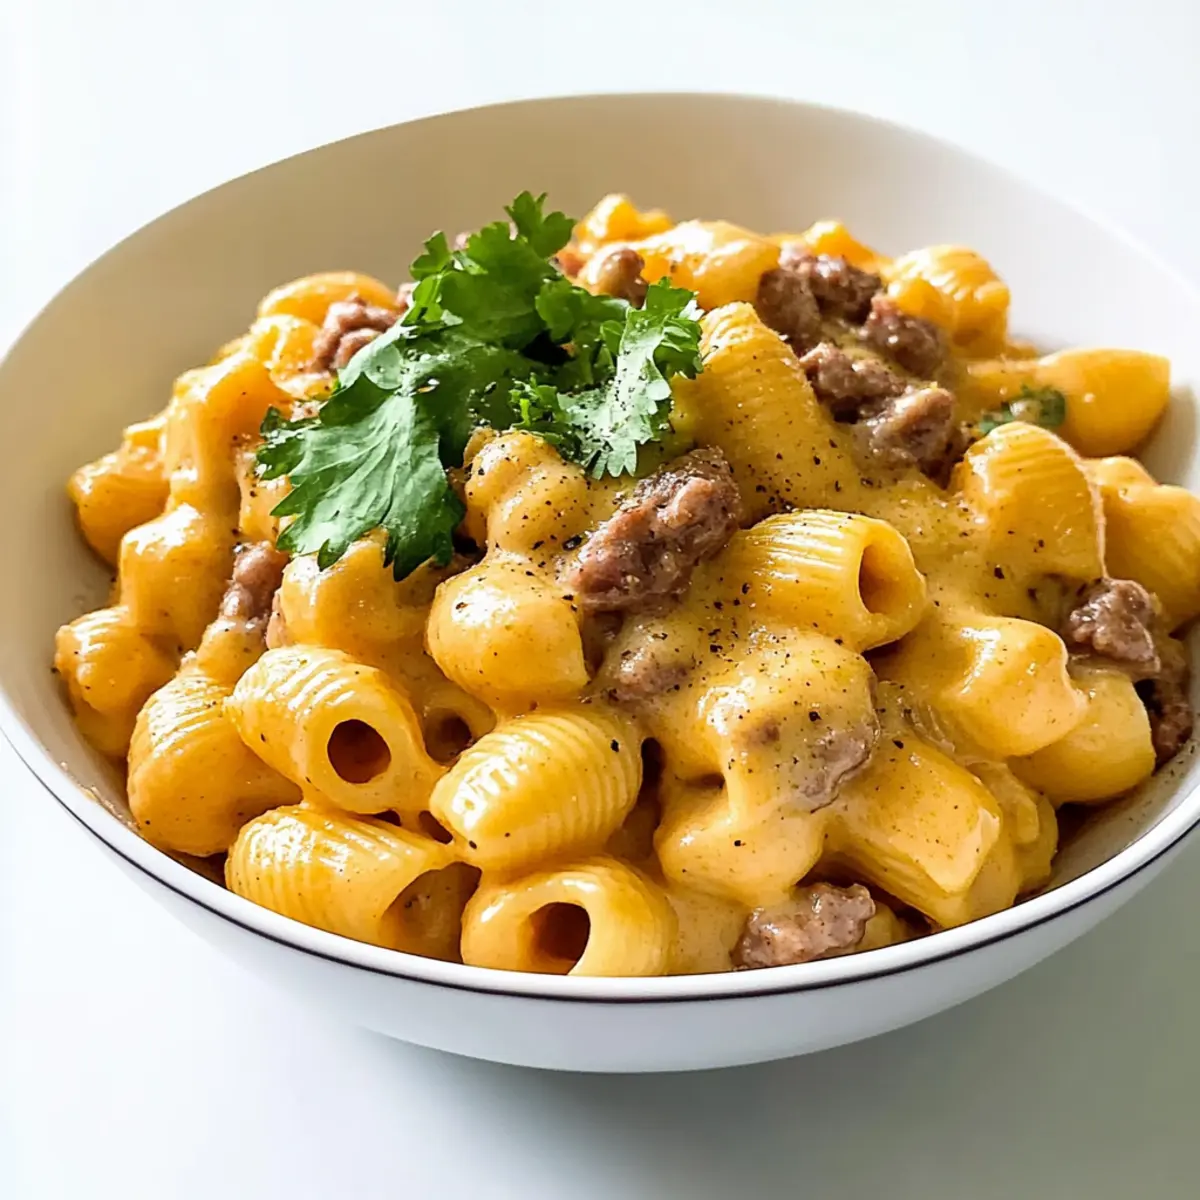
As I stood in my kitchen, trying to escape the fast-food rut we often find ourselves in, inspiration struck — what if I combined two favorites into one comforting dish? Enter Taco Shells & Cheese, an irresistible blend of creamy macaroni and cheese with a flavorful taco twist. This kid-friendly recipe is not only a delight for the taste buds but also an absolute breeze to whip up on busy weeknights or for game day gatherings. With rich, cheesy goodness enveloping seasoned ground beef and topped with crunchy veggies, you’re in for a comforting meal that everyone will adore. So, are you ready to upgrade your dinner game and embrace this fusion of comfort food? Let’s dive in!
Why are Taco Shells & Cheese irresistible?
Comforting, creamy goodness: The combination of macaroni and cheese with taco flavors creates a dish that feels like a warm hug on a plate. Kid-friendly fun: This recipe is perfect for getting picky eaters excited about dinner, making it a family favorite. Quick and easy to prepare: It comes together swiftly, allowing you more time to enjoy with your loved ones instead of slaving away in the kitchen. Ready for a delightful twist? Consider pairing it with a refreshing side like Cottage Cheese Chips for extra crunch! Versatile options: Feel free to swap out ground beef for black beans or lentils, accommodating various dietary preferences. This dish stands out as the ultimate comfort food, appealing to everyone at the table.
Taco Shells & Cheese Ingredients
• Dive into this comforting dish with the following essential ingredients!
For the Pasta
- Mini Shell or Elbow Pasta – This serves as the base structure; whole wheat or gluten-free options work well too.
For the Filling
- Ground Beef – Provides protein and flavor; feel free to use black beans or plant-based meat for a vegetarian option.
- Chili Powder – Adds spice and warmth; fresh or roasted chili can give it a unique kick.
- Ground Chipotle Chili Powder – Introduces a smoky flavor; replace with smoked paprika if needed.
- Ground Cumin – Offers earthiness; swap with ground coriander for a milder option.
- Dried Oregano – Enhances herbal notes; Italian seasoning can be a great substitute.
- Kosher Salt – Balances flavors; adjust the amount if using table salt instead.
- Ground Coriander – Adds a citrusy touch; can be omitted if unavailable.
- Ground Cayenne Pepper – Provides heat; modify the amount according to your spice tolerance.
For the Cheese Sauce
- Whole Milk – Creates that creamy sauce you crave; almond milk or cream can be substituted for a richer texture.
- All-Purpose Flour – Thickens the sauce; use cornstarch for a gluten-free alternative.
- Sodium Citrate – Aids in cheese melting; it’s not necessary if using standard melting cheeses.
- Shredded White Cheese – The main flavor player; try cheddar or Monterey Jack for delightful melting.
For the Toppings
- Iceberg Lettuce – Gives a fresh, crunchy contrast; baby spinach works if you’re looking for nutrients.
- Cherry Tomatoes – Adds freshness and a pop of color; use diced bell peppers or omit if you prefer.
Step‑by‑Step Instructions for Taco Shells & Cheese
Step 1: Cook the Pasta
Begin by bringing a large pot of salted water to a boil. Add in your mini shells or elbow pasta and cook according to the package instructions until al dente, usually about 7-9 minutes. Once cooked, drain the pasta in a colander, giving it a good shake to remove excess water, and set it aside while you prepare the filling for the Taco Shells & Cheese.
Step 2: Brown the Ground Beef
In a large skillet, heat a drizzle of olive oil over medium heat. Add the ground beef, breaking it up with a spatula, and cook for about 5-7 minutes until browned and cooked through. Drain any excess fat, and then return the skillet to the heat before moving to the next step. The beef should be nicely caramelized for the best flavor.
Step 3: Add the Spices
Sprinkle the chili powder, ground chipotle chili powder, ground cumin, dried oregano, kosher salt, ground coriander, and ground cayenne pepper over the cooked beef. Sauté this rich mixture for an additional 2 minutes, stirring constantly until fragrant. This infusion of spices is essential to deliver the bold taco flavors that will elevate your Taco Shells & Cheese.
Step 4: Make the Cheese Sauce
In a medium saucepan, combine whole milk and all-purpose flour over medium heat, whisking continuously to avoid lumps. Gradually stir in sodium citrate until fully dissolved. Continue whisking until the mixture thickens slightly, around 5 minutes. Add the shredded white cheese, mixing well until the cheese sauce is creamy and smooth, which will be the heavenly base for your dish.
Step 5: Combine Pasta and Beef
In a large mixing bowl, combine the drained pasta with the seasoned ground beef. Pour the creamy cheese sauce over the mixture, stirring gently to ensure every piece of pasta and beef is coated in cheesy goodness. This step is crucial to creating a deliciously unified Taco Shells & Cheese that promises every bite will be flavorful and satisfying.
Step 6: Bake the Dish
Preheat your oven to 350°F (175°C). Transfer the pasta mixture into a greased baking dish, spreading it evenly. Bake in the oven for 20-25 minutes or until the top is bubbling and slightly golden. This baking process melds the flavors together, creating a warm, comforting layer on top of your Taco Shells & Cheese that is hard to resist.
Step 7: Add Fresh Toppings
Once the Taco Shells & Cheese are baked to perfection, remove the dish from the oven and let it cool for a few minutes. Top generously with chopped iceberg lettuce and halved cherry tomatoes for a fresh crunch. These toppings add a delightful contrast to the creamy, cheesy depths below, making your meal visually appealing and even more delicious.
Make Ahead Options
These Taco Shells & Cheese are a perfect option for busy home cooks looking to save time during the week! You can prepare the entire dish up to 24 hours in advance. Simply assemble all the ingredients in a baking dish but do not bake it yet. Cover it tightly with plastic wrap and refrigerate to maintain freshness and prevent drying out. When you’re ready to serve, simply remove the wrap and bake at 350°F (175°C) for 20-25 minutes until it’s hot and bubbling. This way, you’ll enjoy a comforting and delicious meal with minimal effort on busy evenings!
What to Serve with Taco Shells & Cheese
The creamy, cheesy delight of this dish pairs beautifully with various sides that can elevate your dining experience to new heights.
-
Crisp Side Salad: A simple mix of greens, tomatoes, and cucumbers adds freshness, balancing the richness of the Taco Shells & Cheese effortlessly.
-
Guacamole Dip: Creamy avocado goodness is a perfect complement. Serve with tortilla chips for a crunchy contrast that takes your dinner up a notch.
-
Garlicky Breadsticks: Soft, buttery breadsticks provide a delightful texture. Dip them in leftover cheese sauce for an irresistible combination that keeps everyone coming back for more.
-
Spanish Rice: Seasoned with cumin and peppers, this fluffy rice adds a flavorful punch. The zesty profile of the rice pairs deliciously with the comforting pasta.
-
Roasted Vegetables: A medley of colorful veggies like bell peppers and zucchini cooked until slightly caramelized can bring earthy sweetness and additional nutrition to your meal.
-
Frozen Margaritas: For a refreshing beverage choice, these cocktails bring a fun, celebratory vibe, enhancing the taco theme while cooling down those spices.
-
Chocolate Chip Cookies: Finish off with a sweet touch. Freshly baked cookies create a nostalgic end to your meal that everyone will love.
-
Cilantro Lime Rice: This bright and zesty rice dish adds a fun, fresh flavor. It’s a perfect way to keep things vibrant alongside your cheesy creation.
How to Store and Freeze Taco Shells & Cheese
-
Fridge: Store leftovers in an airtight container for up to 3 days. This helps maintain freshness while preventing the dish from absorbing odors.
-
Freezer: Freeze Taco Shells & Cheese for up to 2 months in an airtight container. For best results, wrap the dish tightly in plastic wrap before placing it in a freezer-safe container.
-
Reheating: Thaw overnight in the fridge, then reheat in a preheated oven at 350°F (175°C) for 15-20 minutes until heated through. This method keeps the cheesy texture intact.
-
Make-Ahead Tip: Assemble but do not bake if planning to store. Refrigerate the unbaked dish and simply pop it in the oven when ready for a fresh, comforting meal anytime!
Expert Tips for Taco Shells & Cheese
-
Perfect Pasta Texture: Ensure you cook the pasta al dente; it will absorb some sauce without becoming mushy. This helps retain the ideal texture for your Taco Shells & Cheese.
-
Juicy Beef Delight: Avoid overcooking the ground beef to keep it juicy. Brown it evenly for the richest flavor, enhancing the overall heartiness of your dish.
-
Smooth Cheese Sauce: Use a whisk while combining ingredients for the cheese sauce to prevent lumps. A smooth, creamy sauce is key to delighting your diners!
-
Flavor Experimentation: Don’t hesitate to mix different cheeses for a unique taste. Just make sure they melt well to enhance your Taco Shells & Cheese’s creaminess.
-
Make-Ahead Convenience: You can assemble the dish ahead of time; just refrigerate it unbaked. When you’re ready, pop it in the oven for an easy and quick dinner!
Taco Shells & Cheese Variations & Substitutions
Feel free to make this recipe your own, transforming it into a personalized delight that satisfies your cravings and fits your dietary preferences.
-
Vegetarian: Substitute ground beef with black beans or lentils for a delicious meat-free option. This swap not only retains the protein but also adds a delightful texture.
-
Low-Carb: Use cauliflower florets in place of pasta for a hearty yet lighter version. Roasted before adding will deepen the flavors and keep it cozy.
-
Spicy Kick: Add diced jalapeños or green chiles for an extra layer of heat. A sprinkle of fresh chili adds not only spice but also a pop of color that draws the eye.
-
Cheese Lovers: Experiment with a blend of cheeses like pepper jack and gouda for a flavor explosion. The mixture will create a scrumptious, creamy sauce that brings everyone back for seconds.
-
Dairy-Free: Swap whole milk with almond milk or coconut cream and use dairy-free cheese. You’ll achieve a rich, creamy texture that caters to your lactose-intolerant friends.
-
Flavor Boost: Incorporate fresh herbs like cilantro or scallions into the beef mix for an aromatic twist. The fresh notes will brighten your dish and make each bite more vibrant.
-
Crunchy Texture: Top with crushed tortilla chips or Panko breadcrumbs before baking for added crunch. This hasty layer not only makes the dish appealing but also brings a satisfying crunch with each bite.
-
Hearty Veggie: Add diced bell peppers or zucchini to the beef filling for a veggie-packed twist. Sauté them along with the meat for an extra burst of flavor and nutrients.
Feel inspired? You might also enjoy pairing your taco creation with delicious Cottage Cheese Chips for an added crunch or dive into Seafood Stuffed Shells for a totally different comfort experience. Happy cooking!
Taco Shells & Cheese Recipe FAQs
How do I choose the right pasta for Taco Shells & Cheese?
Absolutely! Mini shell or elbow pasta works great for this dish, offering a perfect bite-sized shape to hold the creamy cheese sauce. If you prefer a healthier option, whole wheat or gluten-free pasta can be substituted without losing the comforting essence of the meal.
What’s the best way to store leftover Taco Shells & Cheese?
To keep your leftovers fresh, store Taco Shells & Cheese in an airtight container in the fridge for up to 3 days. This helps to maintain the consistency of the cheese sauce and flavor while preventing the dish from absorbing any odors.
Can I freeze Taco Shells & Cheese, and if so, how?
Yes, you can freeze Taco Shells & Cheese for up to 2 months! To do this, first, wrap the dish tightly in plastic wrap, then place it in a freezer-safe container. When you’re ready to enjoy it again, thaw it overnight in the fridge. To reheat, bake in a preheated oven at 350°F (175°C) for about 15-20 minutes until heated through.
What if my cheese sauce is lumpy? How can I fix it?
If your cheese sauce turns out lumpy, don’t worry! Just cool it slightly, then whisk it vigorously to bring it back together. If it still doesn’t smooth out, you can blend it with an immersion blender or transfer it to a countertop blender for a silky texture. Always use a whisk while combining the ingredients to achieve that creamy consistency from the start.
Are there any dietary considerations I should keep in mind?
Very! If you’re catering to different diets, consider using black beans or lentils in place of ground beef for a vegetarian option. Always check for allergies with your guests, especially regarding cheese, gluten-containing pasta, and specific seasonings. You can also make this dish dairy-free by using plant-based cheese alternatives!
How long can I keep my Taco Shells & Cheese before it goes bad?
When stored properly in the fridge, Taco Shells & Cheese should be consumed within 3 days for the best taste and texture. If you’re unsure about it, always look for visual cues like off odors or mold, which signify it’s best to toss it!
Taco Shells & Cheese: A Comforting Twist on Classic Mac & Cheese
Ingredients
Equipment
Method
- Bring a large pot of salted water to a boil. Add mini shells or elbow pasta and cook until al dente, about 7-9 minutes. Drain and set aside.
- In a large skillet, heat olive oil over medium heat. Add ground beef, breaking it up, and cook for 5-7 minutes until browned. Drain excess fat.
- Sprinkle chili powder, ground chipotle chili powder, ground cumin, dried oregano, kosher salt, ground coriander, and cayenne pepper over the beef. Sauté for 2 minutes, stirring until fragrant.
- In a medium saucepan, combine whole milk and all-purpose flour over medium heat, whisking continuously. Stir in sodium citrate until dissolved. Whisk until thickened, about 5 minutes. Add shredded white cheese, mixing until creamy.
- In a large bowl, combine drained pasta with seasoned beef. Pour cheese sauce over and stir gently until everything is coated.
- Preheat oven to 350°F (175°C). Transfer mixture to a greased baking dish and bake for 20-25 minutes until bubbly and golden.
- Remove from oven and cool for a few minutes. Top with chopped iceberg lettuce and halved cherry tomatoes before serving.
Leave a Reply